WK4DS Amateur Radio Blog
Search Posts

A better POTA map tool just landed…
I normally don’t get real excited about new things anymore…BUT…this one has my attention. I say a blog post by Thomas (K4SWL) and he shared it, I actually didn’t read his whole blog post (sorry Tom) but immediately clicked on the link to the new interactive POTA map that was created by Miguel LX1MDA.
I normally don’t get real excited about new things anymore…BUT…this one has my attention. I saw a blog post by Thomas (K4SWL) and he shared it, I actually didn’t read his whole blog post (sorry Tom) but immediately clicked on the link to the new interactive POTA map that was created by Miguel LX1MDA. Here is the link so you can go see it for yourself: FieldQTH Map Below is a screenshot of me learning almost immediately that my nearest park was not actually my nearest park! I was today years old when I learned that the Trail of Tears National Historic Trail runs right smack dab down through the middle of my home town of Trenton GA. I could have simple went to any number of parking lots in town and been well withing the park boundaries all this time!!! That double green line shows that the outside of the two boundaries to be within the park by POTA rules.
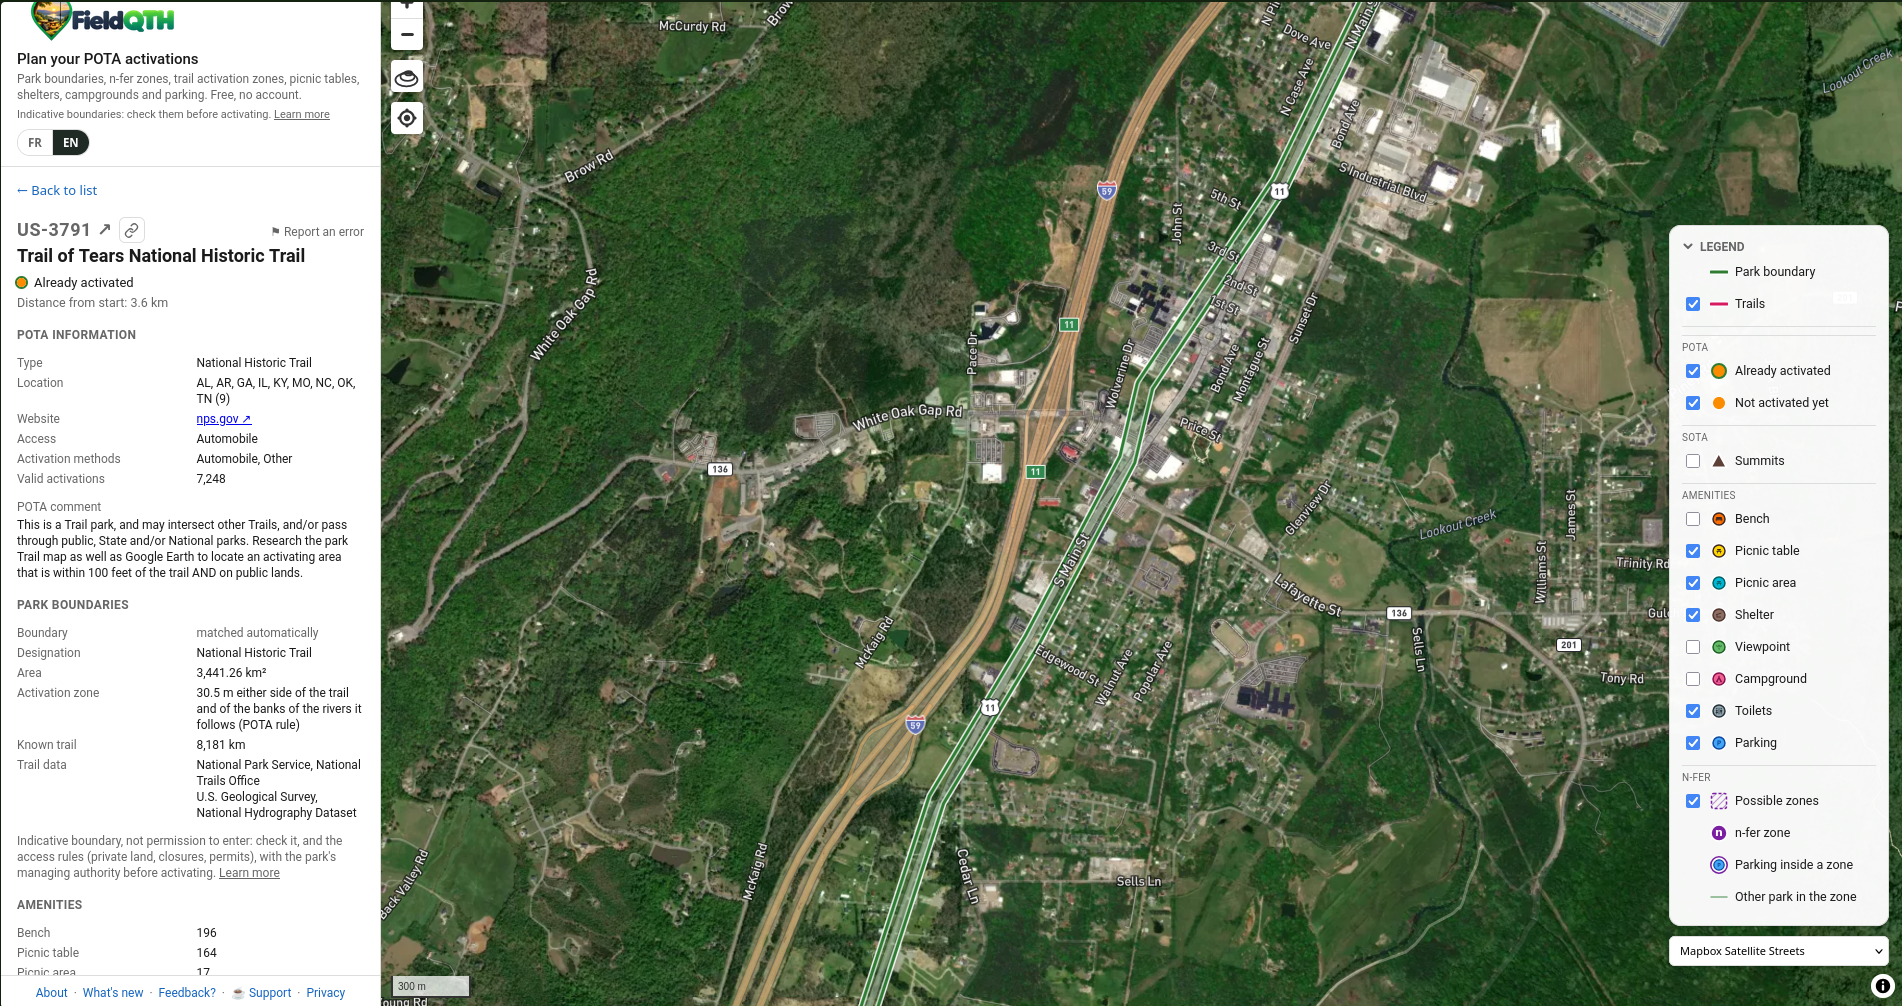
The map is configurable in any number of ways so you can see satellite views or traditional “apple” map style view or you can pick from several others to your liking. The really big thing with this map that Miguel has done so well is show the actual park boundaries for us! This is one of the best parts of this map to me. The original POTA map, while very useful in telling us which parks are in the network, lack the boundaries so you know if you are in the park or not when you setup. Sometimes it is obvious, but sometimes it is not so obvious. What I also like is that it shows where there is a two-fer or three-fer or what have you. Look at this screen shot below of the map where is shows the trail of tears trail running through the middle of the Chickamauga battlefield park. That is something that I didn’t know at all till Allen Padgett told me a few months ago. This map shows it all…That purple line is the other park passing through the battlefield. So if you setup within both at once, you are operating a two-fer!
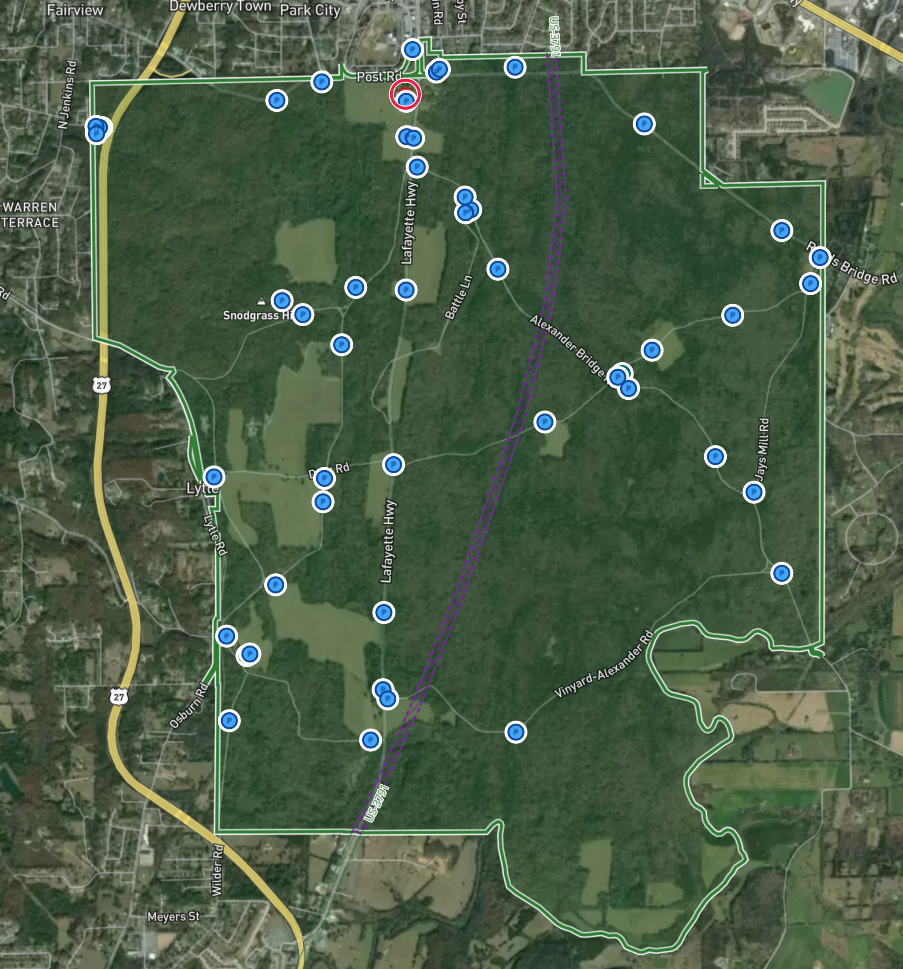
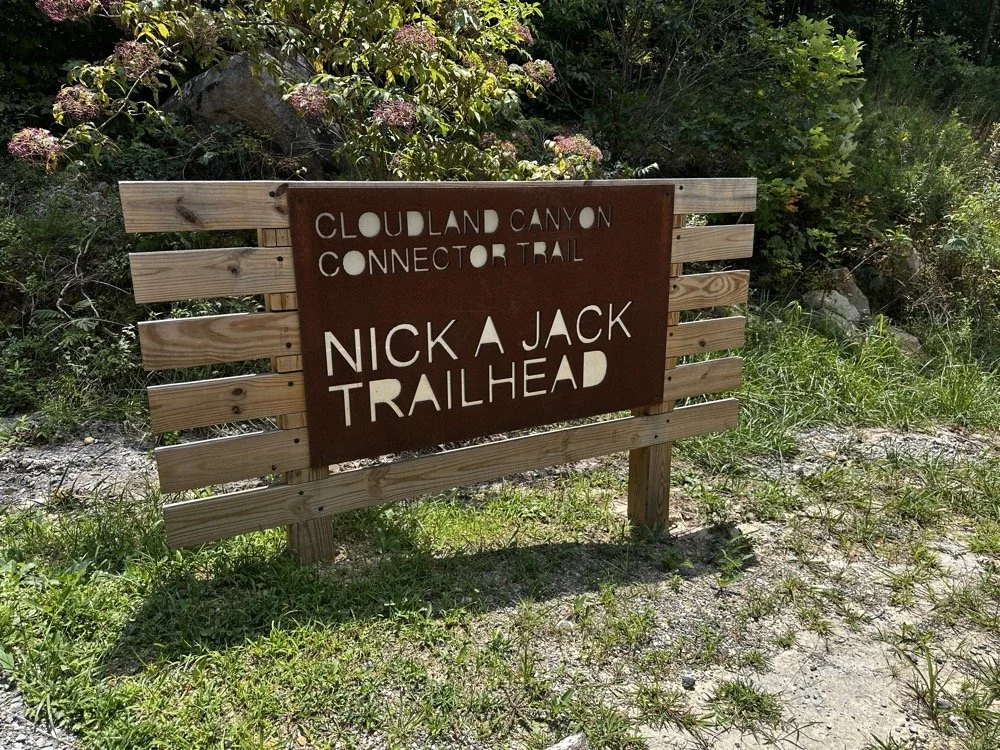
Now for the reality, it isn’t perfect, from what I have gathered, the trail of tears runs down old HWY 27 through the park (LaFayette Rd) and not through the woods as it shows on this screen capture. Also when I checked Cloudland Canyon State Park it lacked the Nick-a-jack Trailhead in the park boundaries too. But remember, this is a brand new website and program so it is essentially in alpha right now. It will only get better with time. Even with it missing some intel, it is still a solid 85 to 90% right and that is a HUGE benefit to the POTA community as a whole. I really hope Miguel keeps adding to this with corrections and updates over time. This is a real gold nugget for the POTA activator in 2026. I have always been confused about multiple park activations as there are not too many in my area. The one above is about it from what I know at this time, but this does help. I really like how it shows the trail park number so you can see that it is a 2fer.
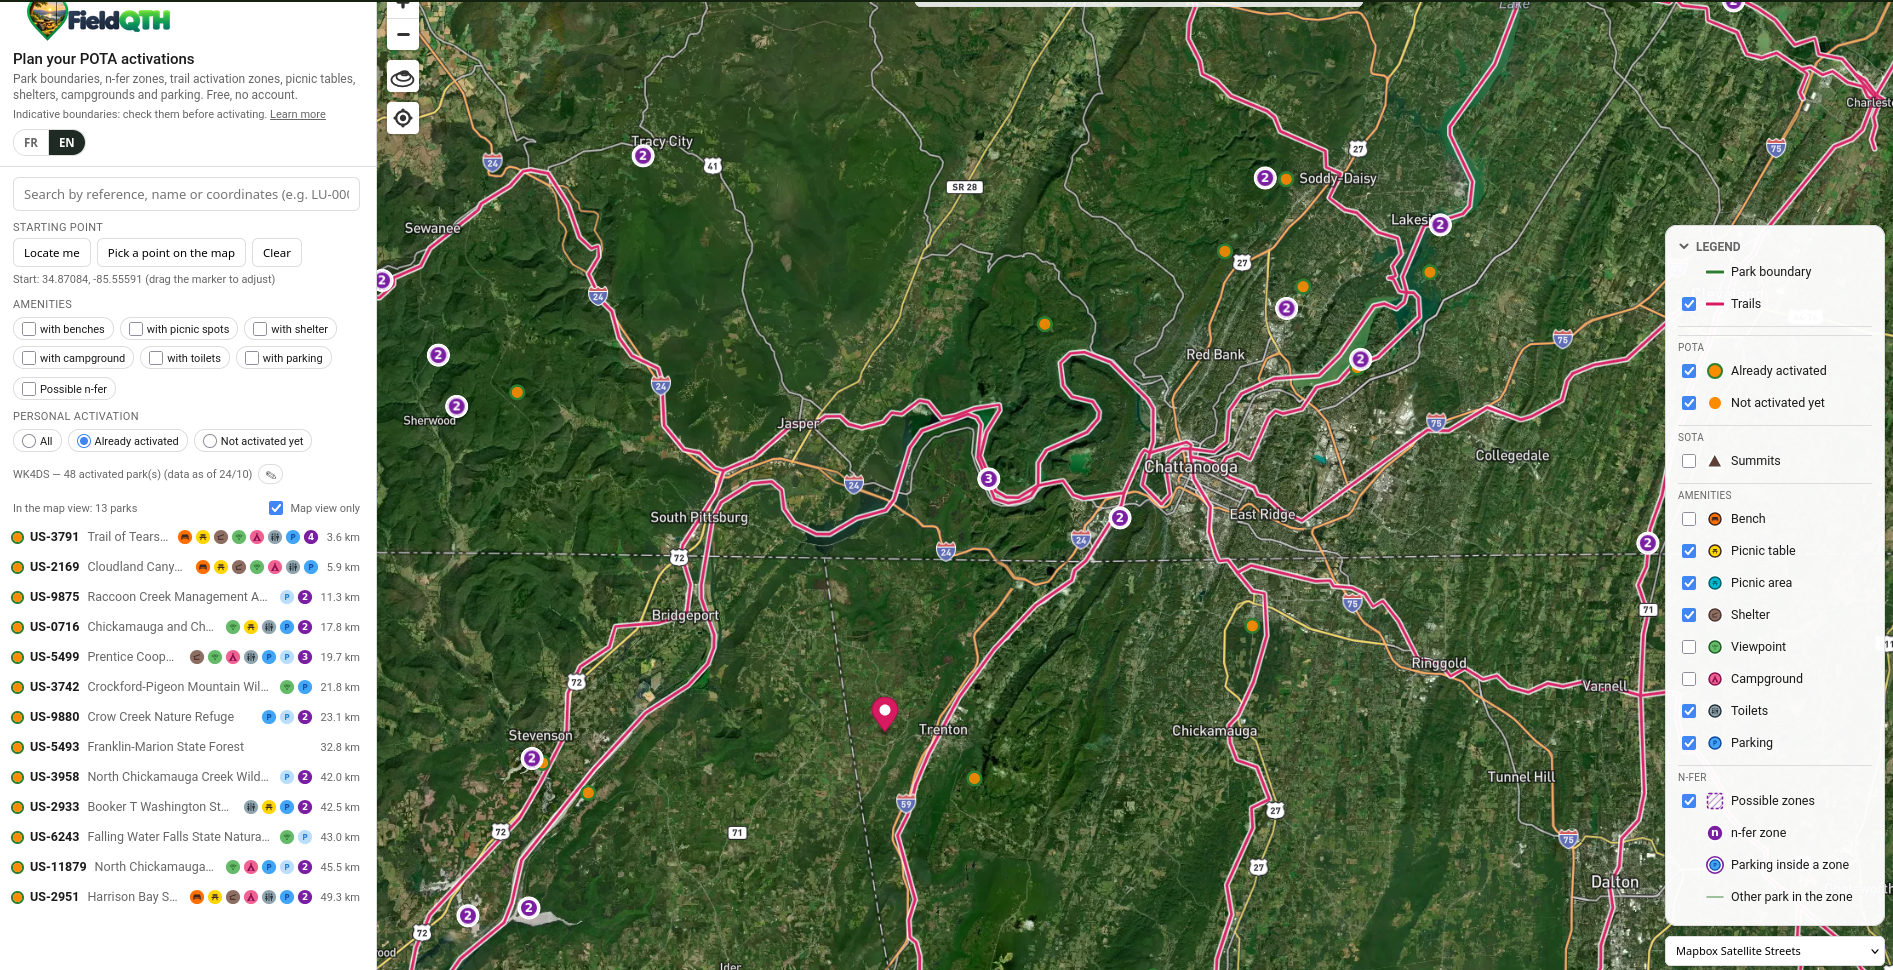
On top of it being an incredible map already, if you will enter your callsign into it, the map will reach into your POTA profile information and update the map with your activated parks and you can then sort the map by activations and not-activated parks and see what is in your area and all sorts of stuff for that too! Here you can see where I selected Already activated and it populated the map with the parks that I have already activated that are within the viewable area on the map. I have done more parks, but this filter only applies to the section of the map that you are viewing at the time. If I zoom in on this map, then the list on the left dynamically adjusts to only show the parks that are viewable once I stop zooming in. They come and go depending on what the map looks like. It is really fast and responsive too. I don’t know if this is because the bandwidth isn’t strained yet or if he is just really good at coding, but the page is not sluggish at all. It is really well executed.
All in all, this is already a powerful tool and should only get better with time, my hat goes off to Miguel for such an awesome tool!
You can help support this channel by using these Amazon Affiliate Links as well:
QRP/Portable Radios:
Antennas & Tuning:
CW Equipment:
Power & Accessories:
Organization & Transport:
BONUS ITEMS (Optional 16-20):
WK4DS- David
73

WK4DS CW Keys…and why I stopped making them…
As you can see, when I was building them back in the day, I spent a lot of time on finishing. They were all highly polished…by me… and that isn’t all. I don’t remember the total parts count anymore, but it was over 40 parts to build one key and I made something like 35 of those parts. I bought the cable (of course) and a handful of fasteners to assemble it with and 4 ball bearings and the rest was made by me. Towards the end, I had another master machinist working for me and he helped make a lot of the components as well, but we were just trying to finish out the existing committed orders before shutting down production.
I am not sure how many of you actually know that I am a CW key maker…or was a CW key maker… I built semi-custom, high precision CW keys back about 20 years ago. There are about 20 of them out in the wild at this point and have become quite collectable now. I still have two of them for myself. One was the last key I made, and of course, the first key I made as well.
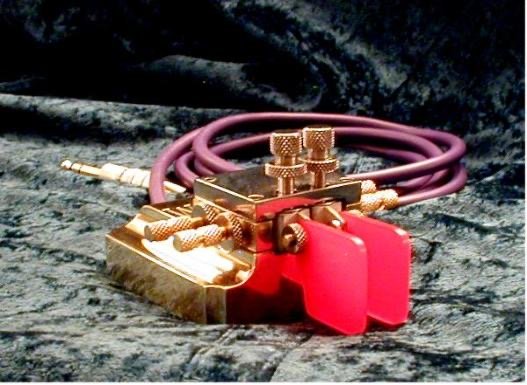
Archive Photo #1 - WK4DS CW Keys
As you can see, when I was building them back in the day, I spent a lot of time on finishing. They were all highly polished…by me… and that isn’t all. I don’t remember the total parts count anymore, but it was over 40 parts to build one key and I made something like 35 of those parts. I bought the cable (of course) and a handful of fasteners to assemble it with and 4 ball bearings and the rest was made by me. Towards the end, I had another master machinist working for me and he helped make a lot of the components as well, but we were just trying to finish out the existing committed orders before shutting down production.
Pictured above is one of the first keys I built. I know because the bearing tension “towers” are not connected to the top plate and later variants had these towers threaded directly into the top plate instead. You can see what became my signature styling, which was the square base with the filleted shelves on the sides. All the keys after the prototype carried some variant of this feature. I set out to make a key I could be proud to own and use. You see, at the time, the March CW key was a bucket list kind of item for me, but I couldn’t easily afford one. What does a skilled machinist do it he can’t have a high end CW paddle? Make it himself out of surplus brass he had in the shop of course! So the prototype doesn’t look exactly like the one above as you can see in the next photo (it is the red handled key on the left). It was hacked out of metal I had and as you can see has a smattering of stainless steel parts mixed in with the brass parts.
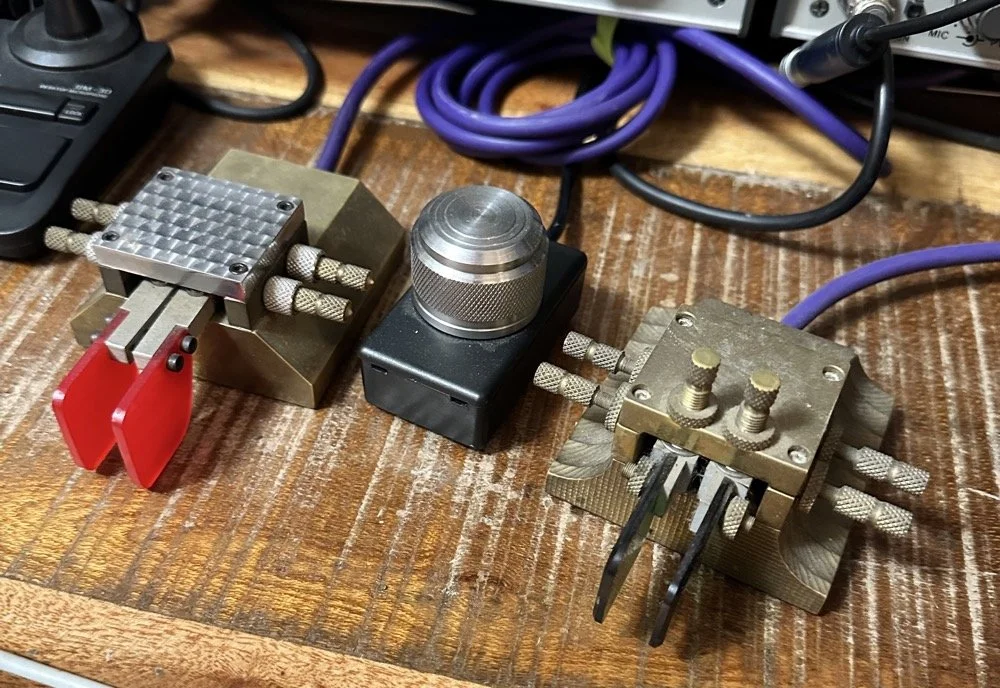
My personal WK4DS CW keys I use on the daily to mostly work POTA activators and occasionally ragchew…
The things I wanted in my key were as follows:
Heavy - you don’t want to be chasing it around on the bench while your in a QSO!
Short lever throw - I looked at the geometry of the lever arms and decided I wanted a 1:! or better throw distance if at all possible. The prototype has a higher lever ratio, but it turns out that it is still usable as I was able to adjust to contact spacing like I wanted anyway and it no longer made it a problem. The key you see opposite of it is the final key I made as I wanted one of the ones like the “production” variants since it had all the revisions. You can see the lever length is much shorter on the green handled paddle as compared to the red one. I shortened the lever arms all the way back to the body and this gave me a 1:! ratio at the end of the paddles to the center axle and from the axle to the contact pads.
Gold contacts - These are not pure gold, but rather gold plated as this provides a much lower contact resistance and reduced corrosion of the contacts so you don’t have to clean them.
Ball bearing pivots - I chose dental drill bearings on the prototype and that was a bad idea as they are actually loose. I guess they tighten up as the drill runs from thermal expansion or something. These are really loose though. You can also see that there is no way to hold tension on the bearings either on the prototype, this turned out the be a bad design flaw, so the production keys cam with bearing tensioners as well. The production keys got larger bearings that were also flanged and this made preloading them much easier too. You can almost see the bearings in the prototype are just under the top plate and they stick out a little on the green key. Same location of the axle which gets the lever as close to the front as possible. This is how I was able to shorten the lever length.
Light weight lever arms - This was done for the high speed CW crowd actually, I don’t go fast enough to need it, but I wanted it anyway. Turns out if you want to go fast, the lever arms need really low mass. I started out with the idea of using pure magnesium lever arms as it is lighter than aluminum (if you can imagine that), but the problems with using pure magnesium far out weighed the weight savings. Magnesium has a terrible propensity to corrode gloriously and aluminum has almost none of these problems. I just milled away every part or the arm that wasn’t needed and the weight was fine. The mass needs to be as little as possible to reduce contact bounce. The lighter the lever the lower the force needed to get it moving and the lower the force to get it to stop. So you can run with a very light touch.
Magnetic springs - I used Neodymium Iron Boron (NdFeB) magnets is opposition as springs as this allows for ZERO friction from the spring, incredible spring force compared to their size and they also allowed my design to be electrically isolated too.
Adjustable bearing tension - This came after I built the first couple of keys, I realize that I wanted to be able to set the bearing preload on the lever bearings as well. This allows the removal of any vertical play in the arms while still allowing free rotation of the bearings. This turns out to be a really nice feature once you have it.
Adjustable spring force - this is a given that even many of the lowest cost keys have in them, but some keys dont have it so I wanted it on mine. The closer the contact spacing the more force you need too. Contact bounce is a real problem at 80WPM
Adjustable contact spacing - All upper echelon cw keys have this feature, but I took mine one step further. Since these keys needed very close contact spacing for really high speed operation, I wanted them to be easily adjusted in something like .001” increments easily. The answer was right there on my lathe too. 72 threads per inch. It was also my mechanical limit at the time too, my lathe would not cut a finer thread without modification… So the Spring screws and the contact screws all got this thread spec applied to them. See the photos below for close up shots of this feature and the magnets embedded in the ends of the screws.
Properly electrically connected - good electrical engineering states that current should never flow through a bearing. It can cause arcing in the bearing which will damage it. So I ran tiny little ground wires from each contact post to the ground cable on every key to eliminate this possibility.
1/4” Stereo plug - I know this is now a dated connector but at the time, (and even to this day) my favorite radios are TenTec and almost all of them use the 1/4” connector.
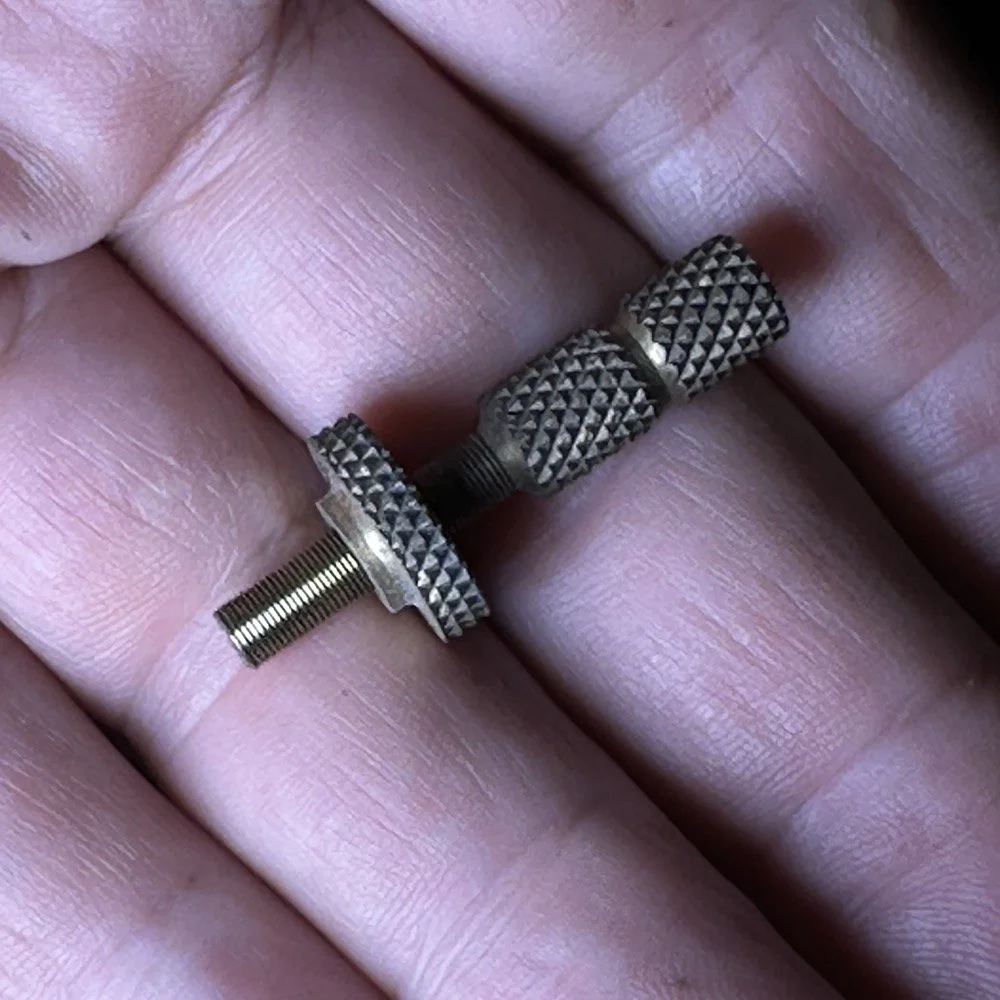
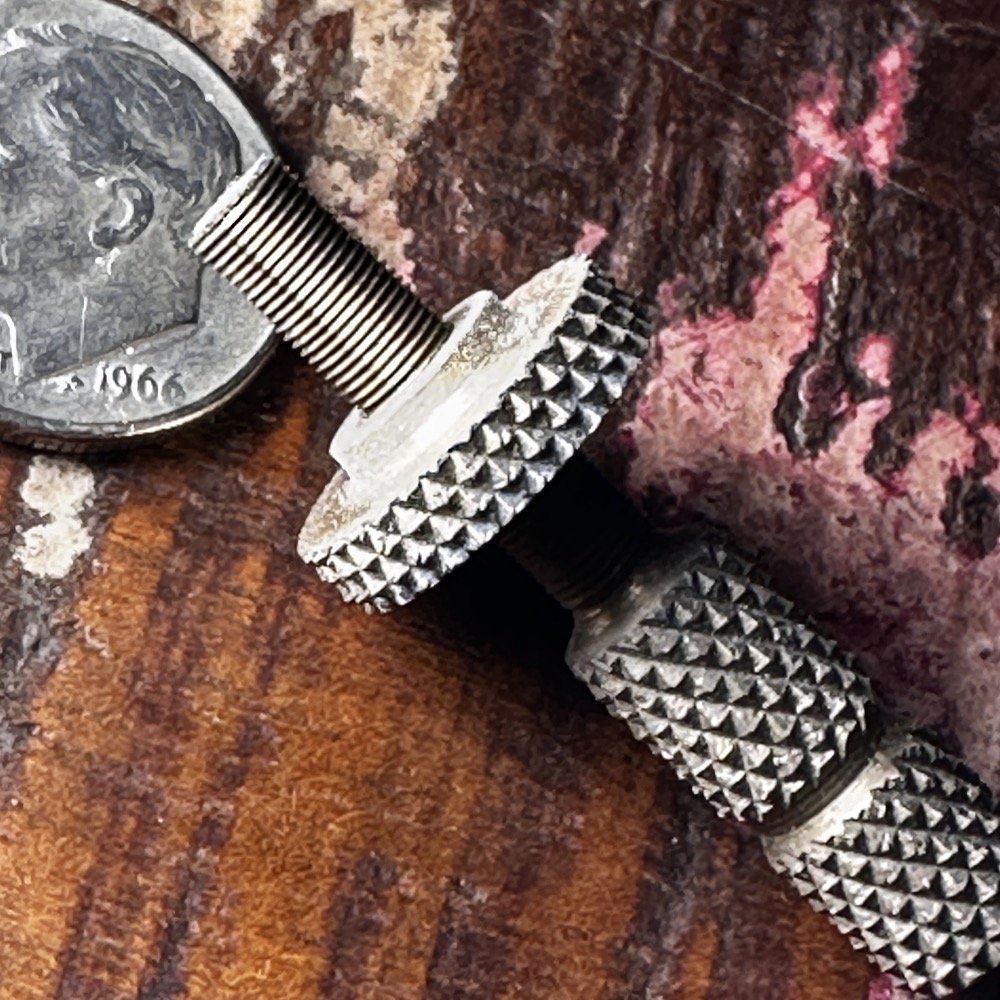
You can see the 72 threads per inch here on this spring adjustment screw. Those threads are just a few thousandths thick. It takes a jeweler’s loupe to even see what I am doing when I cut them in the lathe… I was able to buy taps to cut the internal threads so I would make the lock nuts first and then fit the external threads to them. It worked really well. What this ultimately gives you is a full rotation of the screw will advance it .0139” Essentially 14 thousandths per revolution. That means a quarter turn is only .0035” so it is pretty easy to see that I could make .001” adjustments if I wanted to…maybe less. That was the goal with the high thread count screws. That and the fact that everyone else was using 32TPI screws on their builds…haha.
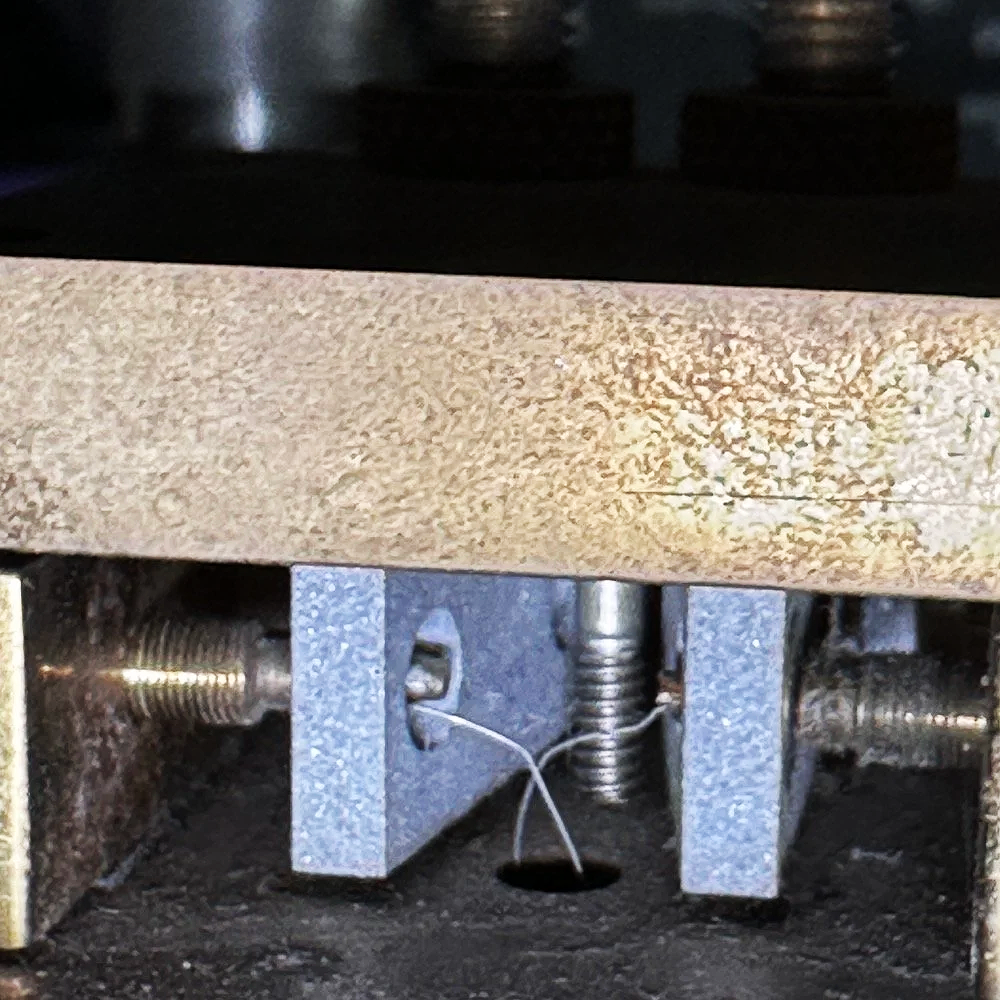
Above is a shot of the two ground wires that tied each arm back to the return lead on the cable so the current, no matter how little it was, had a path that was not through the bearings. This was very important to me as I was not sure what radio these keys would be plugged into and wanted the key to last.
Below shows the magnet that I set in the end of the spring tension screw. Yes, there is literally just enough screw there to drill a hole in the end and glue a magnet into it…barely.
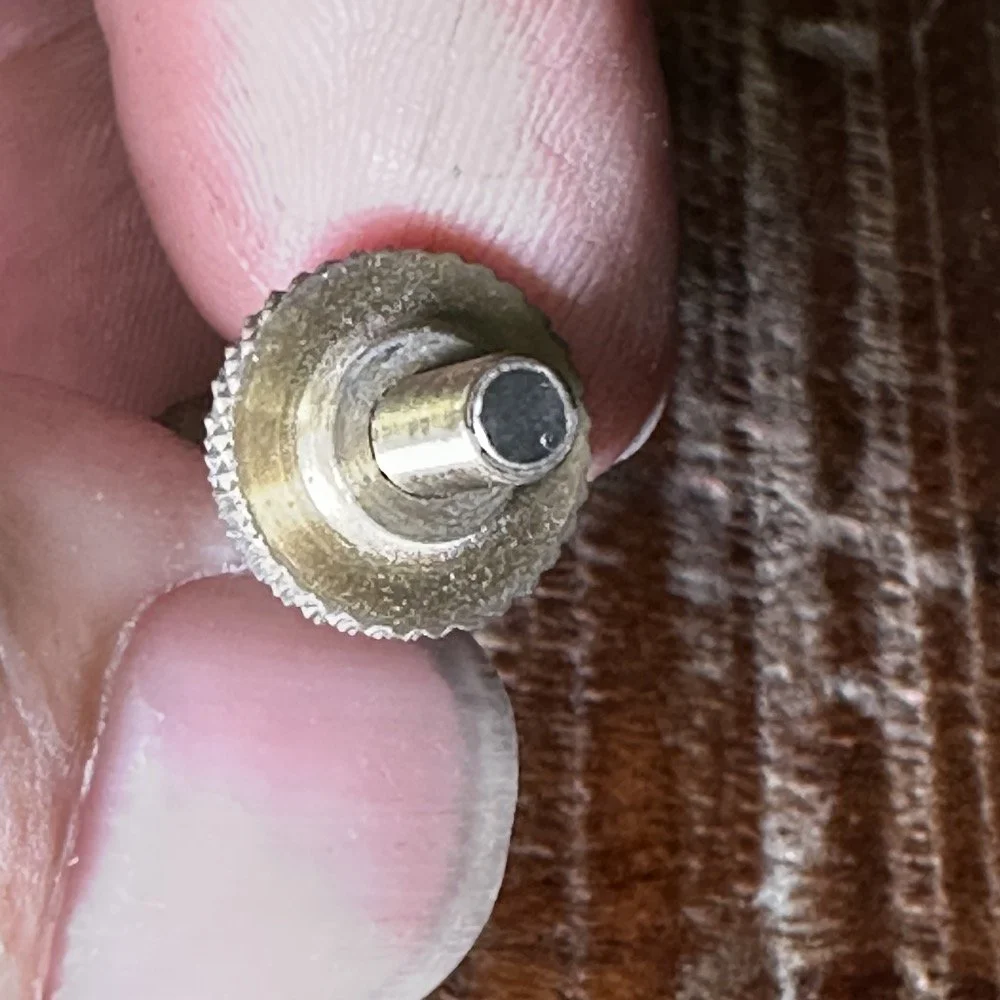
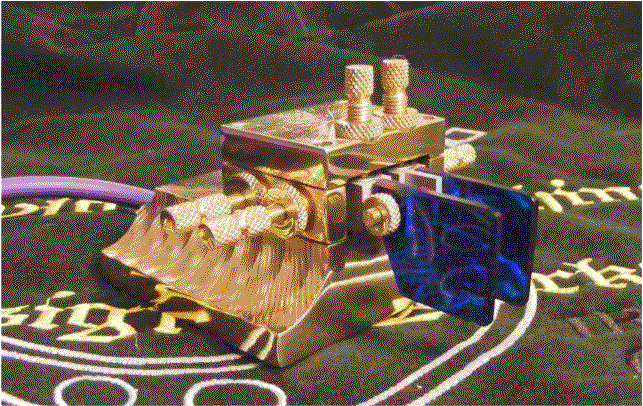
Archive Photo #2 - WK4DS CW Keys
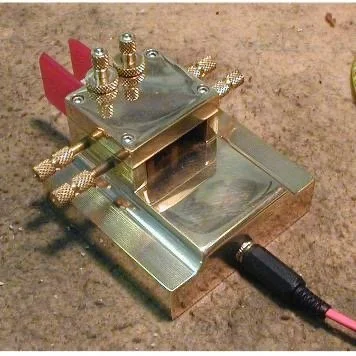
Archive Photo #3 - WK4DS CW Keys
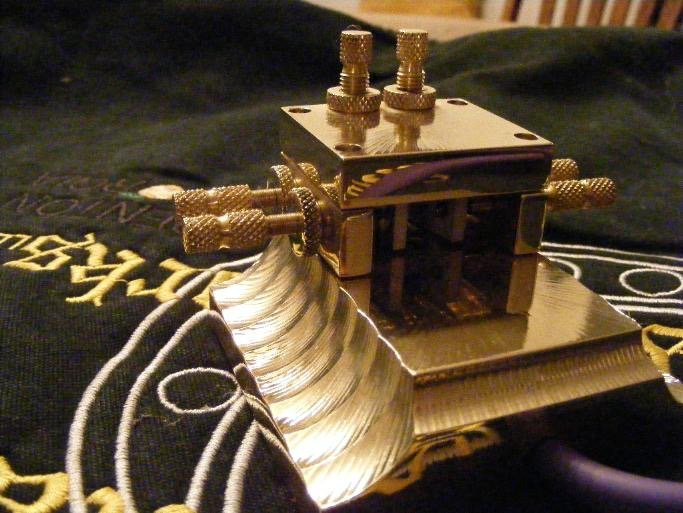
Archive Photo #4 - WK4DS CW Keys
I made each one of these keys a little different from the last one so that each person essentially had a custom key made by me.
As you can see from these old photos, it took a lot of time to make all the parts, finish all the parts and then to assemble and adjust them into a working CW paddle. I had way over 60 hours in each one and that is what ultimately made the whole project untenable. I was spending most of that time doing two things. One was making the ultra fine threaded adjustment screws (one wrong move or a dull tool and you had to scrap the one you was working on and start over) and the other was polishing. If I could eliminate either of these two operations then suddenly the cost to make one was within a reasonable window. The problem was that they looked so good polished that I couldn’t being myself to not do it… As long as it took that long to make them, there was no way anyone would be willing to pay what the price needed to be for me to be compensated properly for my time. I charged 55$ per shop hour back then (and it should have been closer to 75$ but I didn’t have a lot of overhead) so just the shop hours alone made this key cost over 3300$ and we have not added materials or finishing supplies yet. You can see why at 450$, it was crazy how little the shop made on each one. I was doing ultra precision machine work for less than $7 per hour and I still had to take power and supplies out of that… I couldn’t feed my family on that so I had to make the hard decision to stop production till I could figure out a more efficient way to make them. Well, it turns out that was way harder than I thought. I never got back to making them. I have since then done some designs where they are not built like these, but still carried most of the features from the original list. This turns out to be very difficult and to make them to where they can be produced on a turning center. I take my hat off to Tony Baleno (N3ZN) & Piero Begali (I2RTF) for figuring it out and making astonishingly good keys at the same time. Both of these men make fine CW sending instruments and I can recommend them both since I own keys made by both of them.
I have looked at approaching this project again now that I have more modern and capable machines at my disposal. Maybe there is a way that I can make a new key that can be made in a reasonable amount of shop hours and we can come back to market with something new soon. Till then, all that is left are the keys that I have already made…
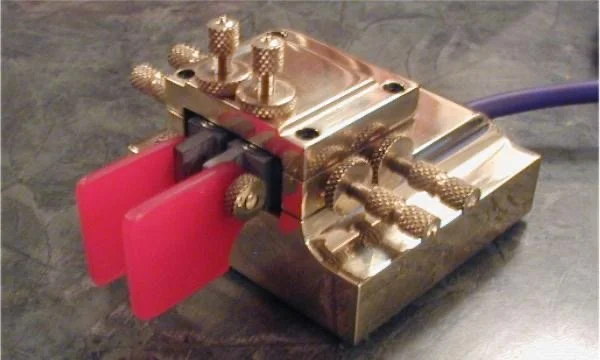
Archive Photo #5 - WK4DS CW Keys
Thanks for taking the time to read about my old keys and what I wanted to do with them.
You can help support this channel by using these Amazon Affiliate Links as well:
QRP/Portable Radios:
Antennas & Tuning:
CW Equipment:
Power & Accessories:
Organization & Transport:
BONUS ITEMS (Optional 16-20):
73
WK4DS - David

POTA and understanding your nanoVNA
This means I have to make a little board up that will allow me to plug the coax into one side and connect it to the base of the antenna on the other. Since I use BNC connectors in the field, this should be pretty easy. I don’t want to let the cat out of the bag just yet, but what this really is, is a L network antenna tuner…
Today I was back over at my local park and while setting up the activation, I took note of the Smith Chart values for my tuned antenna on 20 meters. This took me down a rabbit hole and now I want to implement the changes to see how well it works.
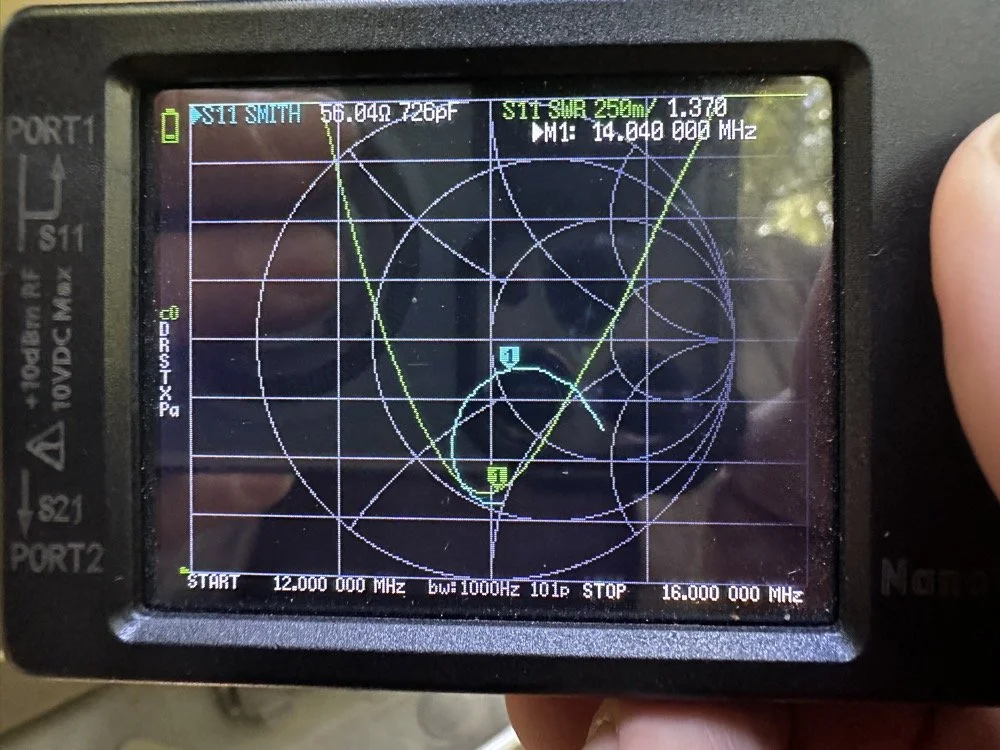
As you can see in the photo, I had the SWR plot on at the same time as the Smith Chart. When I am “on a clock” I will ignore the Smith Chart portion and just focus on the SWR plot. This is simple as all I have to do is place the radials in the usual position and then collapse or extend the antenna a little at a time to move the null over to where I want to operate. Is this antenna efficient? Not really. Does it get me on the air quickly and making contacts? Absolutely!
The information on the display above shows a lot of information. You can see with the SWR plot that the antenna is still just a touch too long. It is close enough to use, but if I wanted better bandwidth for CW use, I should shorten it a little more. You can also see where the same value is on the Smith chart at the same time. It is plotted below the resistive line, so it is capacitive. This is also confirmed at the top where you see 726pF. It is also above 50 ohms of impedance since it is inside the unity circle for 50 ohms, just a little bit.
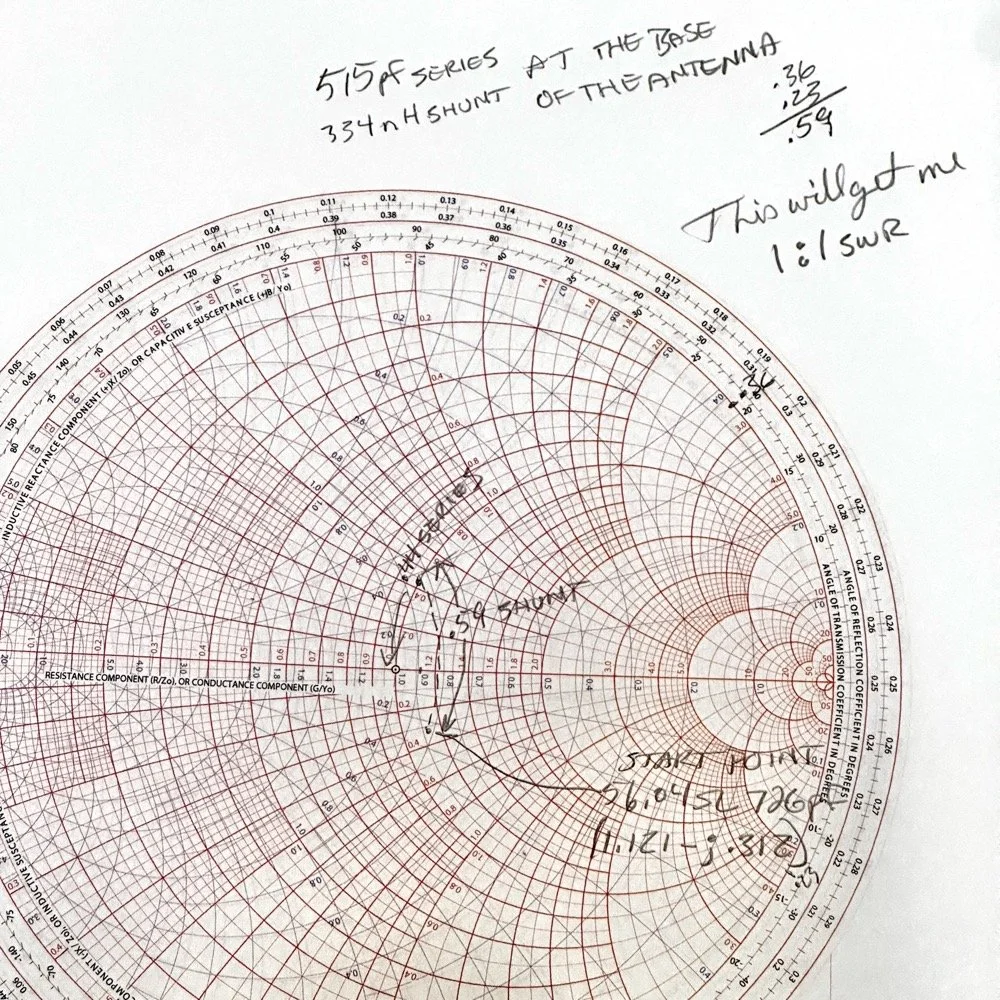
The Smith chart is really cool once you start understanding it a little. BTW…a little is all I really know about these powerful tools. It would seem to be counter productive to put an inductor from the antenna radiator to ground. It would also seem even more so with one of a very small inductance. But the Smith chart don’t lie… It looks like a hand wound air core inductor and a 550pF trimmer cap are the goodies here. or at least a 500pF cap and a 50pF trimmer to tune it with. The catch here is that the inductor shunts to ground BEFORE the capacitor is wired in series with the antenna. This is because my first “movement” on the chart is up (which indicates using inductance) and along the conductance lines (blue lines). THEN the capacitor is in series with the antenna after the inductor.
This means I have to make a little board up that will allow me to plug the coax into one side and connect it to the base of the antenna on the other. Since I use BNC connectors in the field, this should be pretty easy. I don’t want to let the cat out of the bag just yet, but what this really is, is a L network antenna tuner…
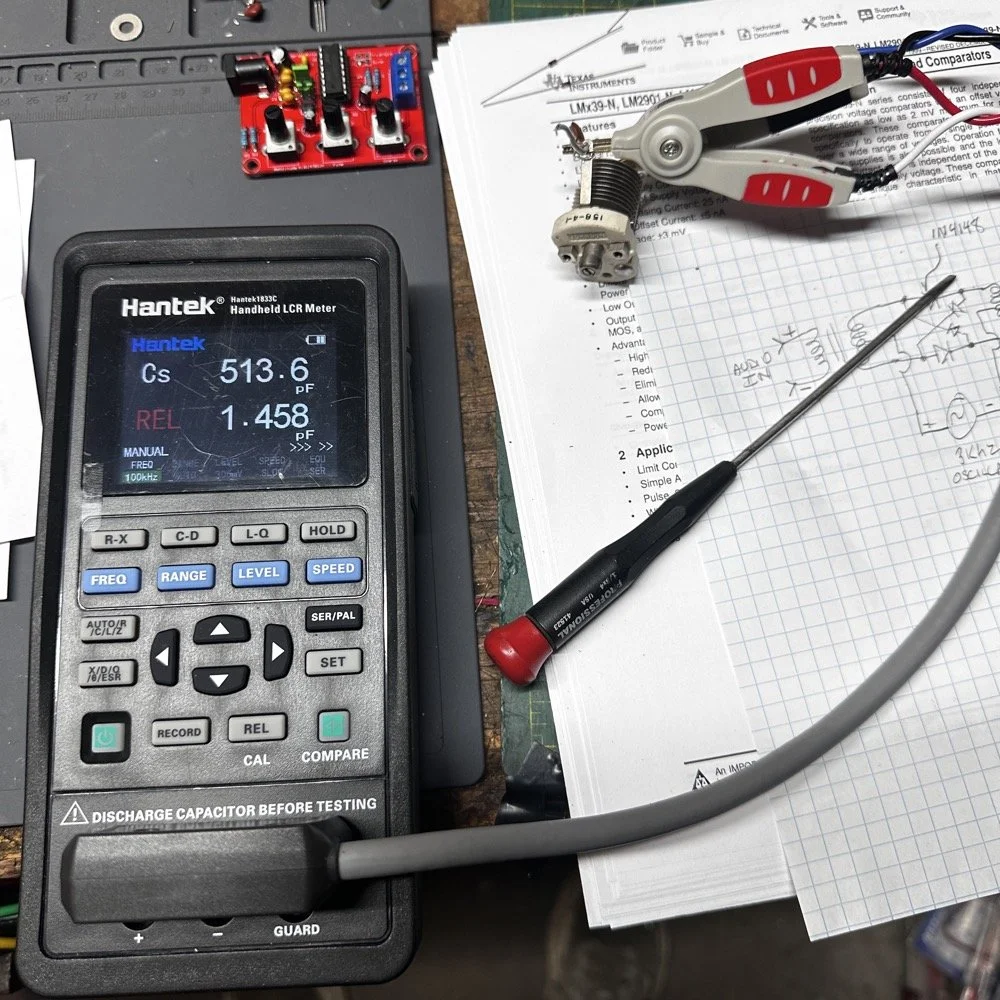
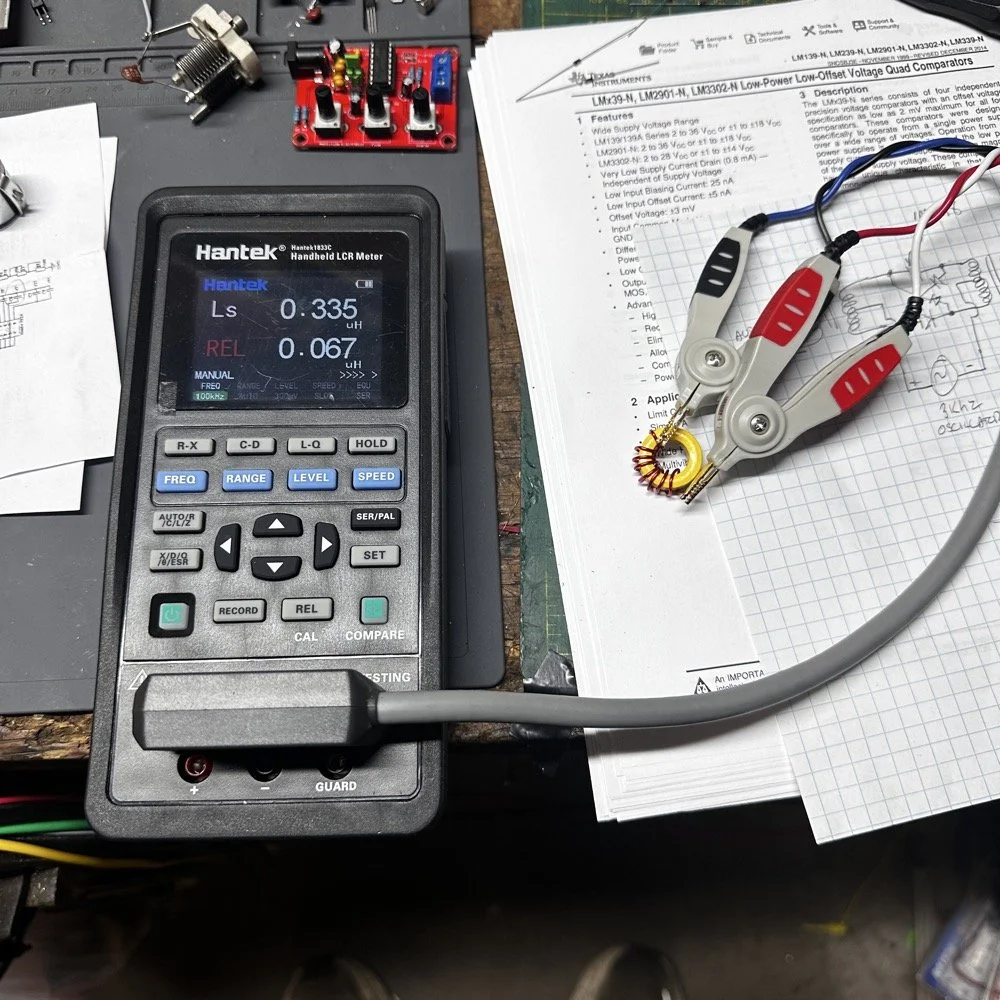
To get the capacitance, I soldered a 560pF capacitor across the 10-70pF trimmer capacitor. The 560pF actually measures 490pF so this with the trimmer gives me a decent working range. I used my Hantek LCR meter to measure the inductor and capacitor before I built it out. The REL in red letters means I “zeroed out” the display prior to testing the parts to remove the inductance and capacitance from the meter leads. I tried a few iterations of the same piece of magnet with to get it to 330nH and it required a toroid to get it to that level of inductance. Without the toroid, I was only able to get about 95nH max out of it. It is also a lot more stable with the toroid core too. So there is that. I am pretty sure this core is not really rated for 50 watts, but we will see. I figure I will call QRL and then “test” on my call for a minute, on a higher band where it is usually a ghost town, and then go out and see if the core is hot. I hope it can handle all the stress I am about to put to it…haha,
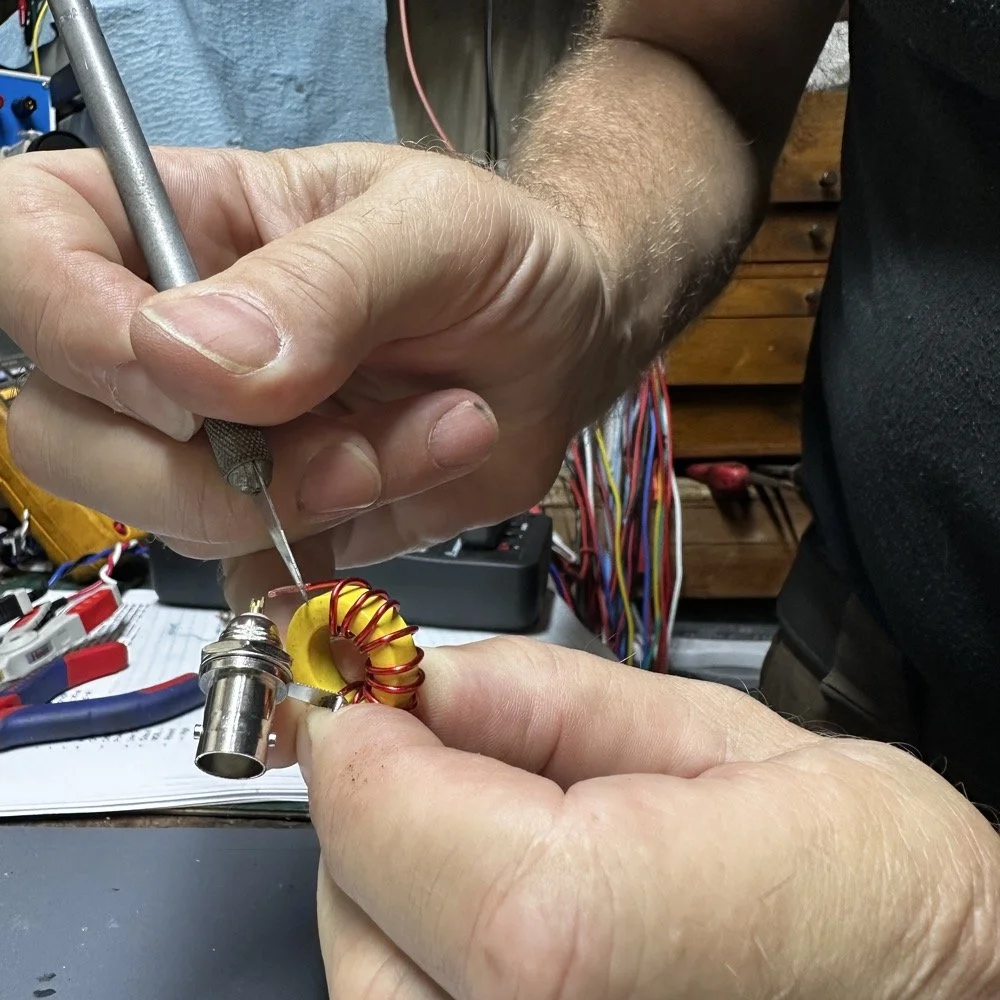
This has been the easiest way for me to get the enamel insulation off of magnet wire. I simply scrape it off with an Exact-o knife. I tried burning it off but it makes a mess. I also tried sanding it off and this does work really well, but it is hard to do and slow. So I scrape them. I dead bug style built this one as it is simply me playing with the idea and wanting to see if my math actually works like it is supposed to. I am fairly certain that it will work, I just want to see if I can get it to do it in the real world too. The SWR was completely usable the other day and whatever it was, so don’t think this is needed for the setup I was using. We are learning here.
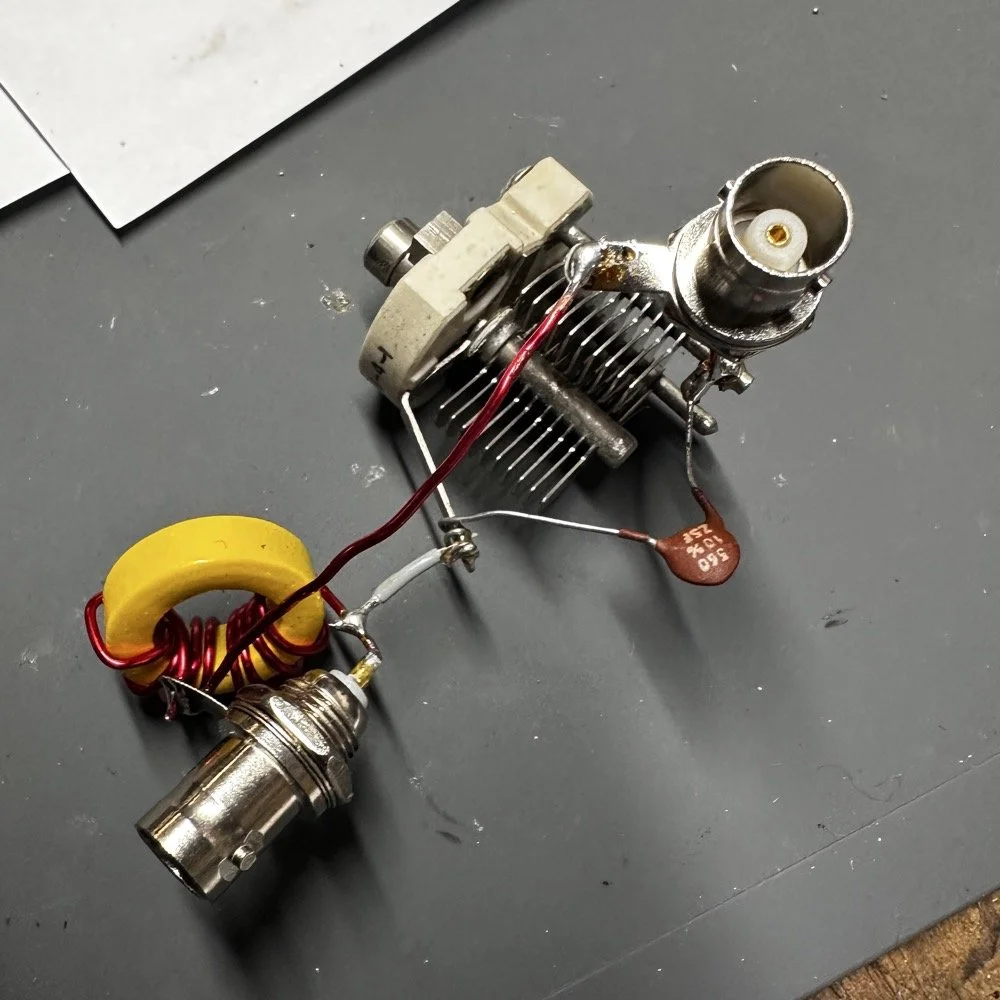
Here it is. I simply used another piece of magnet wire to connect the grounds from one socket to the other and then simply soldered the rest in place. This will have all sorts of stray capacitance issues but as long as I get it to sit still, I should be able to tune it to the setup for the next outing. It will vary a little from one day to the next so this is why I used a trimmer. Also the toroid is adjustable somewhat too. By spreading out the turns on the core, I can lower the inductance some, so this should work pretty well. The cap is technically out of tolerance (and this is probably why I was able to get them on eBay so cheap too) but the measured value was just what I needed for this project.
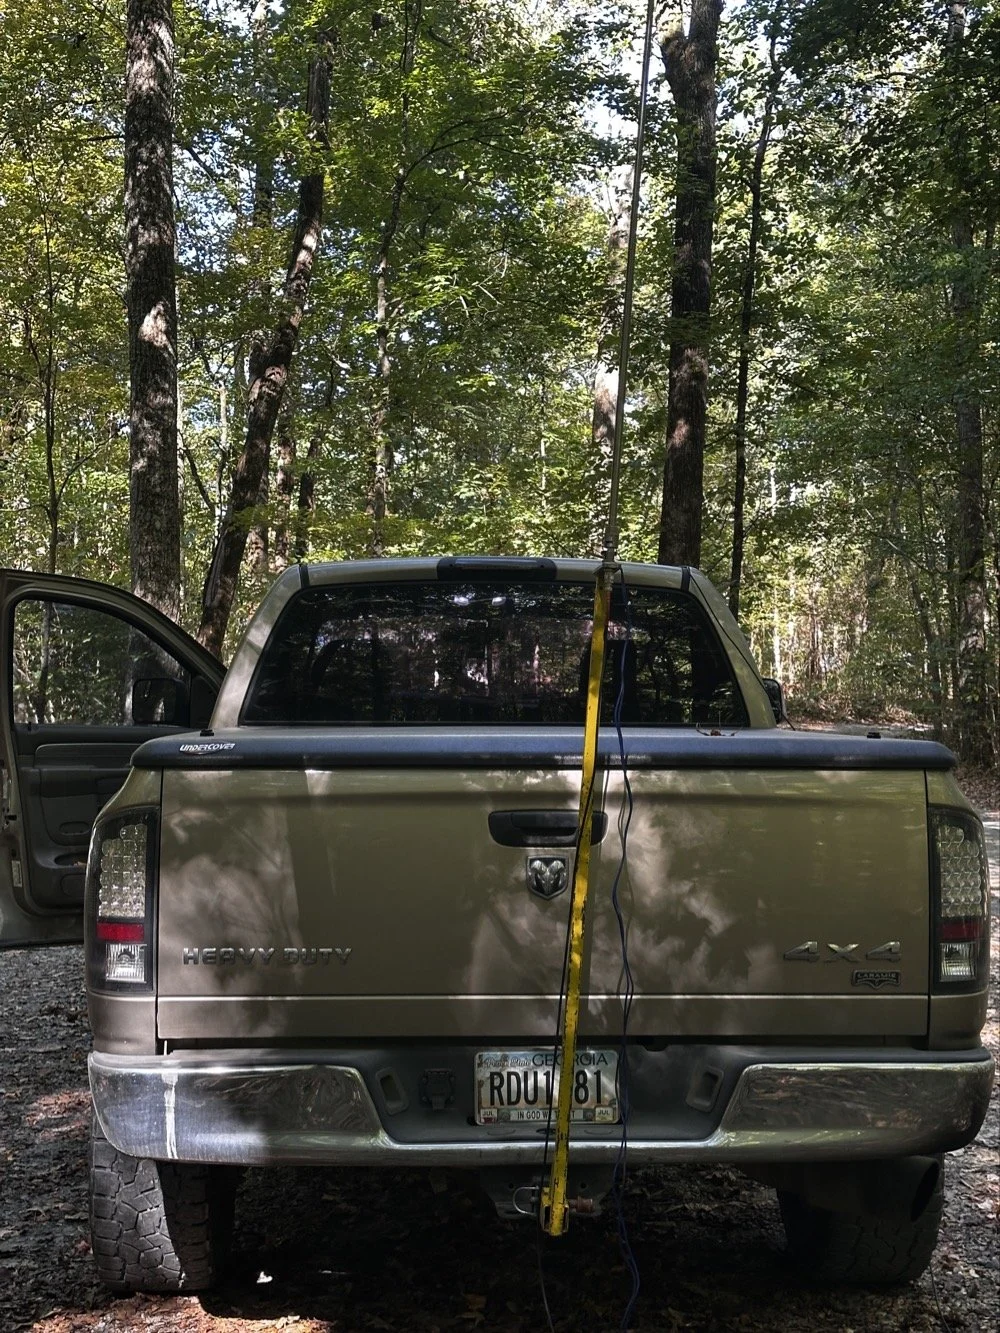
So the antenna on the first trip out for this test, was leaning over to the right. This was so it would not touch some tree leaves near the top of the antenna. This problem will be going away soon as we are entering fall… So this is the setup I need to replicate when I perform my test. Lucky for me, I took a photo of the nanoVNA before I took it apart so I can see when I get it close.
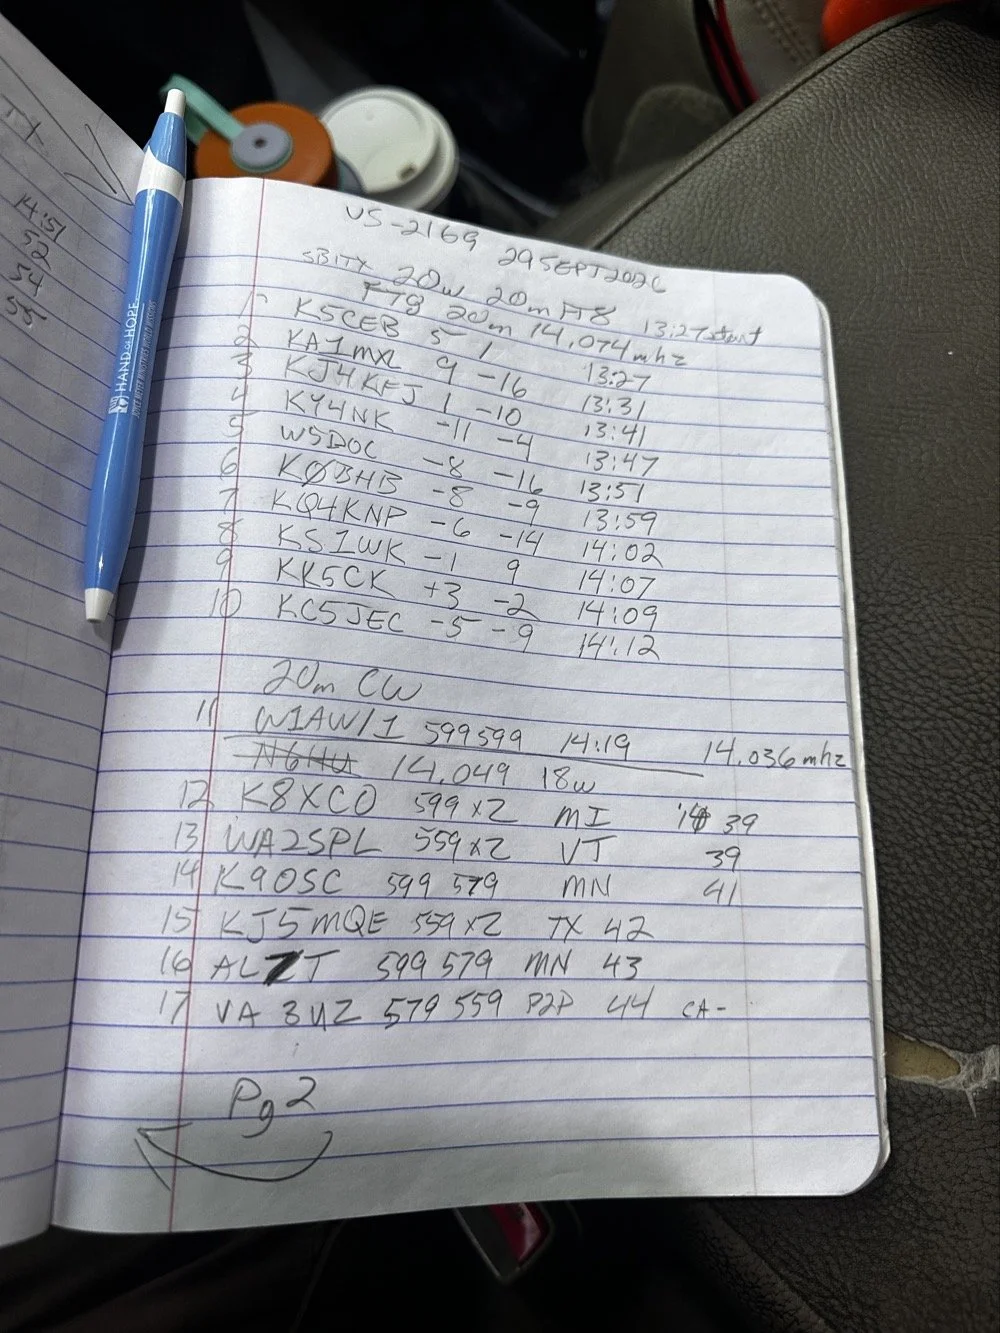
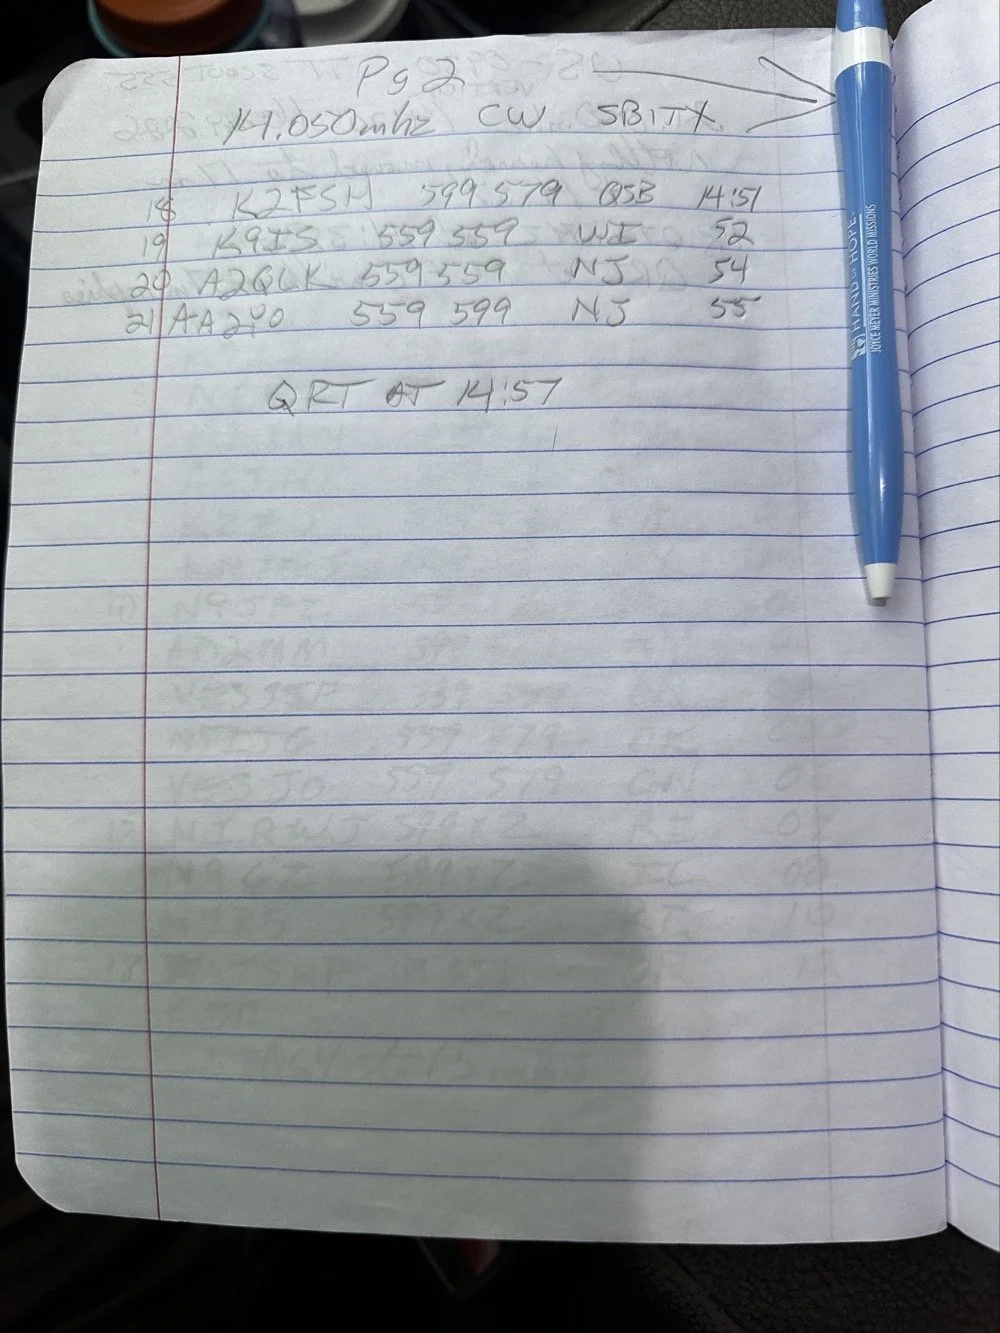
So today I wanted to use the sBitx and see how many FT8 contacts I could get before I switched over to CW. The mini-goal was to secure the activation with just FT8 today then do what ever. Well, as you can see, that was a win. Then I wandered around the band a little and found W1AW and got them in the log next. QSB got to N6HU before I could work them… After that I was able to work several more before I ran out of time. It was a great day at the park! Come back next week to see what happened with the antenna tuner I built!
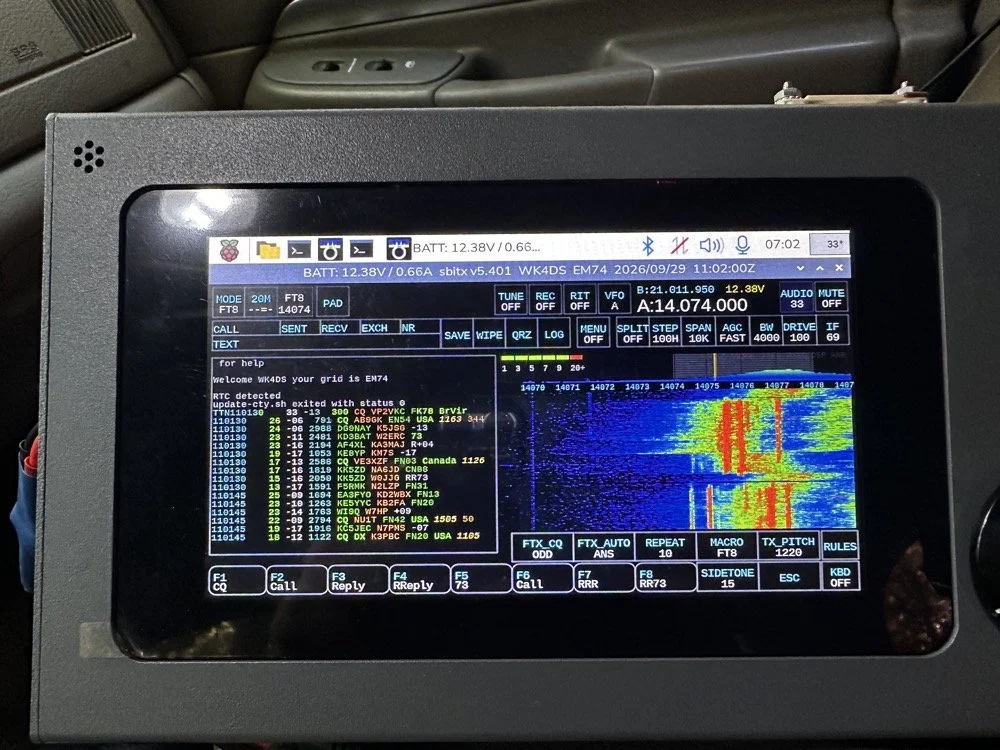
This latest version of the sBitx OS is really good. This radio was really economical when you consider what your getting. It is only 40 watt, (mine is the early version with the 40 watt amplifier and not the 25 watt version that ships now). It does have a pretty inefficient amplifier design as it loses output power the higher you go in the ham bands. But you know what? It will operate FT8 and FT4 natively INSIDE the radio with no other gear needed. That in itself is amazing!
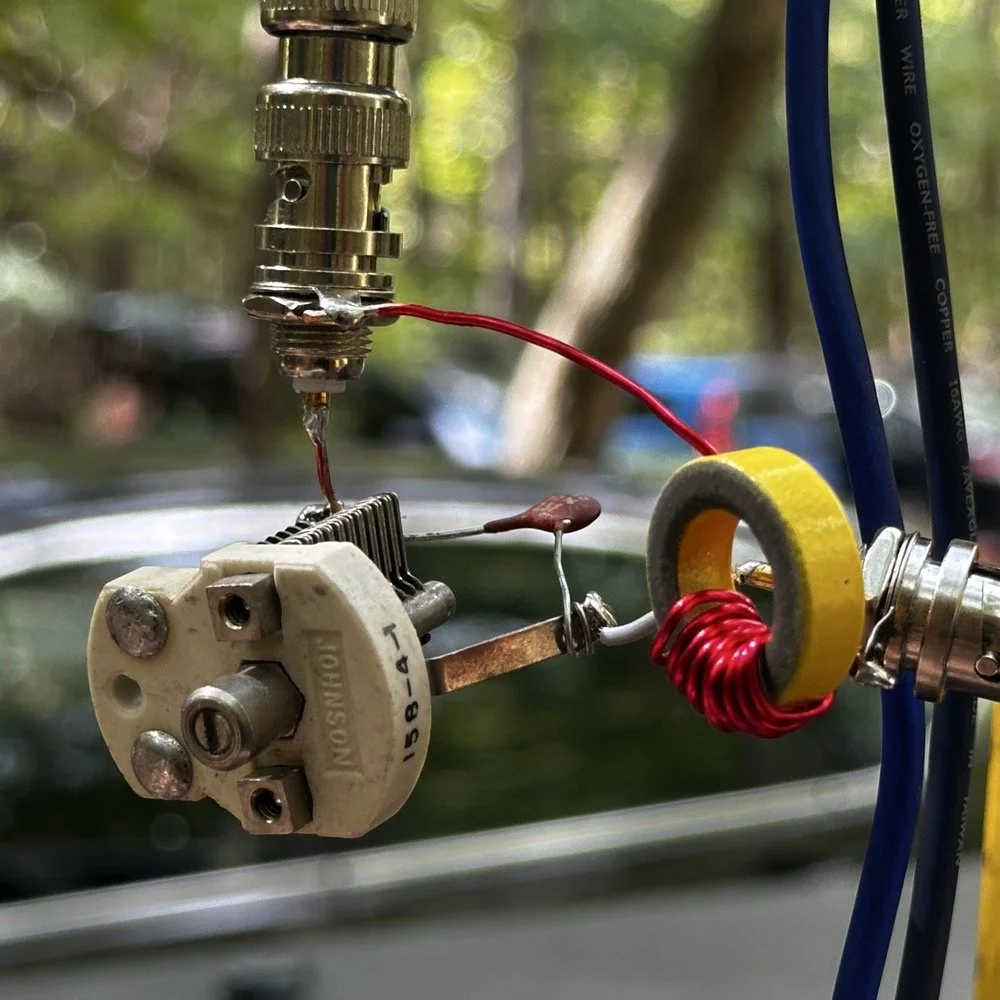
Today is the day of the big test to see if my math works. I took this amalgamation to the park with me so I could replicate the setup and get it back to as close to what I had as possible the other day. I even parked in the same place. I simply used a BNC to BNC adapter to couple the two bulk head connectors together. This allowed me to connect the matching network to the base of the antenna. You can see both the capacitors and the inductor in this photo and now I have them wired. This should be close to 50 ohms impedance and will probably need a little adjusting on the trimmer cap and maybe moving the coils of wire on the toroid. Other than that, it should be good to go.
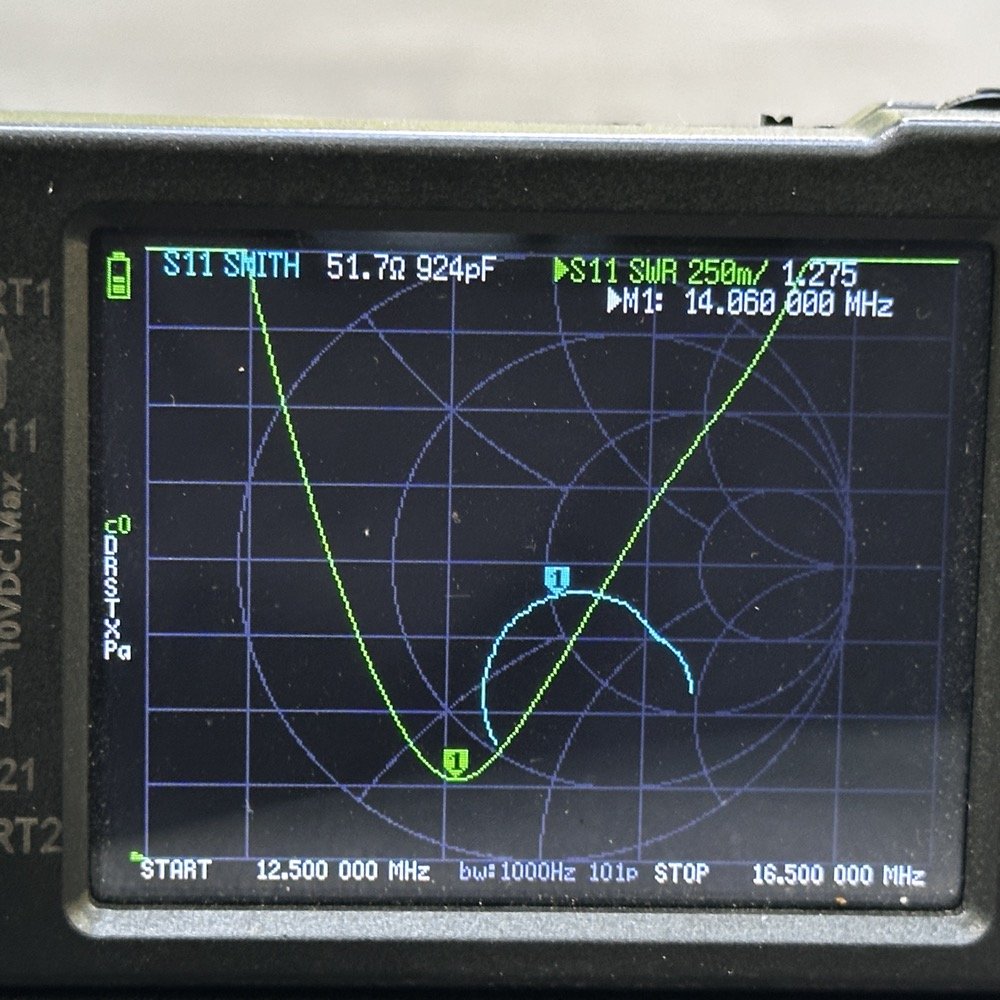
These two photos show what the system looked like before I added the matching network I had made and the lower image is after. As you can see above, the SWR plot looked really good with the impedance being really good. It was close to the other day as well so I should be able to adjust the L network to clean this up some more too.
What you see below is the result after I added the L network to the system. The plot is now over 2 : 1 and the impedance is inductive finally. I have had these be capacitive in nature for a very long time and it was good to see I had moved it to the inductive side of the graph. This tells me that I am on the right track. You can also see that it lowered the resonant frequency of the circuit too. Now what could have caused this? I was needing it to move the graph to the center of the chart and we ended up with this mess instead.
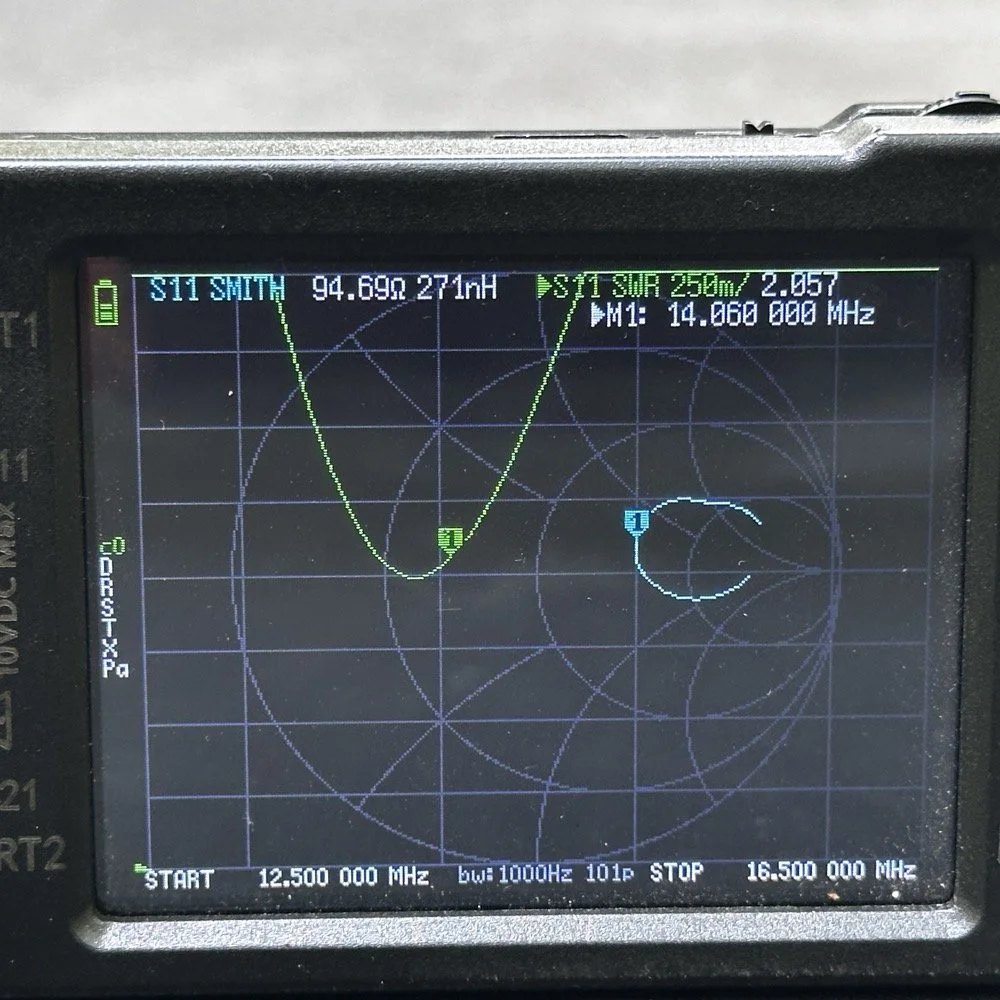
So now it is back to the drawing board to figure out what I did wrong. I am not sure what has happened here. Maybe I measured my components wrong. Maybe I wasn’t setting up the nano VNA correctly. Maybe I did the calculations on the Smith chart wrong… All I know is that it did not work like it was supposed to.
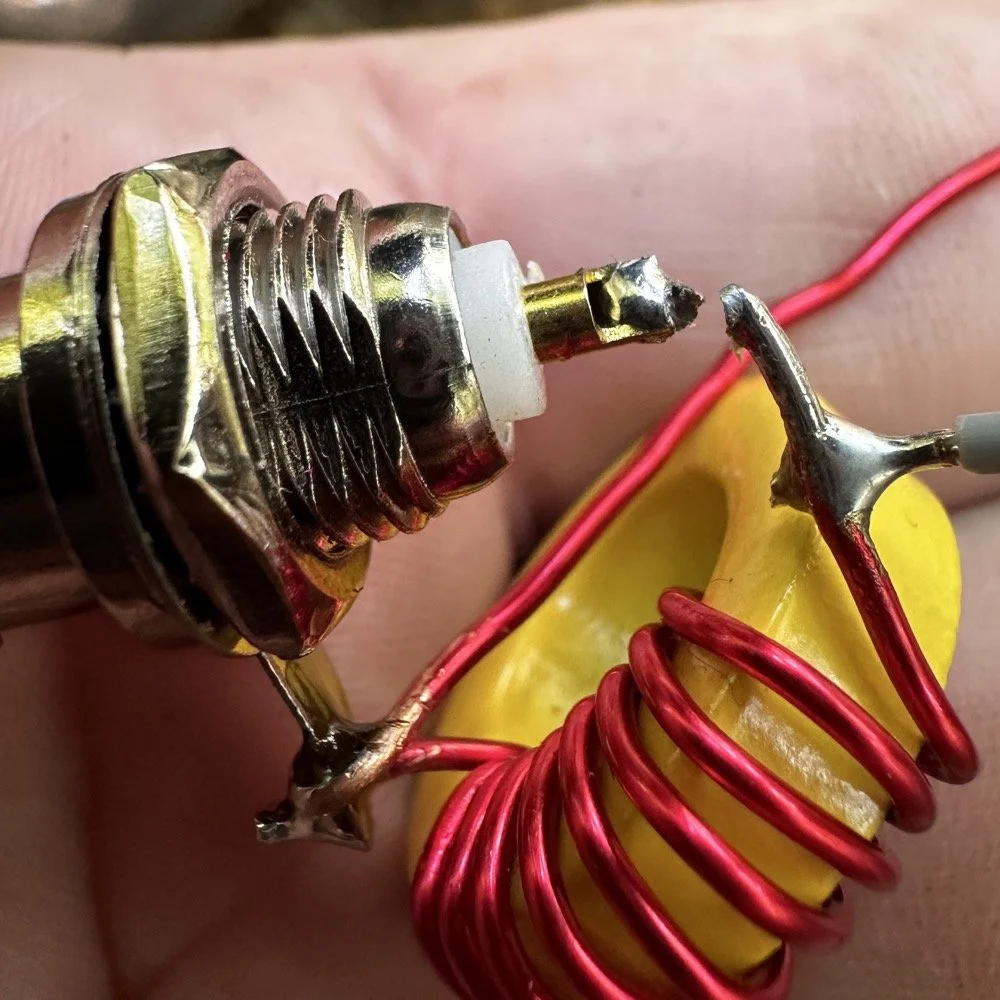
I am going to re-solder the broken solder joint you see in the photo above, then re-test the circuit. Maybe it was a bad solder connection that was causing the error. I really don’t think it is though…
Sometimes you win sometimes you lose sometimes you make a mistake, this seems to be one of those times…
You can help support this channel by using these Amazon Affiliate Links as well:
QRP/Portable Radios:
Antennas & Tuning:
CW Equipment:
Power & Accessories:
Organization & Transport:
BONUS ITEMS (Optional 16-20):
73
WK4DS-David

Sharing the fun with some kids
Today, Josh (KS4JM) and I went down to the local library in Trenton GA to setup some ham radio gear and share it with some interested young people that were in a homeschool group. I left early as I wanted to have time to setup a station if possible. I wanted to setup outside the library as this would allow me to make use of HF and hopefully show them CW as well as some digital modes. When I get down there I look around and there really isnt any trees that would work well for a wire antenna and I didn’t want to drive my truck into the yard of the library…but…
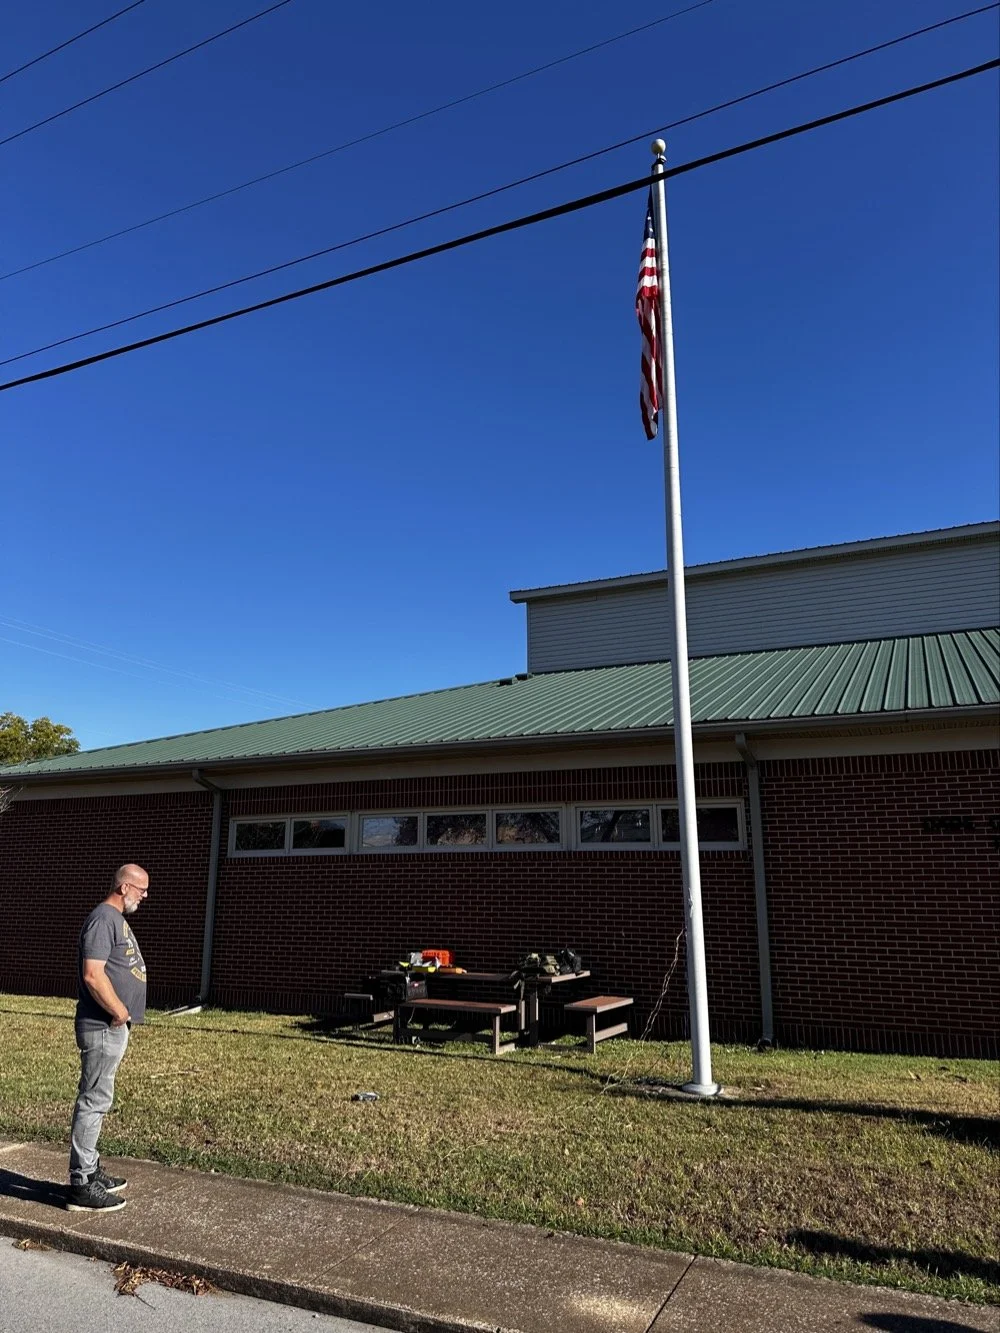
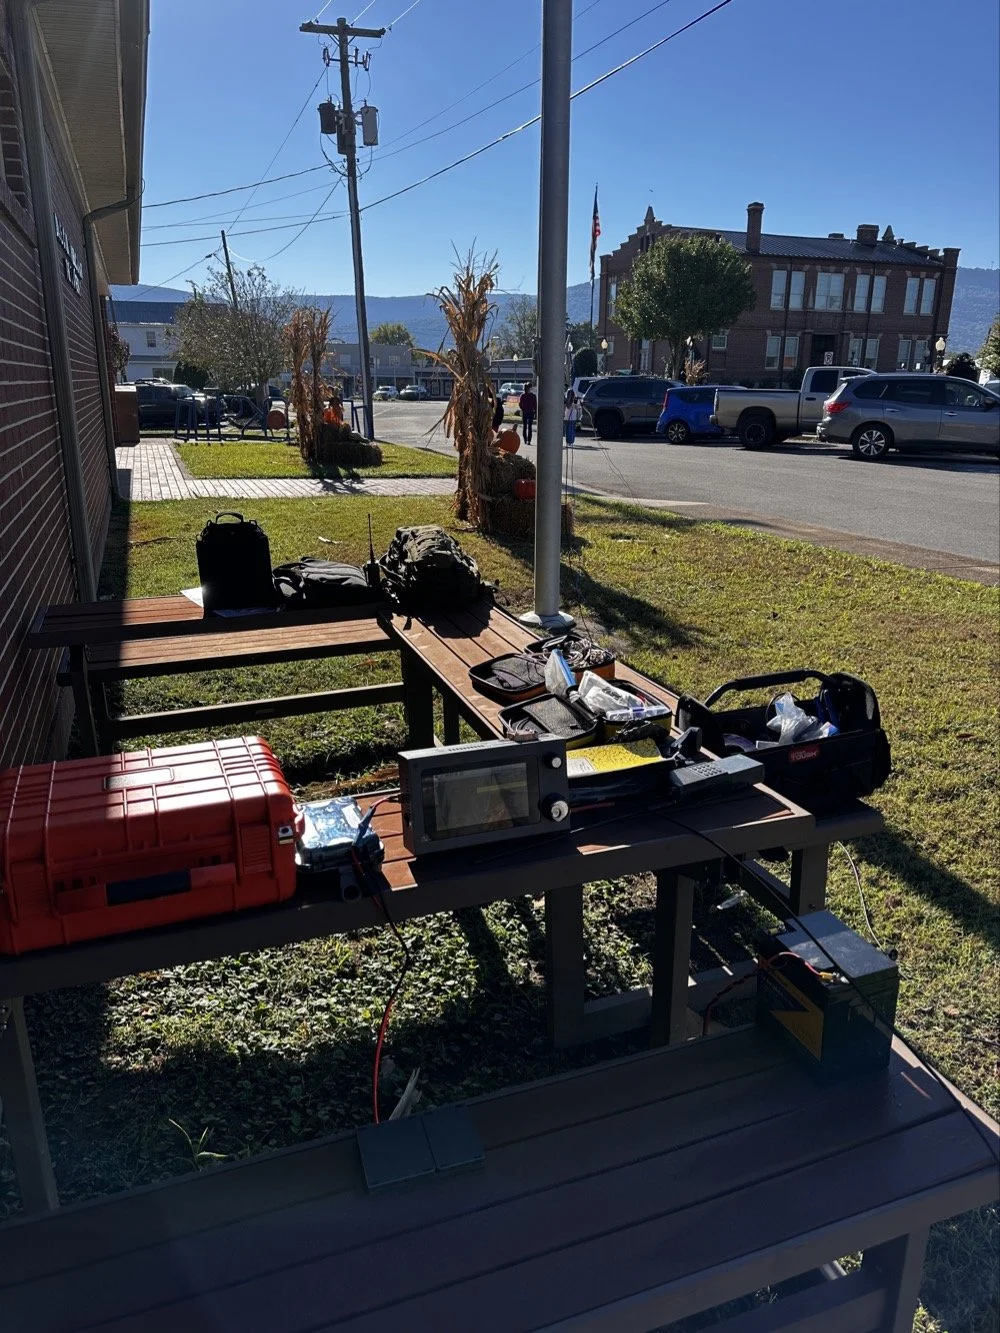
…as you can see, I saw what I hoped would work for a vertical antenna to use on HF. In the top photo, Josh is marveling at my cobbled together mess of wire that made quite a few HF contacts today… The first thing I did was get out all my gear and pile it on the table next to the building. What respecting ham would come to a demo and not bring WAY too much gear with them??? HaHa. So I basically dragged out all my usual POTA stuff along with a few other odds and ends to show the kids. More on that in a minute, right now lets get back to setting up an antenna in the front yard.
I measured the flag pole with my iPhone and it said it was just over 28’ tall, this led me to believe I was looking at a 30’ vertical antenna if I could isolate earth from the radio ground… This also was made easier since I was running on battery power today and the negative post of the battery was not grounded. Next step was to come up with a way to connect the antenna to the pole. This turned out to be easier than I though initially. I simply took a BNC to binding post adapter, attached a short piece of wire to it and then tied the other end of the short wire to the lower rope cleat on the pole. To get a counter poise, I just grabbed one of my radial pairs from my POTA kit and threw it out in the grass. I tied the radials to the binding post adapter an you get what you see in the photo below.
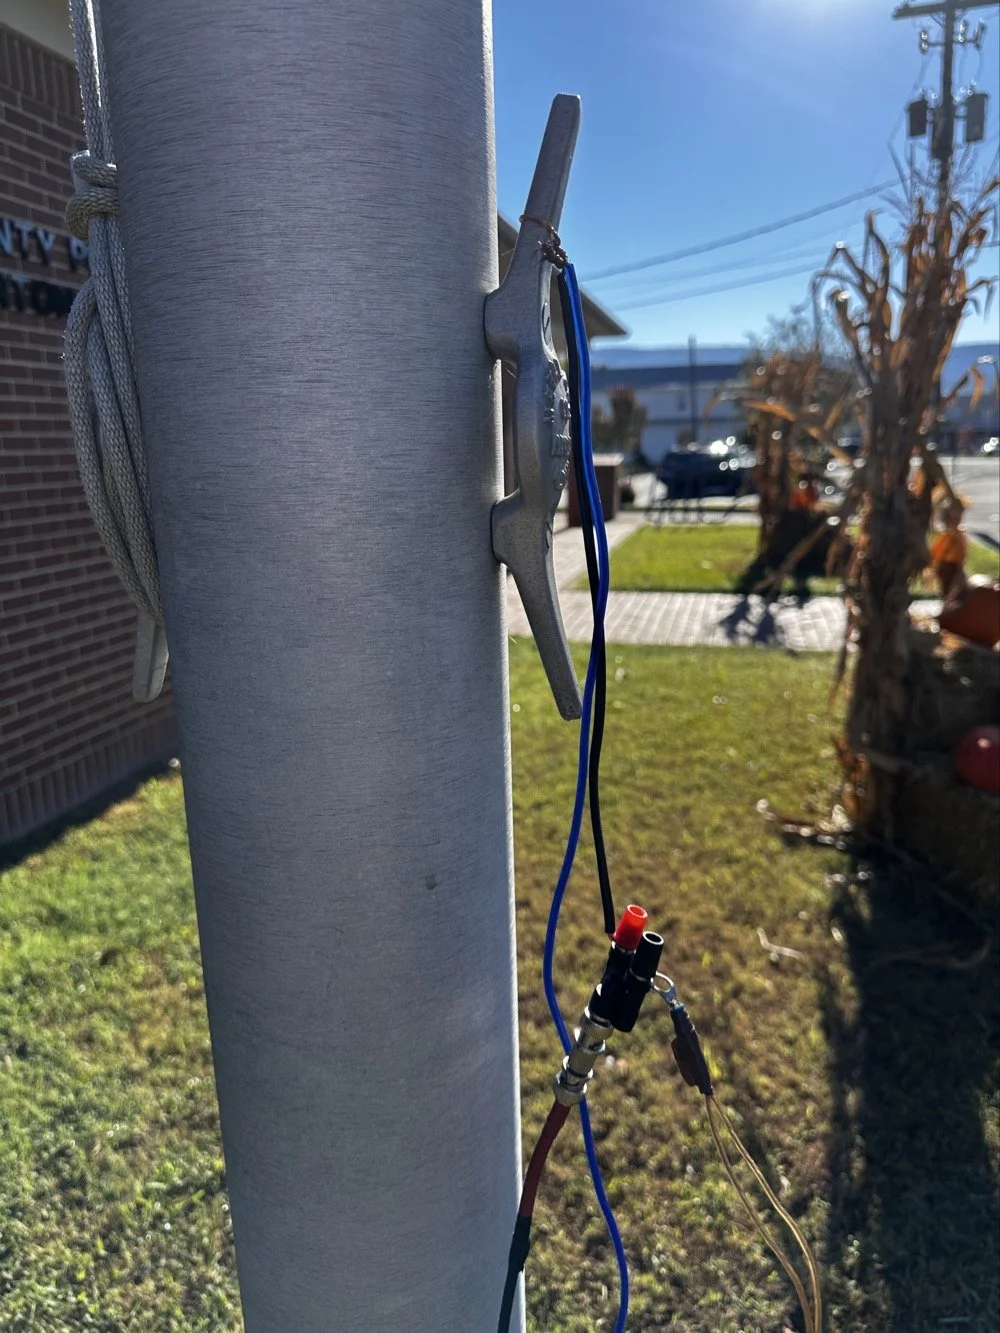
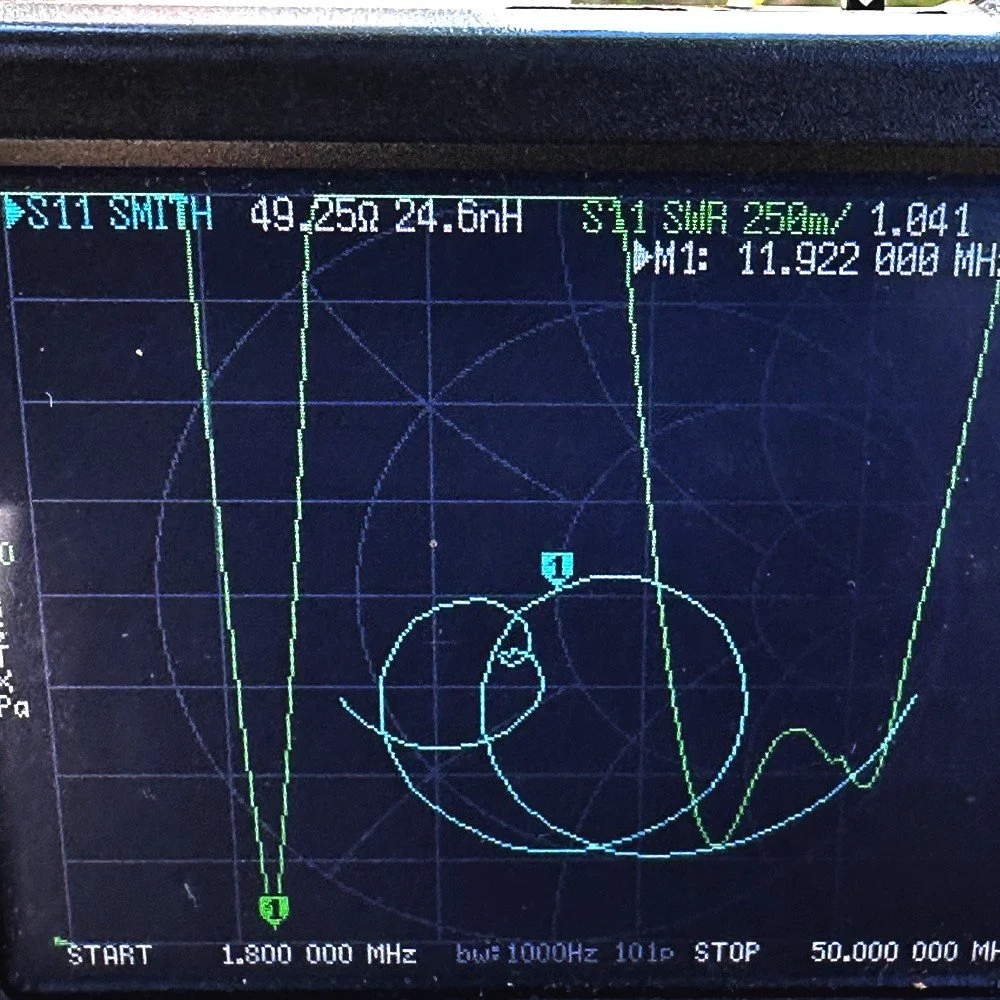
As you can see, it is the least engineered version of a connection that could be done, BUT I was able to connect the nanoVNA to and saw this plot… I set the marker to the bottom of the null to see what it was resonant at with the setup like I had it… IF I could just use this 11.922mhz band space, this would be awesome! Check out the SWR value of 1.041:1 that is incredible to say the least. It also shows that it will work on the higher frequencies between about 32mhz and 41mhz with reasonable SWR. These are also not amateur band spaces, but maybe this area is open to your uses, what ever that is. This would allow someone in an EMCOM role of some sort, could in the least, work out a small problem of two. Alas, I had to operate in the amateur spectrum so this is not an option for me. But this did give me hope. I couldn’t shorten the antenna so it will work on 20 meters, which is what I need to do to get on that band. Instead, I can go the other way and maybe get it to resonate on the 30 meter band instead. Making it longer, electrically, is far easier than shortening a flag pole that is set in concrete… If you will look closely in the above photo, you will see a blue wire also tied to the cleat and running down out of frame, this is the rest of the radiator that I added to make the pole electrically a little longer so it would move the resonant point down to 10.1mhz I failed to get a photo of the nanoVNA when I finally got the wires positioned right but it was about 1.7:1 SWR when I was finished. This is more than fine to work some 30 meter HF so lets get on the air!
Once I had the antenna tuned to the 30 meter band, I set out to get a radio tied to the flag pole to see if anyone could hear me. You see, just because I got it to resonate, doesn’t mean it is a good antenna. After all, a dummy load resistor has a near perfect SWR… To say that I was a little skeptical would be an understatement, but when I turned on the radio, I was pleasantly surprised to hear 30 meters was open AND there were people there! The antenna was working well! Well enough at least. Since Josh had arrived, as you saw in the earlier photo, I wanted to chat with him and catch up, so I found a clear spot on the 30m FT8 space and set out to calling CQ to see what would happen. Well, QSOs is what happened! I made a ton of contacts in a very short time on the FT8 band space. I was shocked that they just kept coming in too, I worked around 10 stations in about an hour. This whole time Josh and I were talking to the kids about the radios, activities and what all we could think of that involved ham radio. The whole time the radio was getting called by stations and it was completing QSOs for me. This is one of the awesome things about FT8 in my book, the semi automatic ability to complete the QSO without having to do a lot of work. It doesn’t hurt to have the ability to work in really poor conditions too. If I can’t hear a station on CW, I can usually spin the dial over to FT8 and make come contacts.
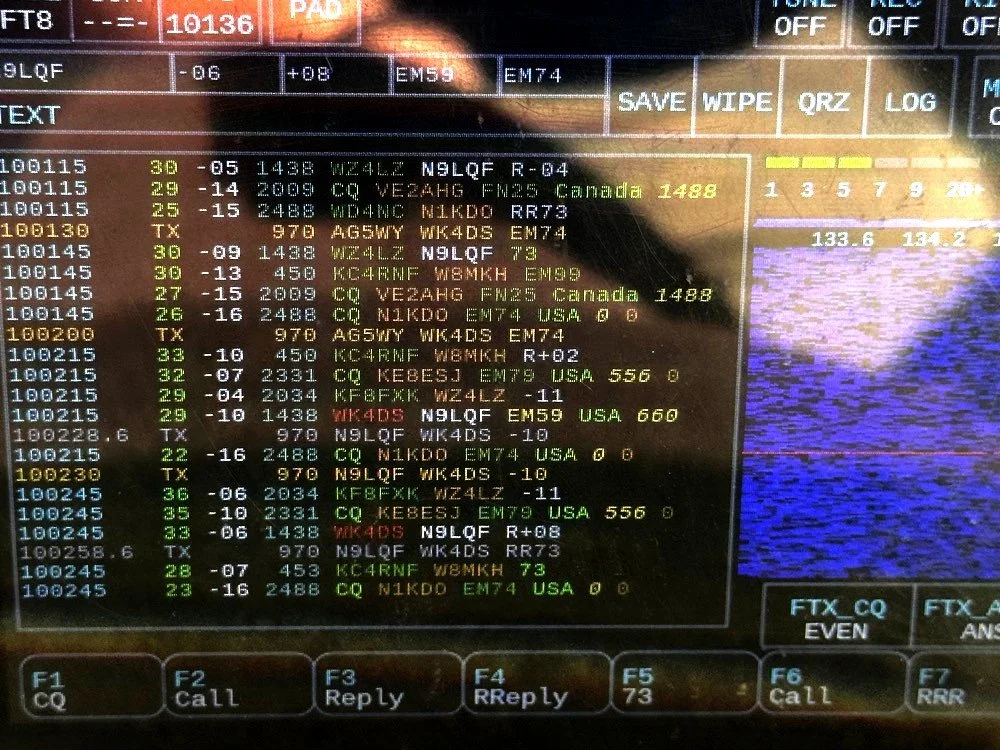
Here you can see where I was calling AG5WY attempting to make a contact with them and get a reply from N9LQF which I was able to log the QSO from instead. I had been calling AG5WY for several cycles with no replies so it is possible that they could not hear me. This was why I switched and worked N9QLF instead. Weak signal modes are awesome. The nice thing about this radio is that it has a touch screen and powered by a Raspberry Pi 4 SBC, so I was able to talk about how the modern radios do things the older radios don’t. I was also able to show them how I could work HF pretty easily and the radio didn’t have to cost 1500$ to do it. I even plugged in my Begali Traveler CW key and worked a POTA activator while they were there. The whole time I am working the contact, Josh is telling them about Field Day and how we have a lot of fun with our club and things like that. He shared a info graphic that shows the amateur band space and explained come of it to the kids.
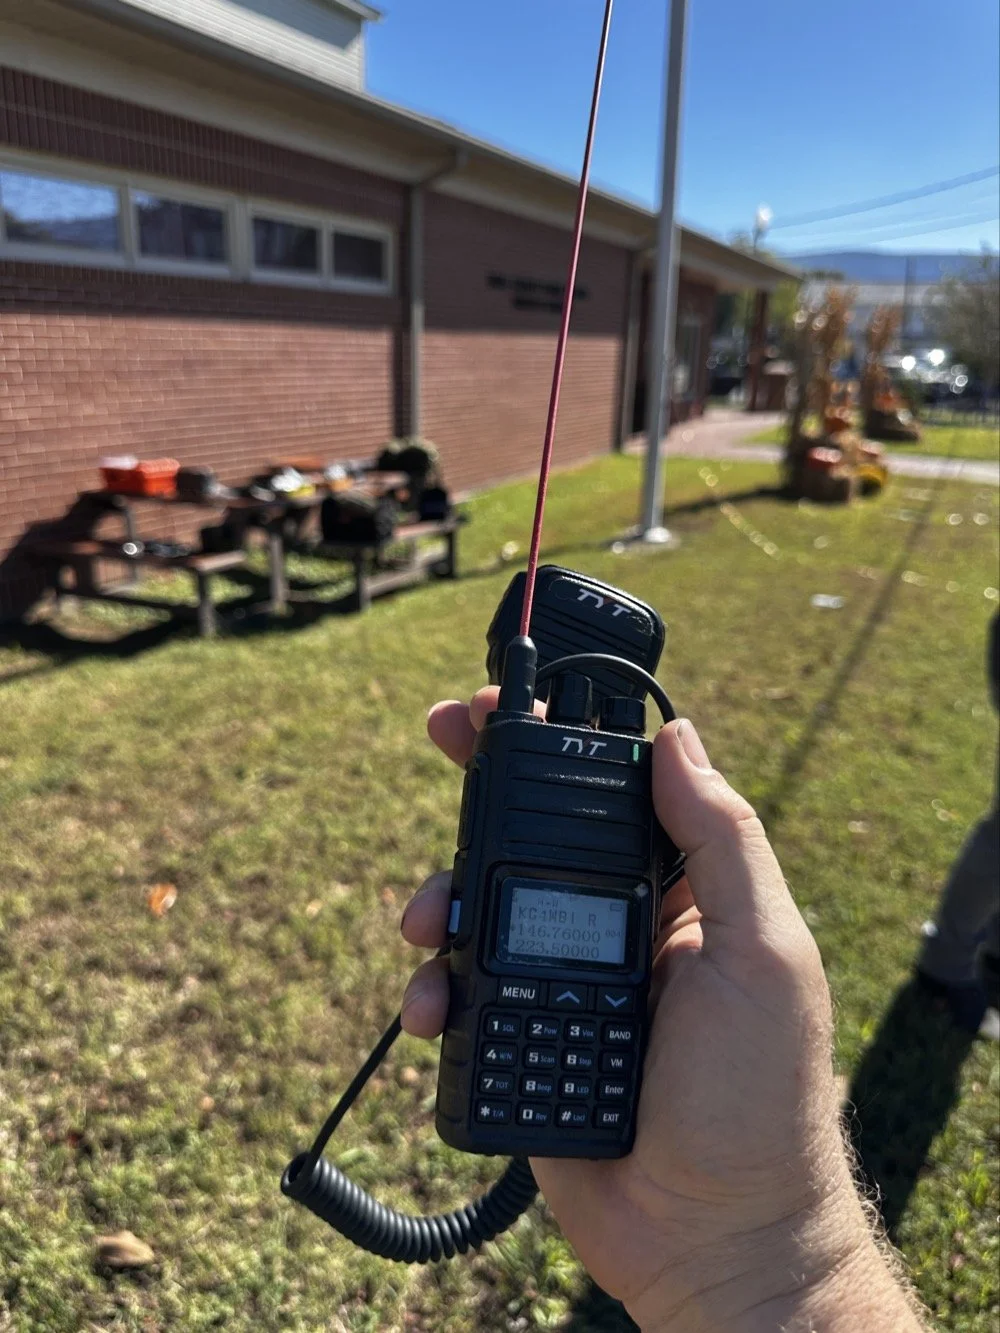
We also showed the kids how a small hand held radio like this TYT I picked up off of amazon can do a lot more than meets the eye since there are repeaters as well as satellites it will reach. Josh brought his “GO” bag kit radio along with his HT and he demonstrated talking through a repeater and how he has found some of the radios to only cost 25 to 30 dollars now days! That is crazy to think that back 20 years ago, a radio like the one in the photo would be between 700 and 1,000 dollars, yet today it is about $75 new. Who would have ever guessed a tri-band radio could be so cheap and work as well as this one does? After about an hour or so, the homeshool group had to go, but we stayed around for a little while longer and talked about things we wanted to do. It was a great morning with a lot of good kids.
If your wondering why there are no photos of the kids, there are two reasons. One, I dont normally publish images of children on my blog and two, I was so busy while they were there that I forgot to ask the parents if it would be ok this time. Figures, but rest assured that they were there and I hope they had as much fun as I did. If you get the chance to do something like this, I highly recommend it.
You can help support this channel by using these Amazon Affiliate Links as well:
QRP/Portable Radios:
Antennas & Tuning:
CW Equipment:
Power & Accessories:
Organization & Transport:
BONUS ITEMS (Optional 16-20):
73
WK4DS - David

The POTA Scout is good to go!
Today finds me at Cloudland Canyon State Park again but this time on remote battery power! After testing the scout on the bench supply and finding that the radio was fine and my energy in the truck was bad. I decided to test that theory in the field.
Today finds me at Cloudland Canyon State Park again but this time on remote battery power! After testing the scout on the bench supply and finding that the radio was fine and my energy in the truck was bad. I decided to test that theory in the field.
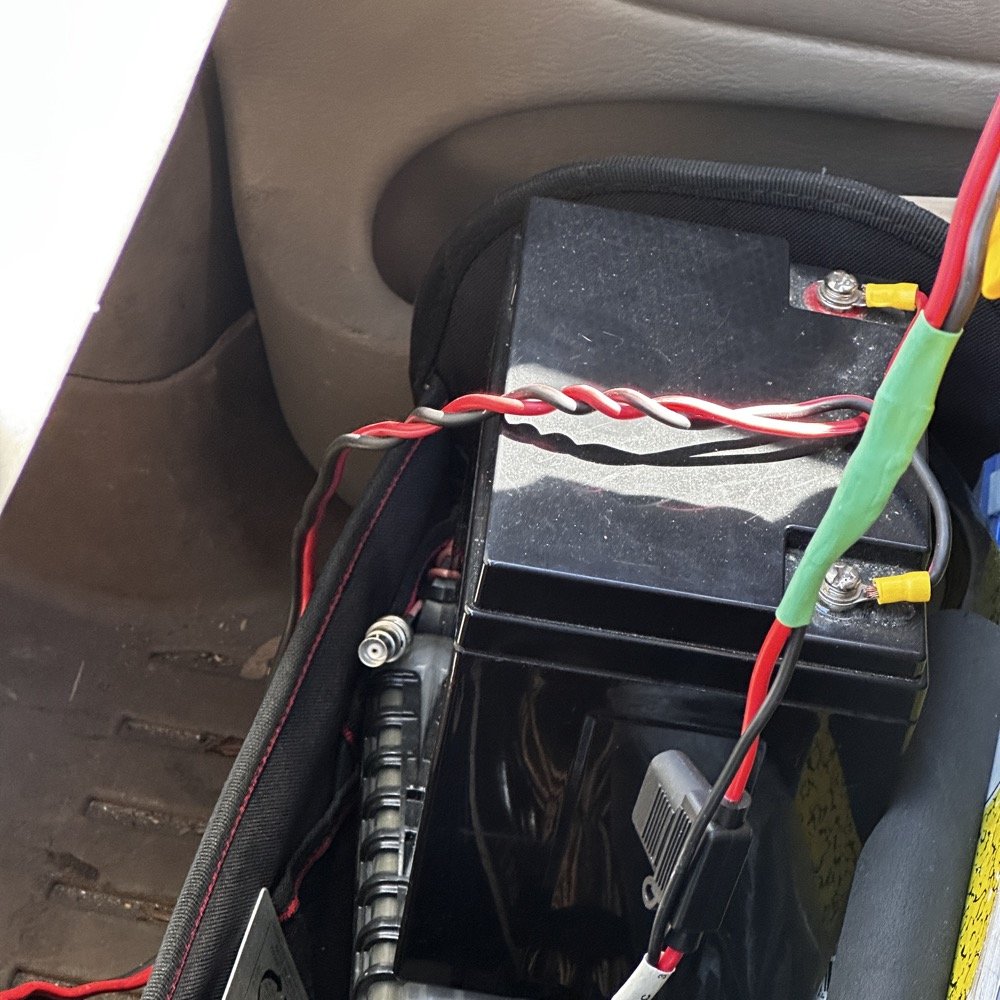
So I grabbed the 36Ah lithium iron phosphate battery I have, charged it for a while, then went to the field with it. I set up the vertical on the back of the truck as I was pressed for time today. I only had about an hour and a half to activate so I figured this would be the more expedient way of doing things.
When I got to the park, there was a few Frisbee golf players on the scene, but nothing else and it was still very quiet, which is great. Today I used a set of antenna radials that are cut slightly different in length, as I wanted to experiment with that too to see if the SWR on the antenna would change with the length of radial changes. It actually does change the SWR as the characteristic impedance to the antenna is dependent on the radial field supporting it from what I can see.
Once the antenna was set up and the radio was hooked up to power, I decided to start on 20 m and see what I could find there. It seemed like a contest was happening so I figured there would be plenty of ops on today.
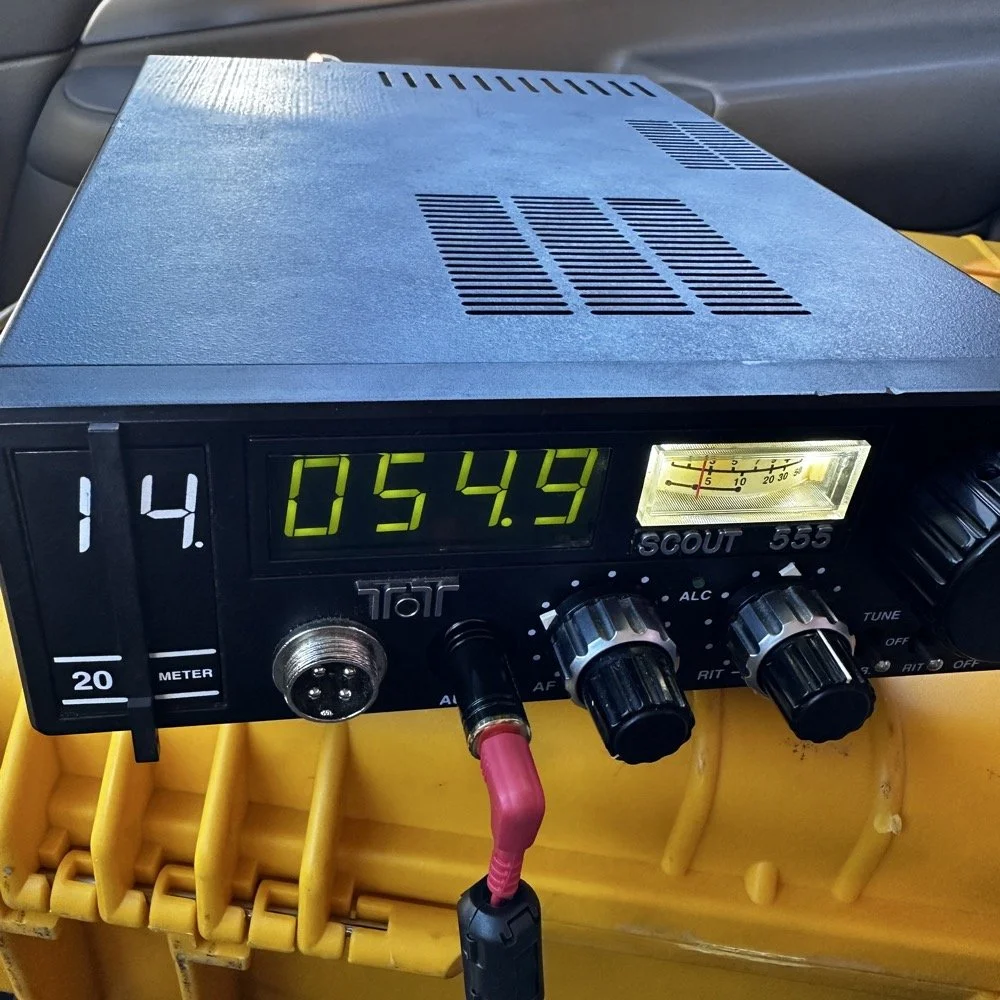
The Scout, as it turns out, works just fine as long as your power source is up to the task. Since I had tested it in the shack on the Astron RS-35M and it worked perfectly, I decided to use the battery so the radio would work like it should. This also afforded me the ability to have fun other than be frustrated over a problem with the system. Sometimes I just want to play radio and not go into diagnostic mode… So I hop on 20 meters like I mentioned and there is some sort of contest happening. I am thinking it was something to do with Germany as they would call CQ DL or something like that…I don’t remember at this point exactly. Point is that I had to find a open spot on the and and from what I was hearing when I powered up the radio, that was going to be hard. I could not have been more wrong… Turns out, that I dialed up something like 20kc and the band was a ghost town! So I find a good spot and get started. The radio shows 14.0549mhz but the radio was operating on 14.0555 in reality. The radio has automatic centering for SSB but on CW, which is where this radio shines…, it has to be adjusted off by the amount of the side tone frequency. That is supposed to be 700hz but the Scout also has another problem, it drifts a little until it is warm. Once the old girl gets warmed up, she is rock solid on frequency, but until then is will crawl up slowly and I have to keep an eye on it to keep dialing it back down over time. It is just one of the little quirks of using an older radio compared to using a new one. My sBitx never drifts because it is an SDR and the program wont let it. It doesn’t sound as good as the Scout though so there is that.
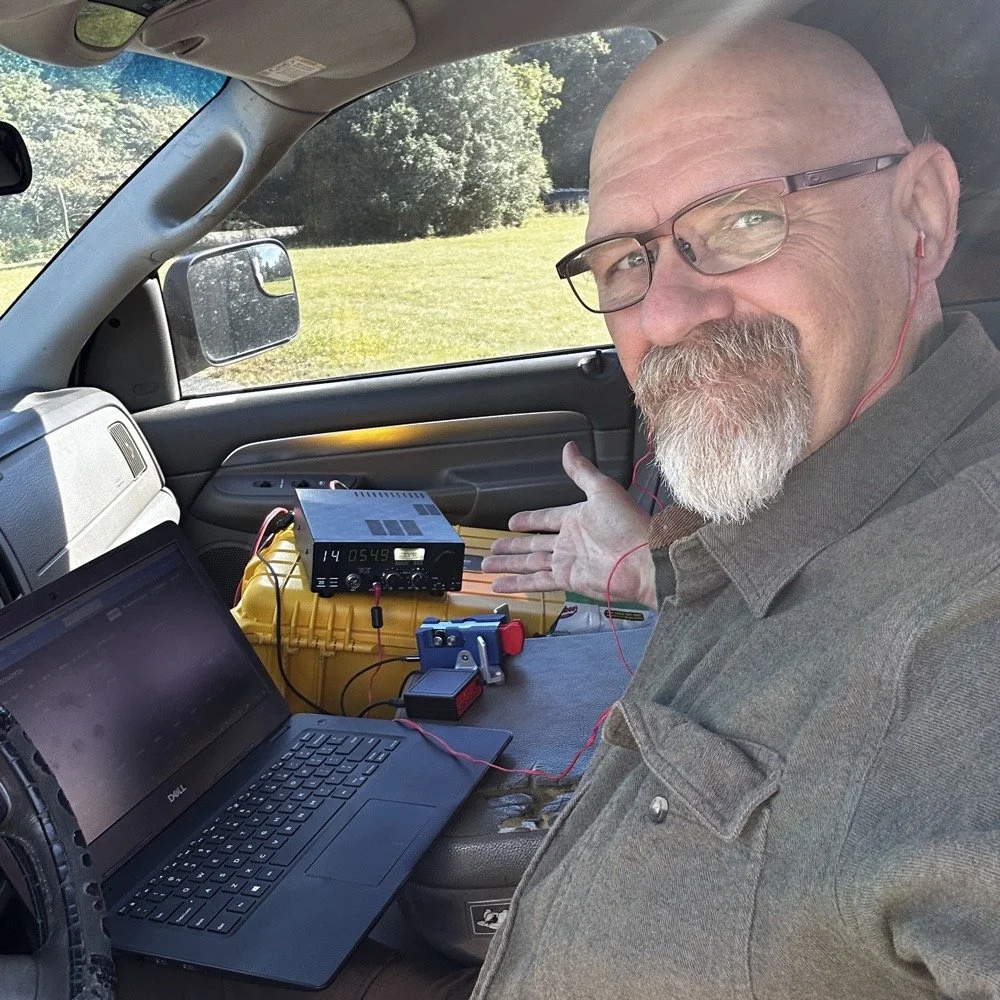
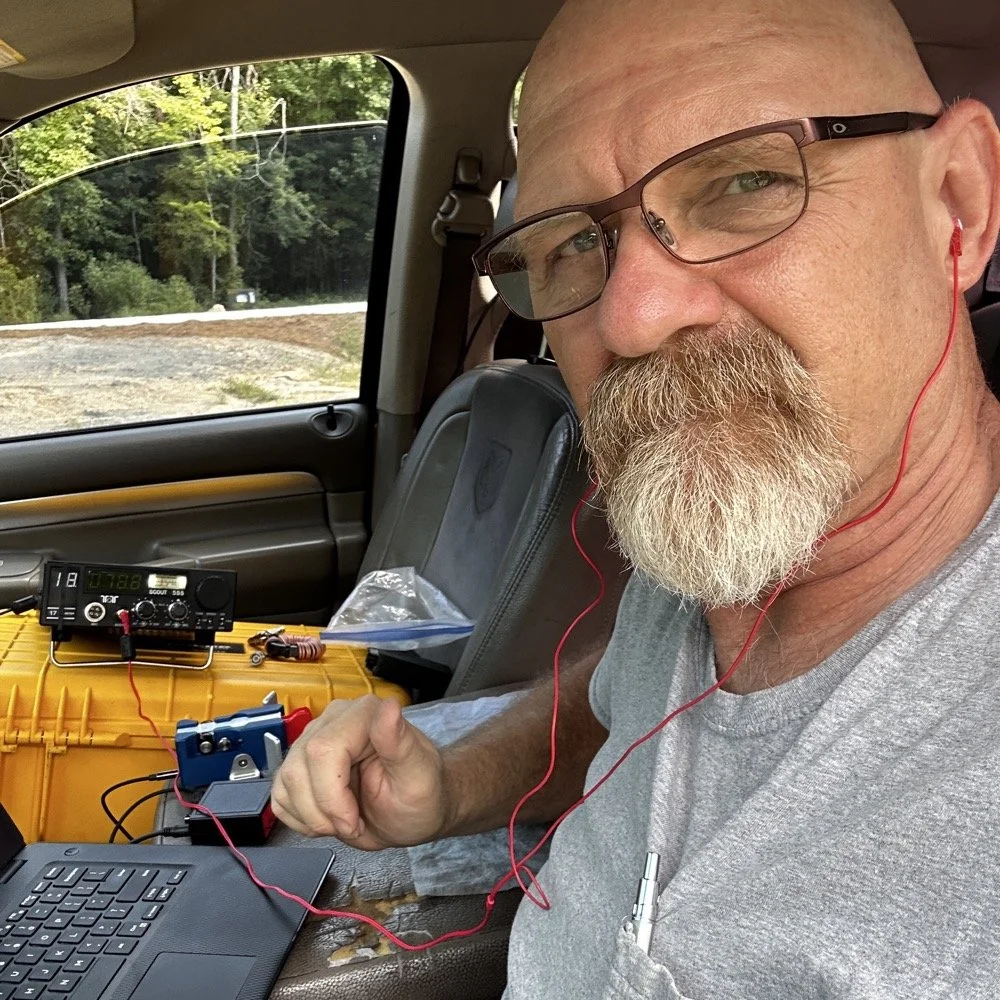
You know what else was at the operating position today? Cool weather is what! I finally didn’t have to run the air conditioner to be able to activate in peace and a little comfort! It was cool enough to start with today that I even wore a long sleeve shirt for a while…haha. As you can see in this photo, there is just what I need to work and nothing else. No spare this or that cluttering the work area. The key, keyer, radio and logging computer and that is all. A simple setup will work for me much better as I am not struggling to find things when I need them or having problems because I don’t have enough space to work.
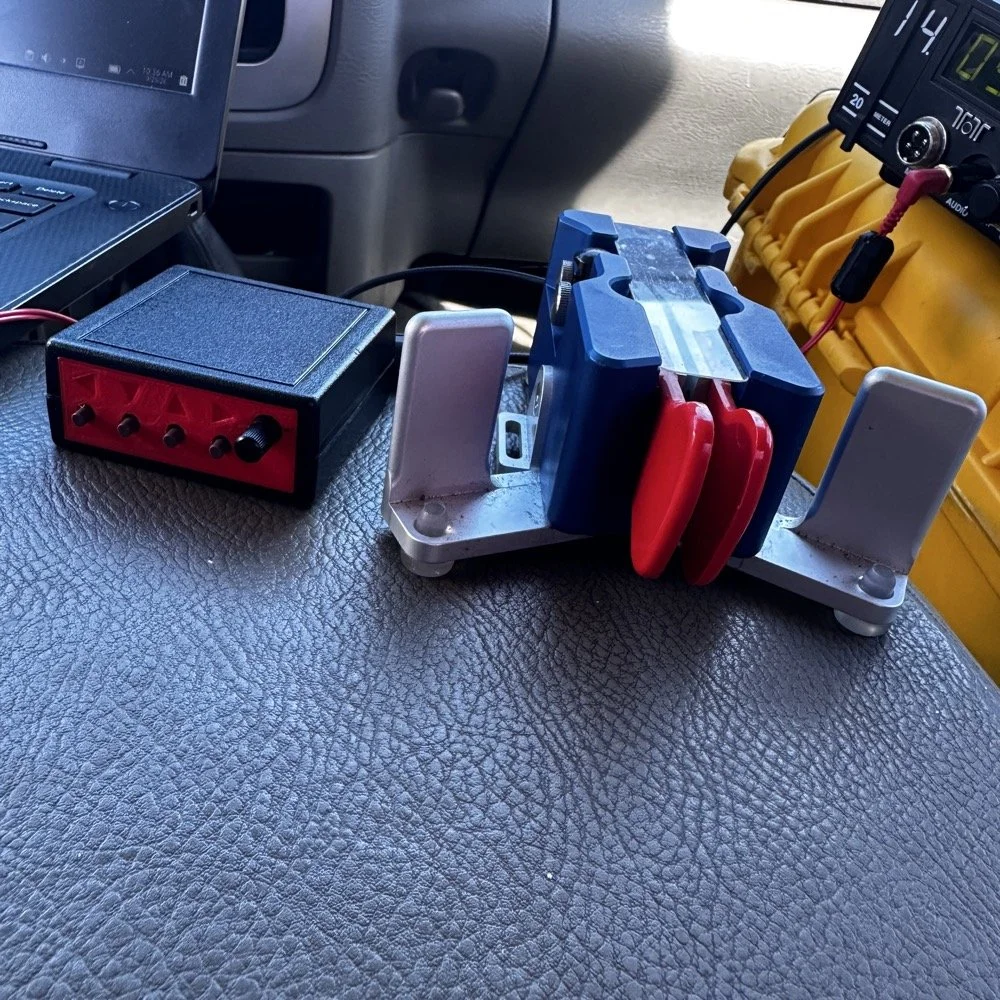
After a while, you will start to optimize your stuff for better or more conformable operating. This key/keyer layout is a result of that process. The keyer is on the left side on purpose. I can see the buttons clearly and I know what the buttons do based on their position on the keyer. Truth is I pretty much only use the first one to send CQ with and the rest almost never get used. One is setup for signing off at the end and the other two are setup for signal reports. I need to repurpose the signal report section as that idea fell apart almost immediately. I found I wanted to send reports that reflected what I heard and not just one of two common values. There was almost no time savings when using them either so those go unused. There was a time when I used the closing a good bit though. When I paper log contacts, it helps to have that little bit of time at the end to write information about the QSO so I use that one when paper logging. Computer logging is instantaneous so it doesn’t have the same need as a paper log book does.
I also us HAMRS to this day for my logging. When I log FT8 contacts, I just key them in manually. I don’t have an integrated software based log to auto-log them and then integrate them into my conventional contacts as well. This leaves me to keying them in by hand later. This really isn’t too bad though and I don’t have hundreds of contacts to worry with when I come home from a park. My log MIGHT have 100 total QSOs if I have an exceptional day out. I think I have broken 100 contacts 2 or 3 times total. FT8 will never be 100 contacts either since I am using the sBitx and it takes time to get a contact in the log with that radio. So I will just sit down at the table and build the log out right quick. If I am computer logging in the park, then I enter them in real time as the radio finishes the QSO. Paper logs are the only reason I have to do it at home now. Back to what I started out explaining here…the CW paddle is on the right as this puts it a little further from my torso as I have long arms and also makes it easier to see the keyer. I also like having a nice key to use when I work parks. I hear people talk about how they don’t want to take their nice key to the field, I am the opposite. I have taken my hand made, custom, one-of-a-kind CW paddles out to the parks numerous times over the years now! I want to use my good paddles. I recommend you do it as well, just pack them well for travel so they don’t get damaged. That was what drew me to the Begali Traveler, the legs fold to protect the handles. On top of that feature, I also store the paddle in a foam lined hardshell case. You can see the case in the photo below.
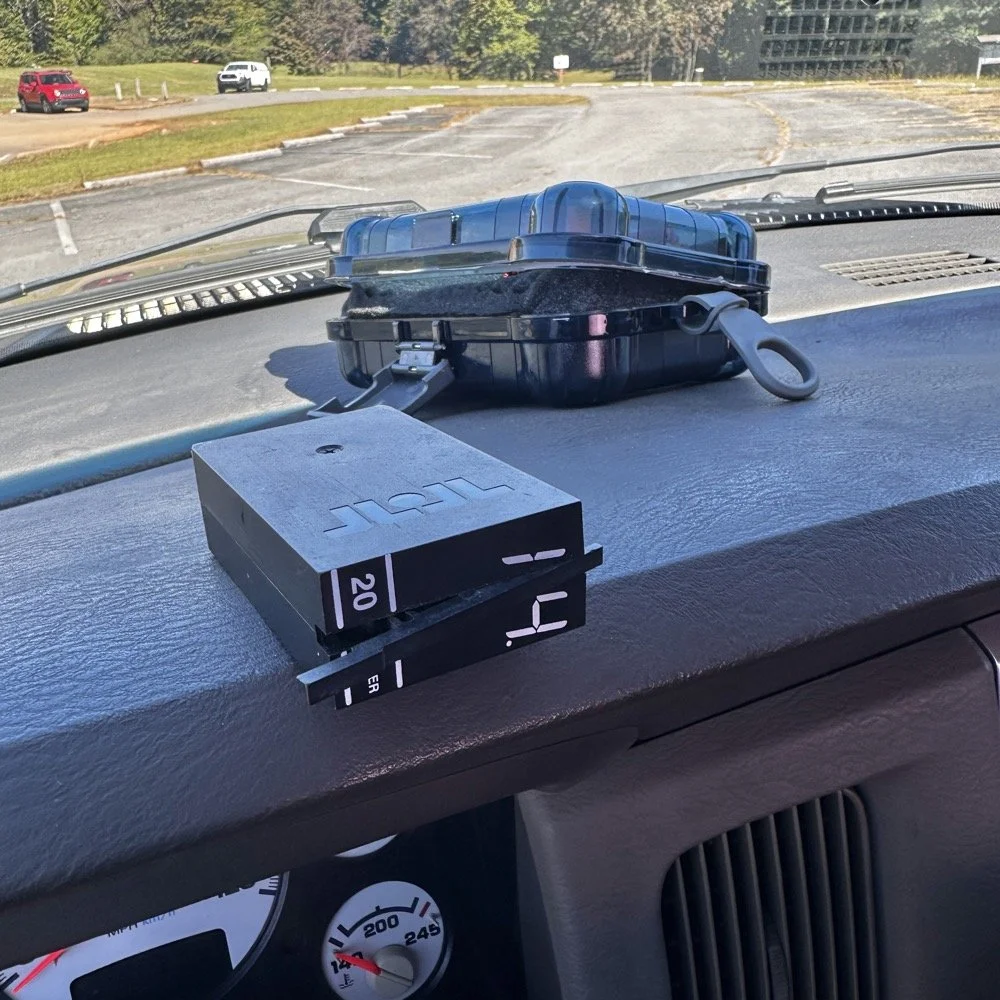
The 20 meter band module was the work horse today, pulling in the lions share of the contacts! I also ran a while on 15 meters and made over half a dozen contacts there as well. 15 meters affords me contacts on the west coast and the desert states. I made contacts with California, Washington, Arizona, and New Mexico today not to mention several in British Columbia as well as nabbing Puerto Rico today too! That is the magic of 15 meters for me when the band opens. I am normally too late in the morning to run 40 meters so I don’t get any local stations like Tennessee or Alabama, but 20 meters will normally net me as close as Texas, south Florida and Kentucky and further. I will occasionally get a local ham on ground wave or line of sight, but it is actually kinda rare. Today saw 34 QSOs come into the log, wit hone dupe, so 33 counted towards my goals. This was also my 240th activation at US-2169 as well! I am currently working towards 10,000 QSOs at this park and I am almost to 8,000 now. So it should happen by the end of next year if I have it my way. 34 QSOs is a good day for me most of the time. The days I get 100 in the log are the days where I spend almost the entire afternoon at the park and the bands are hopping… So if you are a casual operator like me, don’t expect a kilo in one sitting. That kind of performance takes a lot more dedication and skill than what I have. For me, getting a kilo in 20 activations is the norm…haha.
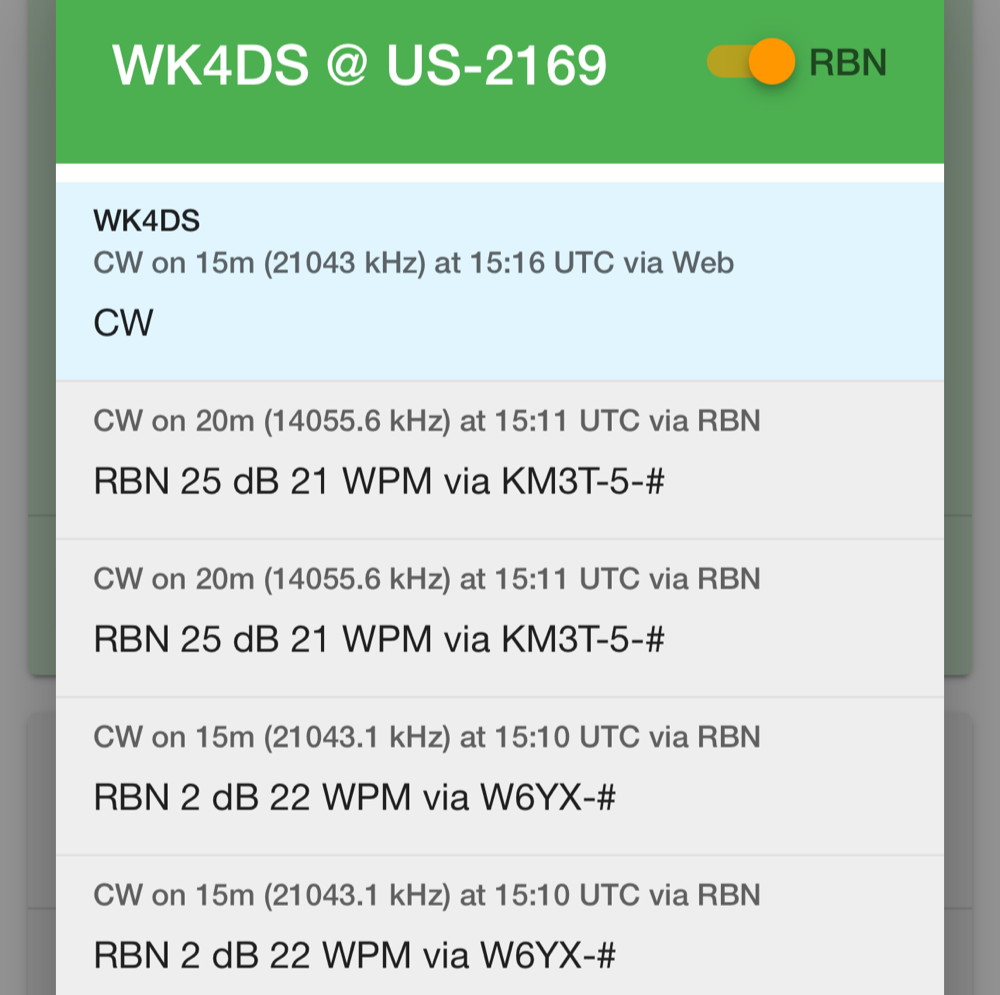
I grabbed this screen capture of the POTA spot log for my call on the POTA site today. Notice anything strange about it? To the casual or uninformed observer, nothing looks out of place. I personally know though that I didn’t hop up on 20 meters once I moved to 15 meters then right back to 15 meters. You see, the antenna takes too long to adjust and I loathe making those adjustments when I could be on the air. So I normally don’t go back to a band I left, but will instead go on to another band I have not used yet. It is a rare occasion for me to go back to 20 meters once I leave it. This was a glitch in the website somehow. I had spotted on 15 meters, then the RBN spotted me many times there, then out of no where the RBN moves me back to 20 meters for some reason! Notice that isn’t someone maliciously spotting me somewhere else to throw off the hunters, it is the RBN glitching out for some reason. I manually re-spotted myself again and it went back, but that was really odd. I don’t think it was a pirate either as those numbers look like what the numbers were when I was on 20 meters, I really believe the RBN simply had a bug in it today, but it is worth checking your spot if you are getting zero calls after a few minutes of calling CQ.
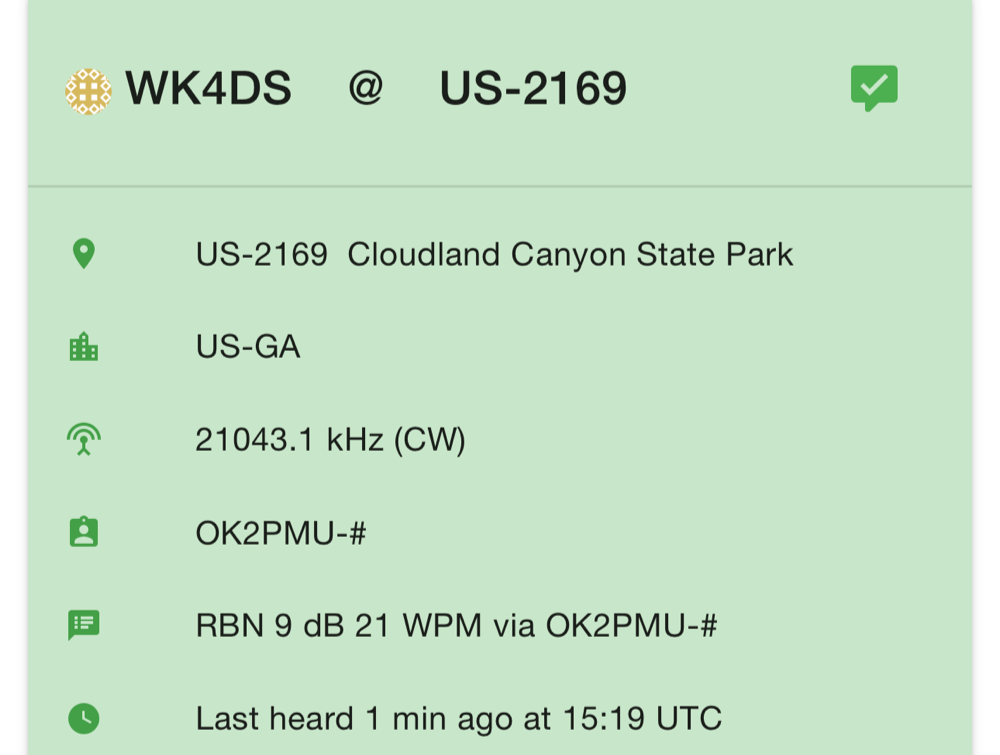
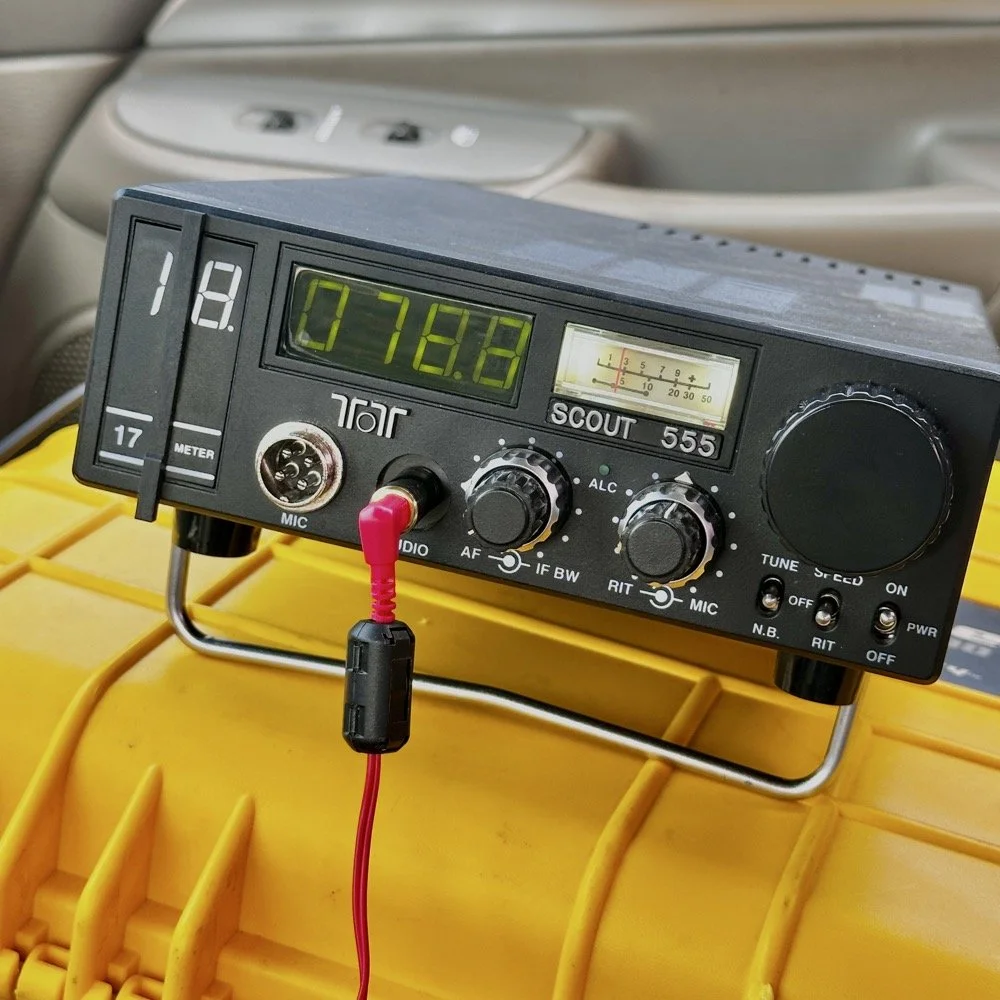
Last thing I noticed today that I want to discuss. This is the perfect example of why I say to go to the higher bands and just give it a try. This is the RBN (Revers Beacon Network) showing me that my CQs were being picked up in the Czech Republic almost 5000 miles away with a signal strength of 9dB. That ain’t bad! That also tells me that I could be heard in the UK, the Netherlands, Germany (this explains why I was hearing that German contest so well) probably a lot more of eastern Europe too. This is kinda cool with a 50 watt TenTec Scout 555 portable HF radio with minimal features. Just take a look at the map below to get a better idea of the distance to that listening station.
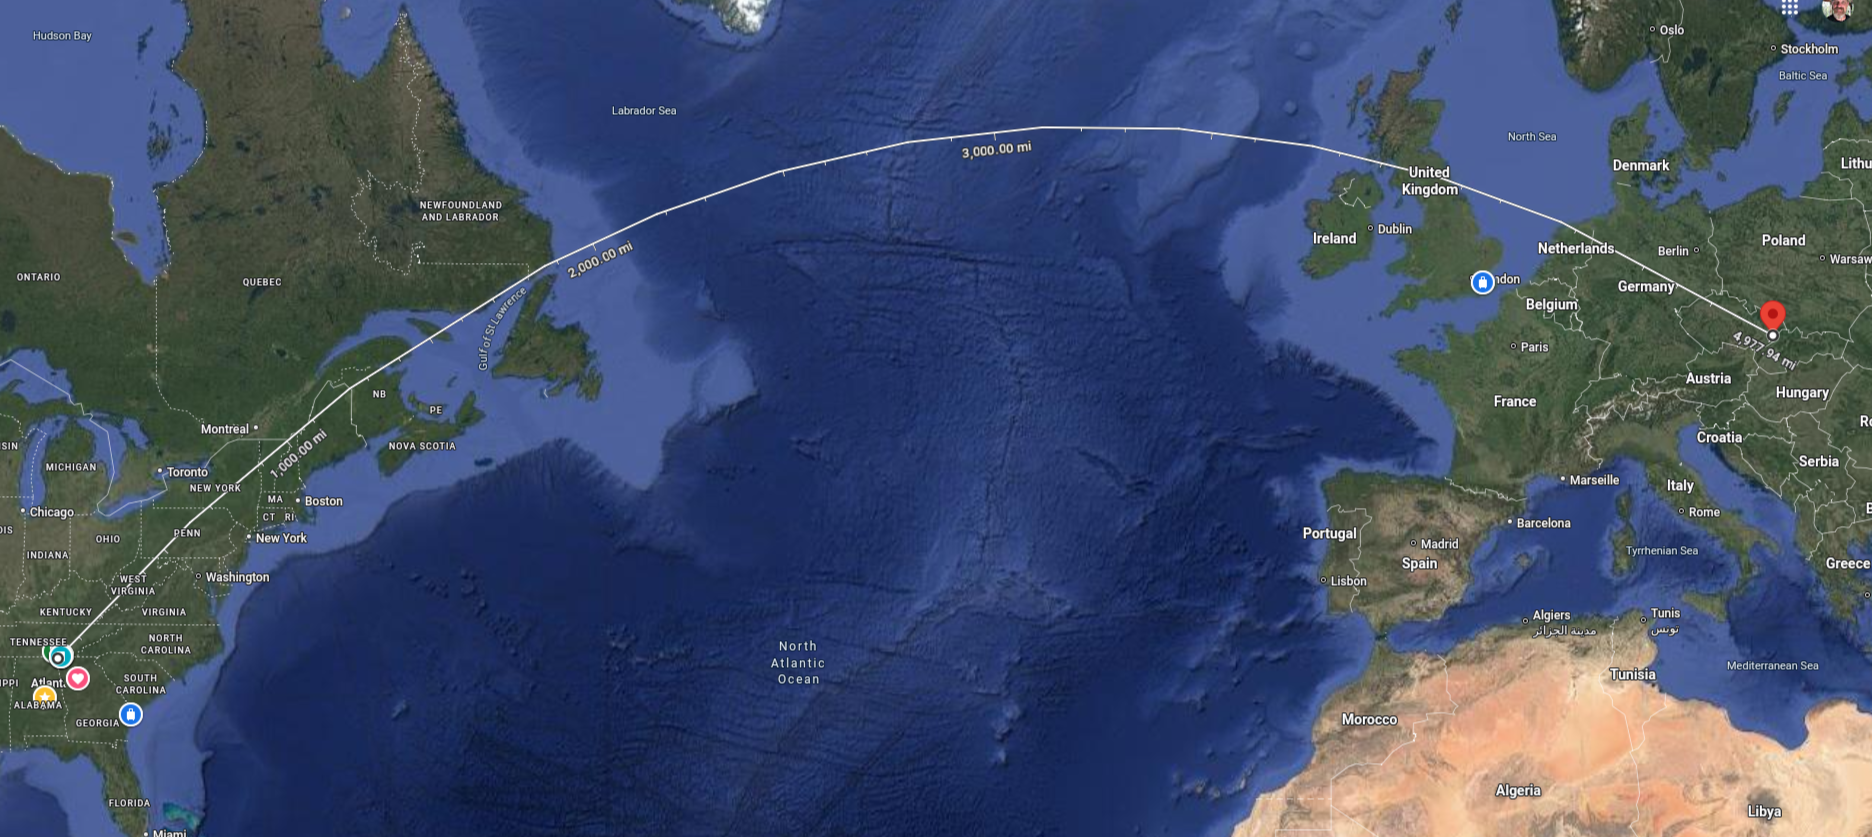
Screen capture of Google Maps showing the path to get to the listening post in the Czech Republic
All in all it was a great day at the park even if I had to wrap up in a shorter time that what I would have liked. I also liked paying attention to the little details and learning some new things like this beacon report and what it tells me about 15 meters on a day when the band is supposed to not be great…
You can help support this channel by using these Amazon Affiliate Links as well:
QRP/Portable Radios:
Antennas & Tuning:
CW Equipment:
Power & Accessories:
Organization & Transport:
BONUS ITEMS (Optional 16-20):
73
WK4DS-David

POTA problems with the TenTec Scout 555
After a solid hour, I got my 4th call. Now what you are not seeing here is the part where I went to 17 meters and called CQ there as well. That was also in that 30 minute block between the third and fourth contacts in the log. I actually thought I would make a few contacts on 17 meters as it usually is open if 20 meters is open.
This activation was very enlightening. I went to US-2169 since it is close to home AND diesel fuel is over $6.00 per gallon currently. I setup at my favorite place in the park, the Frisbee golf parking lot. This place is usually empty on Friday mornings and today did not disappoint. There was one other car that is not in the photo that a group of day hikers exited from and promptly entered the tree line. I never saw them again… I setup in the same spot I like to use, but to be fair, I think I like the spot on the other side of the lot better. This one it the first one I chose, but it really isnt that great for stringing an antenna. I almost have to use the telescoping vertical on the truck mount. The trees near the truck will hold a wire but relative to the truck (read that as to the radio as well) the wire is almost horizontal. This is not ideal for a wire that needs to be above the grade and I assume, the radio…
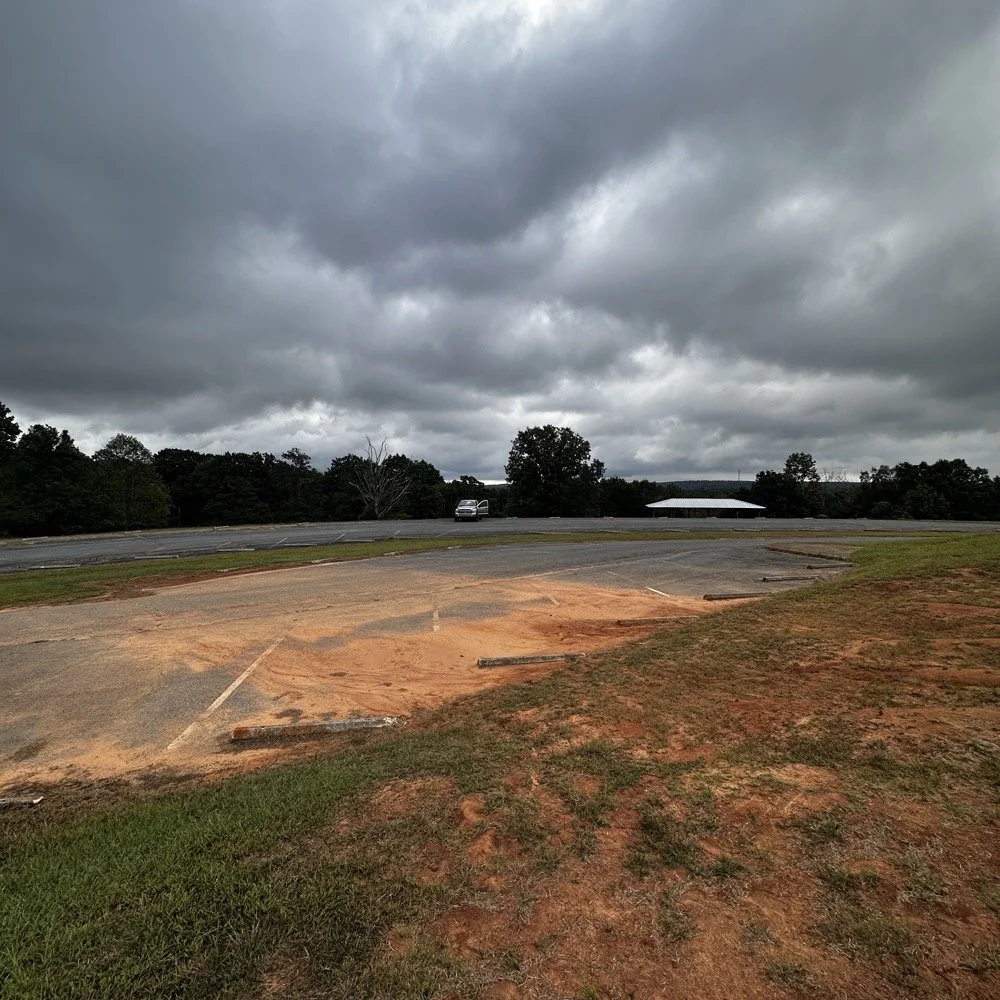
See what I mean about going on the “off” days? I had the place to myself for the most part. Without another soul in sight I was able to leave the doors open so a breeze blew through the truck and made for a pleasant activation. I setup the TenTec Scout 555 in the passenger seat like I usually do since I wanted to use “truck power” to run my radio. You see, I have a cable fed into the cab of the truck that is directly connected to the battery with a fuse and the other end has a power pole connector on it. This allows me to run my radios in the truck with having to hard wire all of the them. This is nice, but as I found out today, it is also a liability…
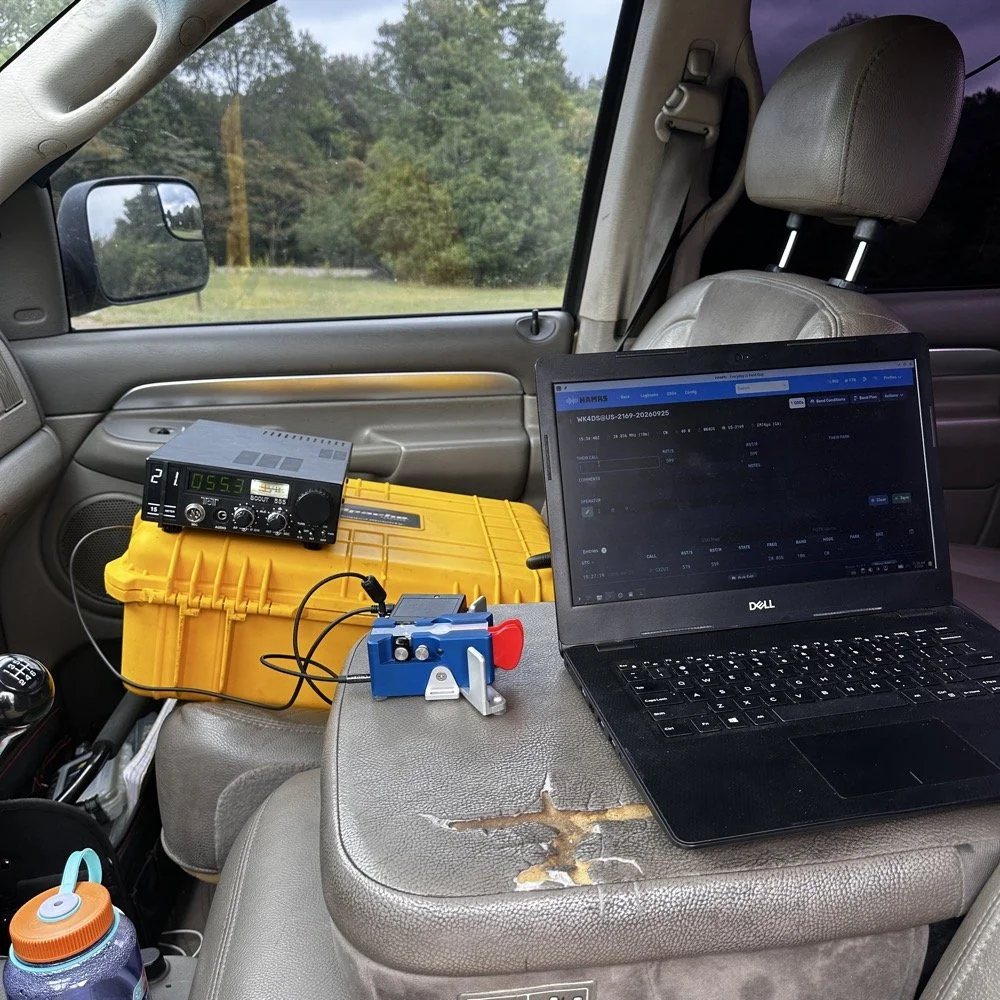
I have gotten very comfortable using this station location. As long as I operate by myself, this works almost perfectly for me. I do wish that the armrest could be longer so that I could more easily sit in the seat and log contacts. As it stands I now sit somewhat side ways a little so my arm can work the key with it at the front edge of the arm rest. I have thought about getting a sheet of plywood and covering the back half with cloth and letting it become the surface when I am operating, that would give me a table for the computer as well as the key and keyer. You can’t see the power cord in this photo as it is run under the yellow case, but it is there. At this point, I had already moved to 15 meters after calling CQ for over ten minutes on 10 meters without as much as a chirp coming back to me. I had high hopes too. You see, when I powered up the radio, I had planned on simply hoping on 20 meters and working on an activation since the signal report looked real bad for today, the K Index was a 4 and the bands only showed Fair from 30 through 15 meters and poor everywhere else.
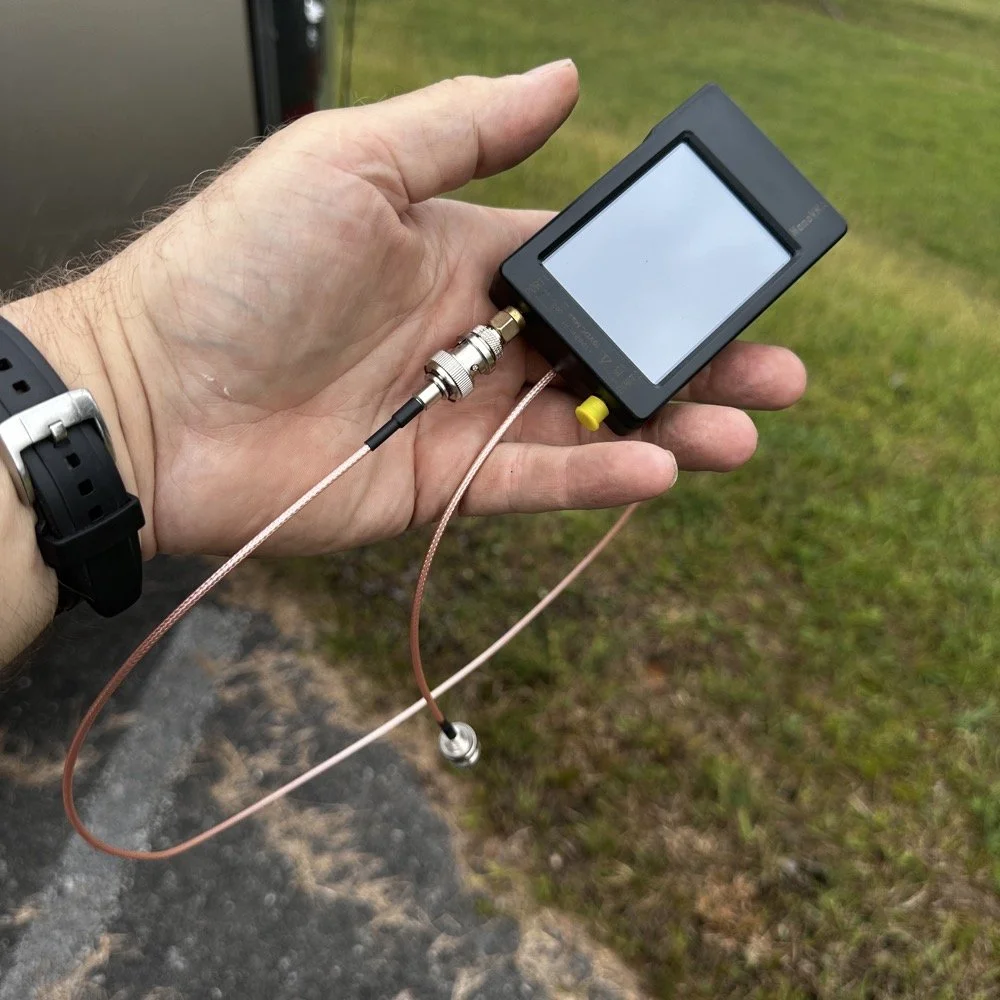
Finally picked up a shorter cable for the nanoVNA to tune the antenna with…
This did not inspire confidence to say the least… But I had the 10 meter band module in the radio so I just hooked it up as it so I could get the circuits warming sooner. The TenTec Scout 555 is a great radio but it had some analog stuff…well…a lot of analog electronics in it and they don’t work properly when they are cold, your frequency will drift while your using it and all sorts of shenanigans. So now, I setup the radio first, get it under power so the idle current can be warming it up and then work on the antenna. I built up the antenna and as soon as I connected the coax, I could hear a station calling CQ! When I looked at the radio, IT WAS ON TEN METERS!!! Ten meters was supposed to be closed right now! Well ,I had just tuned it to 20 meters so back out to the antenna I go with the nanoVNA and tune it up for 10 meters. I get back in the truck and he is still calling CQ! I start answering him and it takes him probably 6 tries to get all of my callsign as I am only running about 40 watts and the band is closed for Christ’s sake. First call in the log today is CX2UI from Uruguay! I am thinking this is about to be a really good day with a lot of calls in the log! Well, it wasn’t. As you can see below it was almost 30 minutes from the first call on 10 meters to the 2nd call on 15 meters… 15 meters was marginally more successful with me landing a whopping TWO calls on that band! Now understand, I dialed up the FT8 watering hole and there were a ton of ops there. If I had brought the sBitx V3 then I could have easily gotten the activation on that mode on ten meters. There was a ton of people there as well. I just wanted to work CW today so I didn’t bring the FT8 radio with me. Constraints like this will make you work harder as it is more of a challenge to get the activation if you dont have easy mode (FT8) available to fill in the gaps. The logbook is upside down as this is a screenshot of HAMRS and that program pushed the call log down and puts the most recent one on top as you go. After nabbing the two calls on 15 meters, it was like the band simply turned itself off to CW use. I tried for almost 30 more minutes to get another contact but nothing was there.
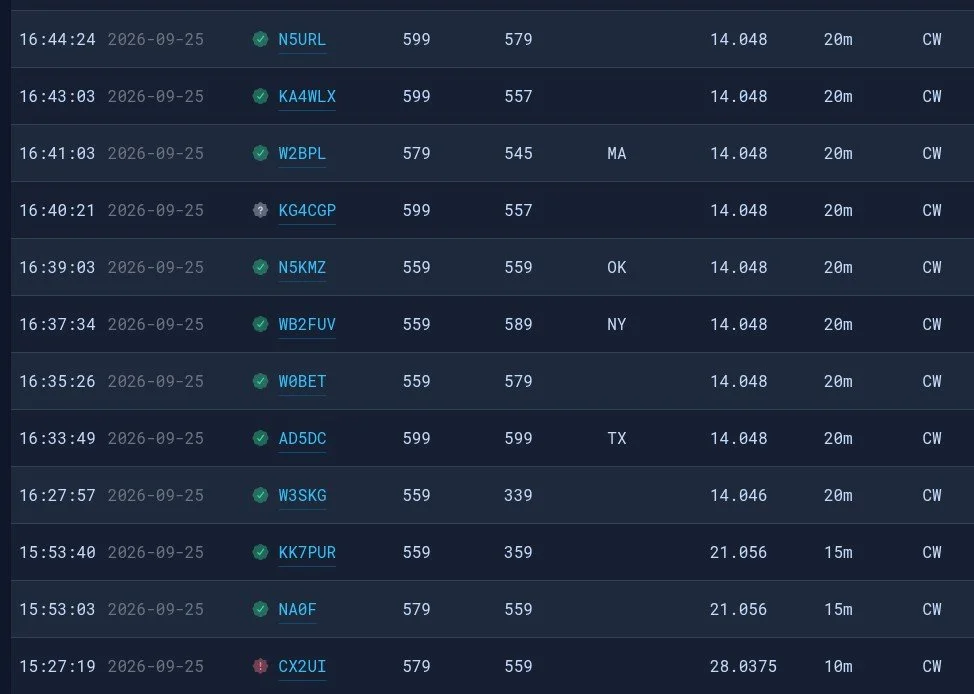
After a solid hour, I got my 4th call. Now what you are not seeing here is the part where I went to 17 meters and called CQ there as well. That was also in that 30 minute block between the third and fourth contacts in the log. I actually thought I would make a few contacts on 17 meters as it usually is open if 20 meters is open. Well, it turns out, 20 meters wasn’t doing great either with heavy QSB on pretty much the entire log today.
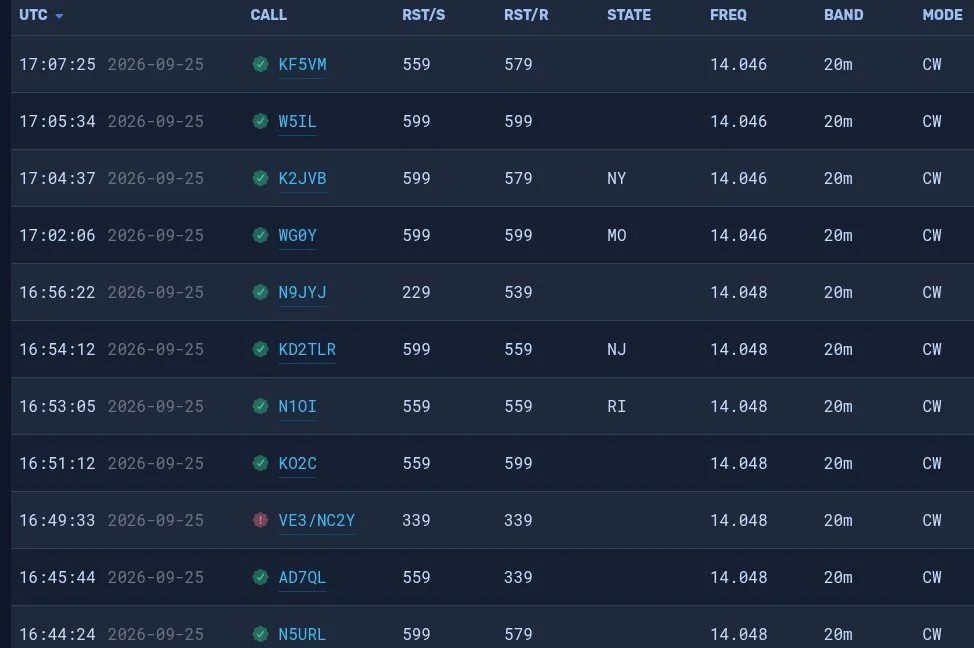
20 meters to the rescue… As you can see, the log is filled out with a lot of 20 meters QSOs. The remains calls only took 40 minutes to get in the logbook. The very last one was a ham that simply answered my call and we had a short ragchew. He also told me that my radio had a birdie or it was chirping when i was sending code. I had noticed that a few minutes into the 20 meter portion I started getting numbers in the 3rd position that were not good. You see, that third number will, pretty much by default, always be a 9. When it is not a 9 then your radio is not working right. I got several in a row with less that a 9 there. That threw me a curve ball as I don’t normally get those kinds of reports. Armed with this knowledge, I took the radio home and connected it to the antenna in my house.
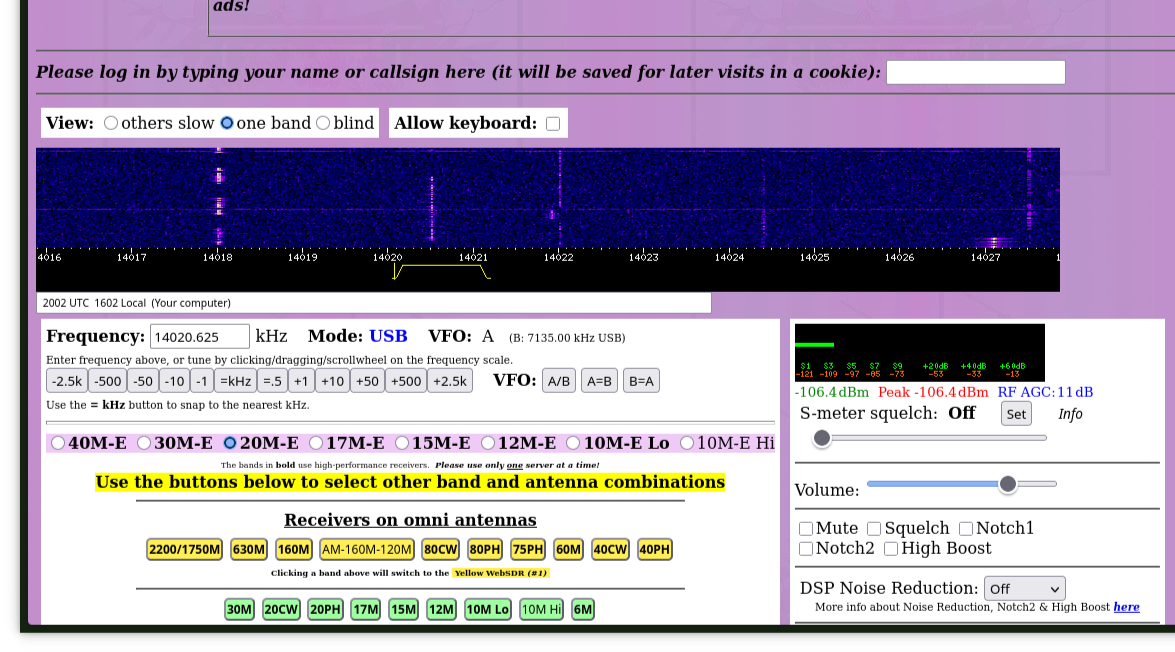
Something I learned from HamRadioCrashCourse on YouTube is that you can dial up these webSDR receivers and test your radio by listening to your signal as it is received by another radio. You are not getting the audio from inside the radio. This is the actual signal that is sent out of the radio, over the air, and heard by another radio. This is the truest test of what your signal will sound like. So I dialed up a portion of the band that had very little use as you can see in the waterfall. Once I found a spot, I adjusted the filter to cut out adjacent signals and then started sending. My signal is the one in the center of the little yellow filter area on the waterfall. The sound coming back to me was perfect too. I listened for a while and it is a little disorienting since there is a delay between you sending and you hearing it. The best way I can tell you to do it is to send your callsign and the word “testing” with the SDR volume turned down and then turn up the volume and sending whatever so you can hear the sound of the signal, and then when your finished, send de Your Callsign and then QRT. It is fine to send a test signal as long as you are not interfering with someone else and you ID your signal. I can not find it anywhere in the rules that this is not allowed as long as you do those two things…well and you know, stay in the allocated band space and don’t exceed the power limits and such as that but you get the point. It is kinda cool to be able to hear what your actual signal sounds like on the air by another radio almost 1500 miles away.
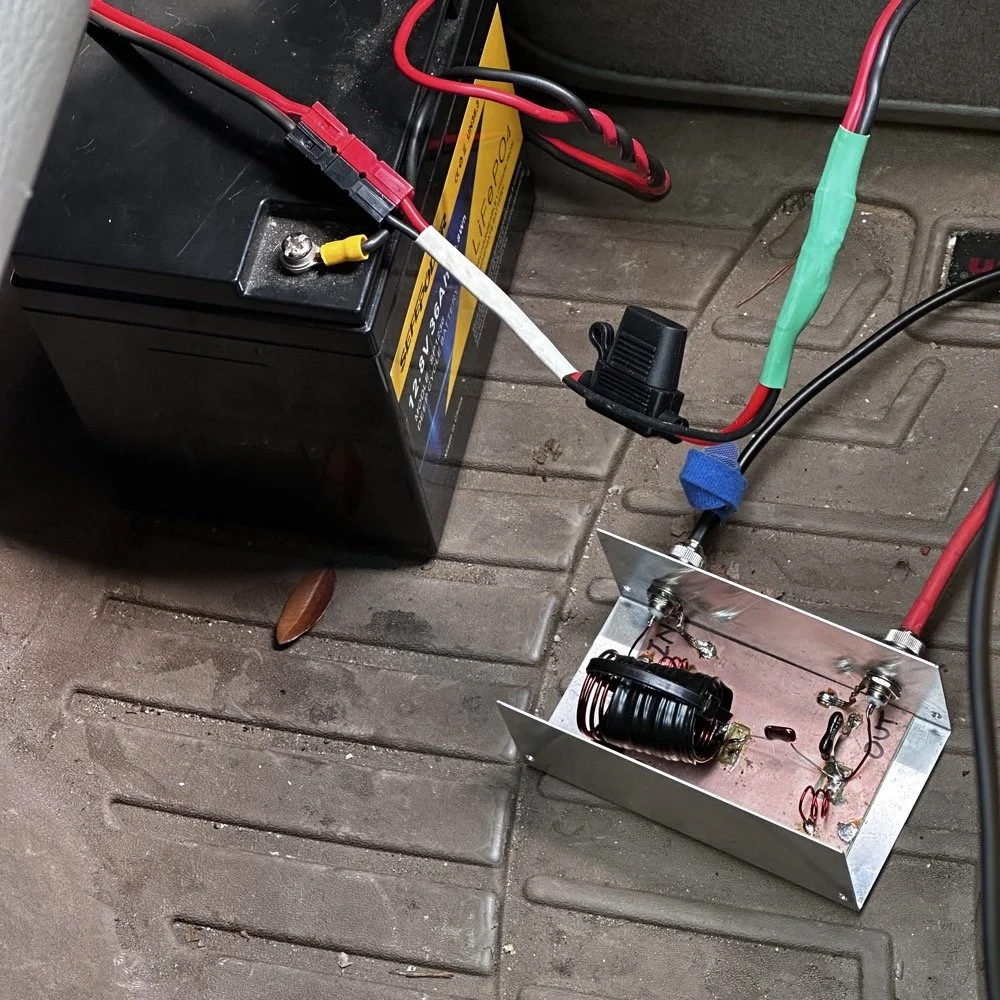
So what did I learn from this today? I learned that the radio isn’t always the problem even if the signal is terrible. Turns out that my cable has a bad connection in it going out to the battery and I was having voltage dips when I would key the radio. I could even see it with the meter lamp dimming on each character during transmit. So I plan to replace that cable with a much larger one on the order of either 10ga. or 8ga copper wire with soon. This and a new fuse holder should get me back up and running in fine order.
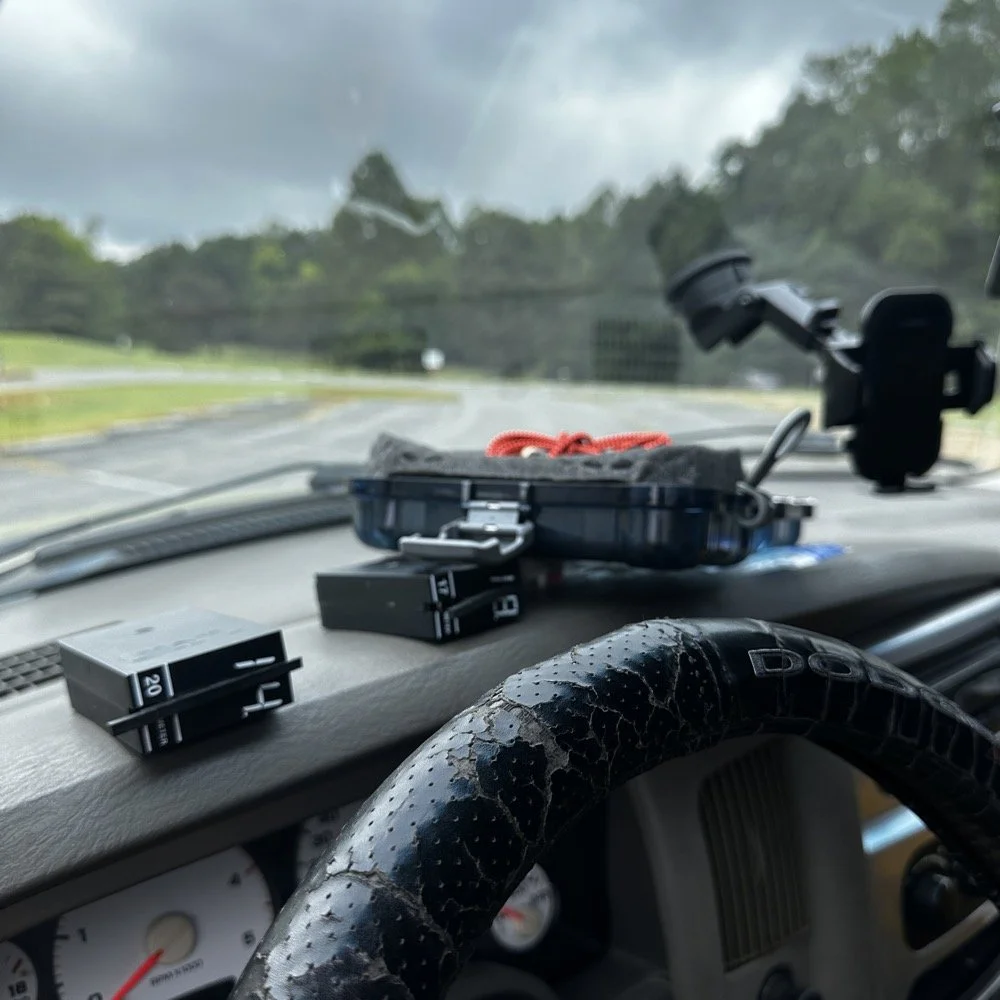
Towards the end of the activation, things were all out of sorts and I had to take my time to get it all cleaned up and put away properly. I will usually get out all the band modules I plan to use that day and just lay them on the dash like you see here. it makes it easy to change bands and I can see all of them as well so I don’t lose one in between the seats or something like that. The case for the Begali Traveler key is laying up there with them too, but that just happened to be the best place for it today. It normally ends back up in the carry tote but today it was on the other side of the truck and this was easier…haha. All in all the day went pretty well considering the Sun was mad and I had a radio that was sending trash for code. Moving forward, I plan to make several improvements to the system as a whole and see if the radio will work even better. Have you had a day when there was a comedy of errors to contend with? Today must have been my day as I have not been out since early August to a park at all and I had started to miss it.
You can help support this channel by using these Amazon Affiliate Links as well:
QRP/Portable Radios:
Antennas & Tuning:
CW Equipment:
Power & Accessories:
Organization & Transport:
BONUS ITEMS (Optional 16-20):
73
WK4DS - David

My 17 meter band pass filter and POTA…
Today I met up with some other hams that routinely go out together and activate POTA parks and was able to fellowship with them for a while before and after I made some contacts. There was (Jonathan Frye AA6H, Allen Padgett KN4FKS and Danny Wooten AG4DW) and they were running what appeared to be FT8 and SSB stations today. Allen and Jonathan were operating SSB the whole time and made quite a few contacts themselves. It was kind of neat to plug in the nanoVNA and see one of the other stations transmitting and messing with my antenna reading and when they stopped I could see the graph again! HAHA!
I built this band pass filter after having a couple of activations with my friend in Florida, Chas (NA2B). We were is such close proximity that if I didn’t have a bandpass filter for the band I was working, I simply couldn’t hear. The sBitx is notorious for front end overload and when the antennas are just a few yards apart, you are going to get front end overload! Well, on the bands that I had bandpass filters for, I had no issues, it was only the bands I lacked filters that I had a problem. It is pretty easy to find bandpass filters for the non-WARC bands, but WARC bandpass filters are kinda rare.
Well, I never let that stop me before…haha. A while back I went down the rabbit hole of wanting to make my own bandpass filters and I figured I would start with the 17 meter band since it is harder to find. I now own a spectrum analyzer with a tracking generator so I can sweep the filter in real time to see what tuning does to the filter shape. That is kinda awesome in its own right, but you could easily do the same thing with a nanoVNA too.

So here is the current iteration of the 17m bandpass module I built. IT sure looks like I home-brewed it, doesn’t it? HAHA! That big inductor It is a classic Pi design with an inductor and capacitor in parallel to ground at the front and back and a series inductor and capacitor in the middle. The input capacitor is underneath that massive 5.31uH inductor in the middle.. I taped it to keep the coils from moving around while I tuned it and then put the ziptie on it to hold the coils in place once I got it like I wanted it. I pulled the values for this filter from the internet off of one of the many website calculators that are out there…I don’t remember which one though… It has been a minute…haha.
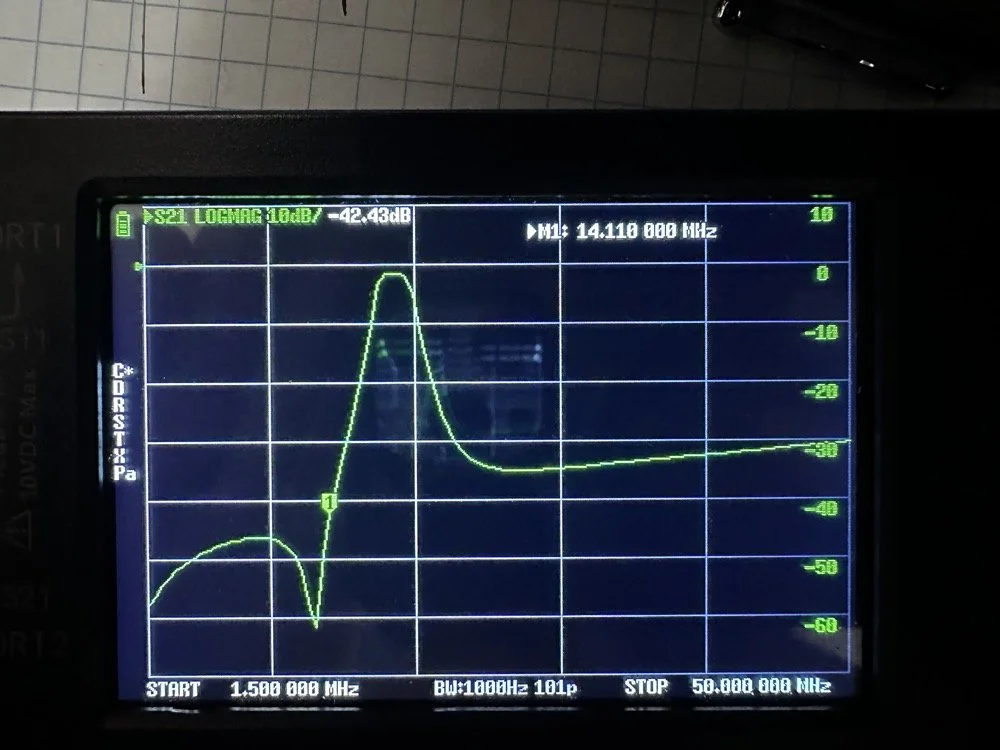
Adding this filter literally stopped all the 20 and 40 meter signals that I had from my neighbors today. It isn’t even all that great of a filter, it does have decent rolloff, but it isnt some knife edge vertical skirt filter. I grabbed a quick photo of the plot on my nanoVNA with the marker on the 20 meter band. I have a little more insertion loss (mine is 1.3dB as compared to a commercial unit at about .65dB), but it works almost as good as one that would cost 200$ and I have about 10$ in it. The filter was even better on the passband before I put it in the chassis. Since I used open air coils, they are interacting capacitivly with the aluminium body to ground. This added capacitance increased the passband insertion loss about .6dB, but it is so clean, I chose to just leave it as is and use it for now. The 20 meter band being over 40dB down compared to the 17 meter band, I was able to setup right next to Danny, who was on 20 meters at the time, without him coming into my radio at all from what I could tell. All the lower bands past 20 meters are lower than that too, so all of them are pushed out of the way so to speak. The higher bands are interesting to me. Before I mounted the unit in the aluminium chassis, it fell off on the high end too. Once mounted it looks like it is about 35dB on 10 meters and about 20dB on 15 meters, which is still good. Another problem that I encountered wtih the added capacitance is that it moved the passband up some. I had it to where the high side of the passband was right at the end of the 17m band before I mounted it. This gave me more attenuation on 15 meters, by probably 6dB or so, but you use what you have and move on with life… This would have also raised the 20 meter rejection some as well, by probably about 6dB or so.
This band pass filter project looks really simple.. The aluminum box, the two BNC connectors, some 16ga magnet wire, three capacitors and a piece of pc board material for a build plane and I am good to go. I lost the lid to the aluminum box hence no cover, but it appears to work just fine like this so I used it. It turns out that if you use toroid inductor cores, that this is a lot easeier to build as the toroids are LESS affected by the chassis ground plane. Notice I said less… they will still change values, just not as much as air wound inductors like I used here. I deliberately chose air wound inductors due to their high Q, which is what gives me the sharpness to the skirts you see in the plot below. I have it marked with “IN” and “OUT” but I honestly think it doesn’t matter which way it is inserted into the feedline as long as it is there. Another benefit of adding a passband filter is that is works both ways, it keeps out stray signals from strong nearby sources and it also only lets the part of your signal LEAVE that will fit through the passband. This makes a huge difference in your signal purity as you are adding a filter to the output of your radio.
Today I met up with some other hams that routinely go out together and activate POTA parks and was able to fellowship with them for a while before and after I made some contacts. There was (Jonathan Frye AA6H, Allen Padgett KN4FKS and Danny Wooten AG4DW) and they were running what appeared to be FT8 and SSB stations today. Allen and Jonathan were operating SSB the whole time and made quite a few contacts themselves. It was kind of neat to plug in the nanoVNA and see one of the other stations transmitting and messing with my antenna reading and when they stopped I could see the graph again! HAHA!
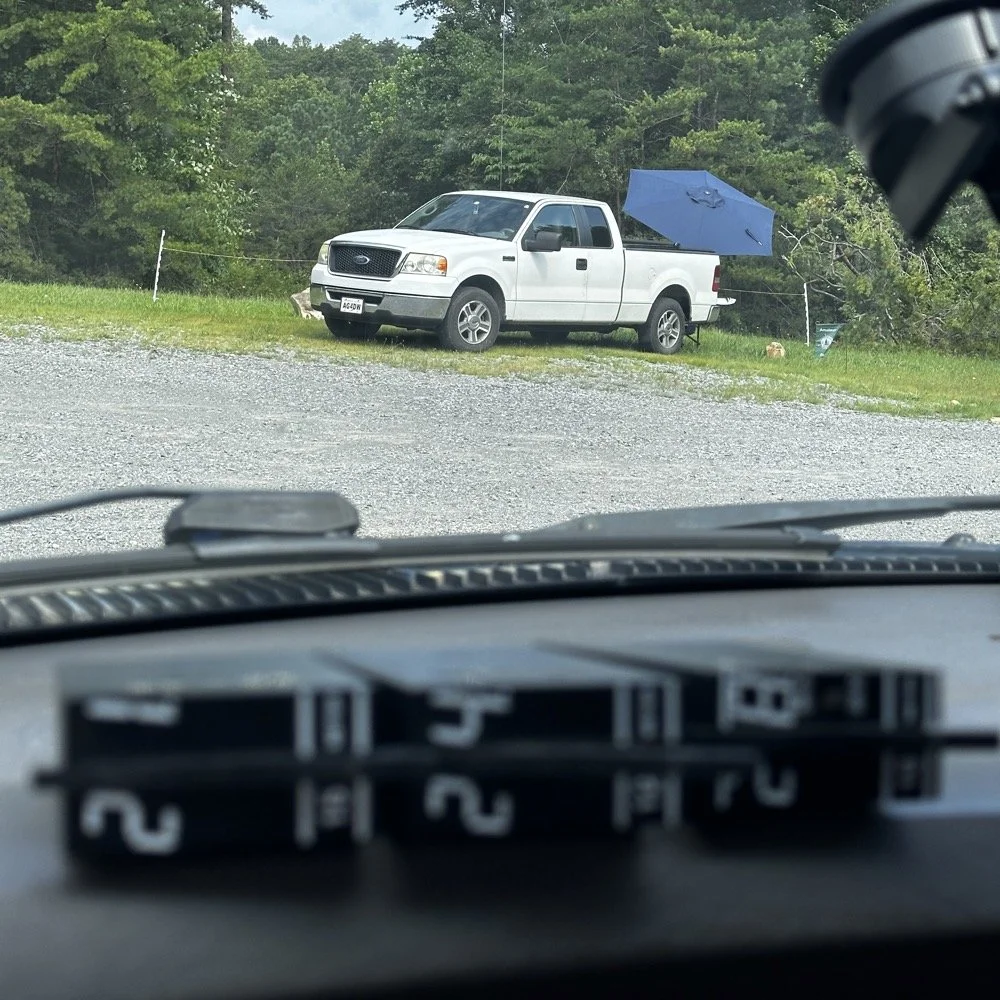
You can see the antenna right behind Danny’s (AG4DW) truck looking out the windshield of my truck today and I moved as far away from the other people as I could muster without driving in the yard… This area is really small to be fair. It just doesnt have a lot of room to setup too many stations. In reality I was probaby the last one that could fit without too much trouble being caused by other radios. Now that doesnt mean this park is overloaded with three stations. Not at all! There are 5 other locations to set up radios that I can think of right off hand with out even trying hard so we could setup several sites at this park very easily. Now, that turns it into something else thoguh, that might be enough activity to trigger the need for a permitted activity, but I dont know. I normally just hand out wtih these guys or go by myself for the most part so it is pretty low key like that.
Those band modules in the above photo are a precursor to what I did today. I opted to stay on the higher bands no matter what. I knew I could land the activation with FT8 and CW, but I had no idea just how hard it would be…haha. This poses a good challenge though as I know I can easily land the minimum ten QSOs to get the activation if I just start on 20 meters but lately the bands have been up and down and have been real inconsistent on the higher bands so to get my ten would take a bit more work on my part. Challenge accepted!
So, natuarally I started on 17 meters…haha. I actually planned to work my way up to ten meters, hence all those band modules you saw earlier. I found W1AW operating CW on 17 meters and busted his pileup to get in their log! That was my first QSO of the day too, I knew right then that it was going to be a good day. As you can see in the photo above, the station was setup in the truck cab to keep me out of the sun as much as possible. I also was using the Begali Traveler key and the HamGadgets Pico keyer as well. Also if you will notice, I dont have the common mode choke installed today. I was testing to see if getting the SWR below 2:1 made using it irrelevant or not. I had really good SWR all day at the radio so I dont think I need this thing adding losses to the system when I was having a good showing on the radio. (It is the thing laying next to the radio in the background.) Do you use one every time you go out or is it something you dont worry too much about? I ran this one through the nanoVNA and it said it had from -.06dB to -.19dB of loss just inserting it in the line. Look at the chart below to see what it looked like across the HF bands for this common mode choke on the nanoVNA.
160m: -.06dB
80m: -.09dB
60m: -.10dB
40m: -.12dB
30m: -.13dB
20m: -.15dB
17m: -.16dB
15m: -.16dB
12m: -.17dB
10m: -.19dB
While this might not sound like much loss (all of them being less than 2/10ths of a single dB), if the bands are in bad shape and you are trying to hear stations near the noise floor, this can make a difference. I routinely listen along the noise floor with headphones for stations that are really weak. Today was one of those days. The bands were really bad for the most part. CW was not being used much because of this. I did get a good run on FT8 on 17 and then 15 meters, but the CW portions were all in the tank.
I started on 17 meters as mentioned earlier, I started by hunting a little and found W1AW was making contacts so I worked them first thing. It only took me three or four trys to get them in the log so I was pretty stoked about the day at that. But then it took me 50 minutes to land the 5th QSO in the log! That is super slow for my normal operations. So I opted to switch to FT8 so I could get the activation locked in before I went off on the higher bands playing…
I worked five FT8 contacts in a little under 20 minutes just using hunt and pounce. This had my ten in the log so now the rest are “gravy” at this point. Next thing I did was re-tune the antenna to 15 meters and since the sBitx was already running, I hunted on FT8 there for a while. I netted 6 QSOs in something like 14 minutes. This is actually a pretty good rate for me on this radio so I was happy with that. After landing those in the log, I set the Scout 555 back up and called CQ on 15m CW for a while… I had zero replies… It was like the CW portion was simply turned off. Seriously, where did all the CW ops go? FT8 was booming! I saw a ton of DX on FT8, even though I couldn’t work them, but they were there. Anyway, after calling CQ for like 15 minutes with no replies I figured I would hop on 10 meters and listen for my beacon and then see if I could get at least one QSO there before calling it quits for the day.
It took me about 50 minutes of calling CQ into the void to finally land a contact between 15 and 10 meters. The last FT8 QSO in the log and the one on 10 meters CW are literally 50 minutes apart! That is a lot of calling CQ with no responses. I actually was listening to the radio while talking to Jonathan and just letting the keyer do its thing. When suddenly there was a reply out of the ether! KE2FUA up in New York heard my pitiful pleas for a call and felt sorry for me. Giving me the QSO on 10 meters I desperately wanted. With that in the log, I called QRT and broke down the station. Afterwards I was able to spend some time with the other operators on site and chat with them a little. This is the main reason I love activating with these guys, the camaraderie is incredible.
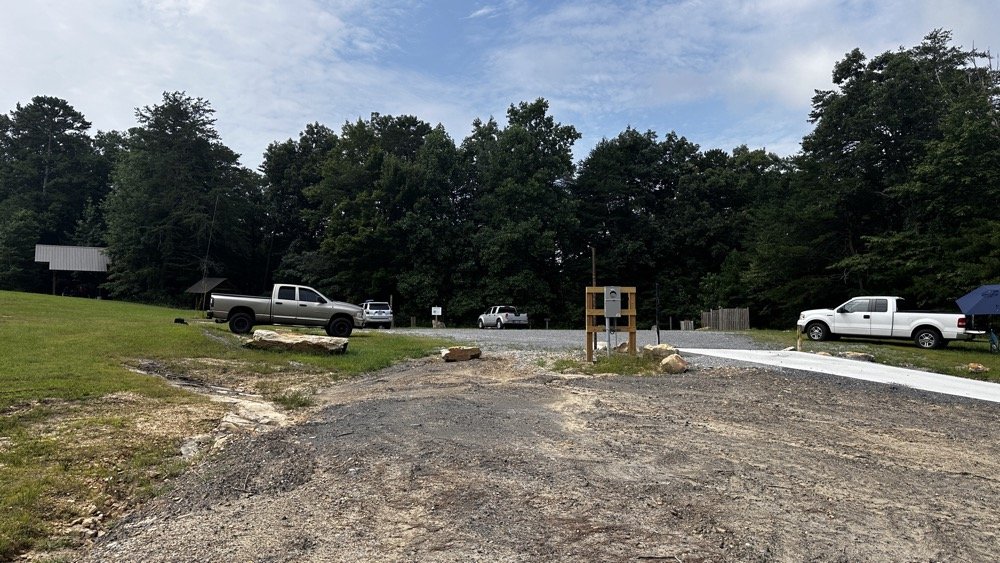
This view shows the tight conditions pretty good. The pavilion in the back has the SSB setup and the white truck had the other station with me kinda in the middle. As long as we used band pass filters or there was enough band space between us, I didnt have a problem. While I was on 10 meters I didn’t have a filter for that band, so I was open to interference and didn’t hear anything from the other stations. I know that at this time, one was on 17 meters and the other was on 20 meters. Band pass filters are a life saver as well as a little coordination between stations. When I arrived, the others were already setup and operating so I went over to each one and gathered some intel about how it was going for them and their current band so I could pick one that they were not currently on. They were both running band pass filters so I was able to start literally anywhere I wanted except 20 and 40 meters. I love the higher bands so that was when I cooked up the idea to do just the higher bands to see what I could net with that sort of restriction. It also allowed me to use my newly minted 17m band pass filter too…
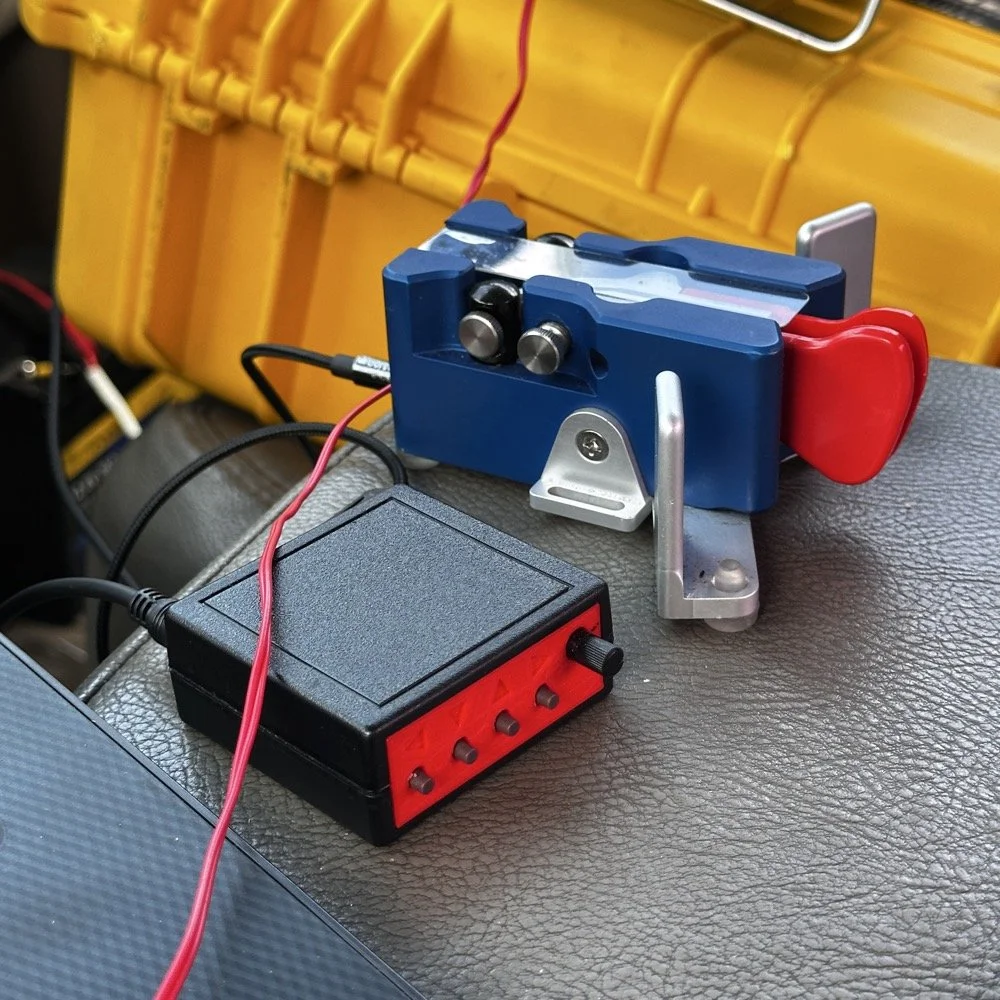
I cant say enough good things about this little keyer. The stark contrast between the cost of each item is not lost on me… I like things the work well and serve me without too much fuss. Both of these tools have done that well. I have finally used the keyer long enough to need to replace the battery in it. Which is a simple task, but does require a screw driver… I thought I would hate having a battery powered keyer, but to be honest, it is kinda nice being able to put it literally anywhere and it just works. I printed the operation manual and keep it in the case with the Scout 555 so if I need to do something in the menu that I dont remember how to do, I can just look it up right quick.
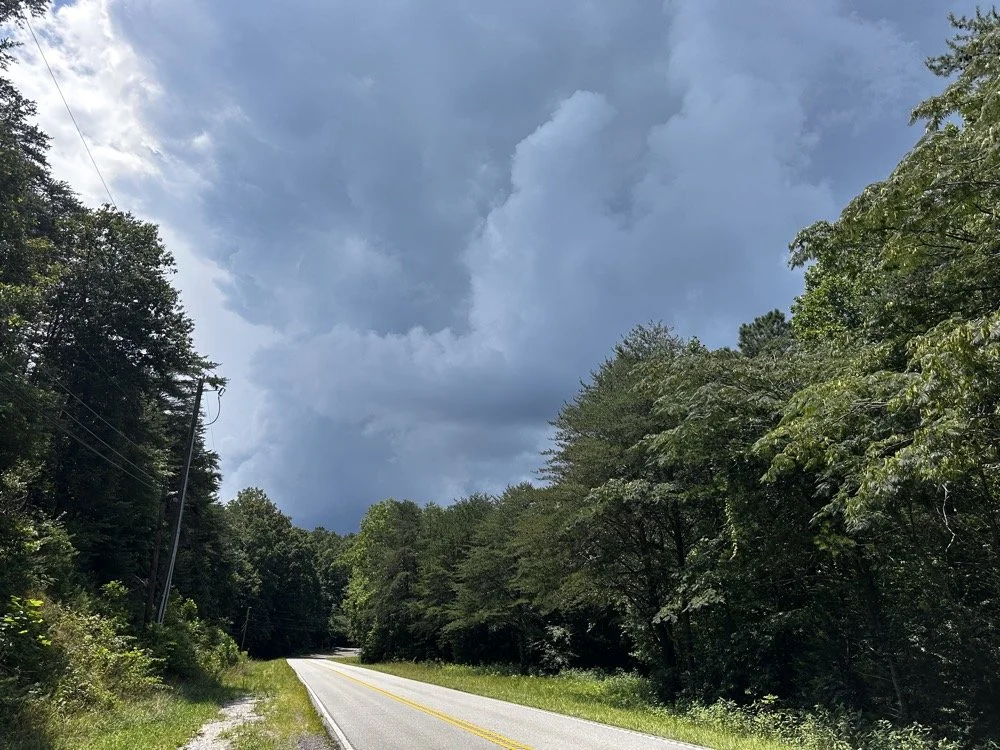
At the end of the activation, I had to break down early and go run some errands and I did itjust in time too as this was what greeted me when I pulled out of the parking lot onto the main road. Sometimes you just get the right amount of things to happen in the right order I guess…
You can help support this channel by using these Amazon Affiliate Links as well:
QRP/Portable Radios:
Antennas & Tuning:
CW Equipment:
Power & Accessories:
Organization & Transport:
BONUS ITEMS (Optional 16-20):
73
WK4DS - David

POTA tip for a CW op…
Just scroll down a couple of posts to see my thoughts on this new release. I setup on 15 meters first as it looked like it was doing well. I only got one CW and one FT8 contact on that band! Well, deflated by this reailty check, I went to 20 meters to get the activation locked in before I wandered off to the higher bands to play. Well, even 20 meters was not that great, I finally got the ten I needed to lock n the activation while there, but it took a while. A lot longer than it normally takes me to land 10 contacts from Georgia, that is for sure.
Today I activated US-2169 with my trusty TenTec Scout 555 using CW and realized I needed to share a “trick” I use every time I go out…almost. But first I wanted to share an update with the shack…
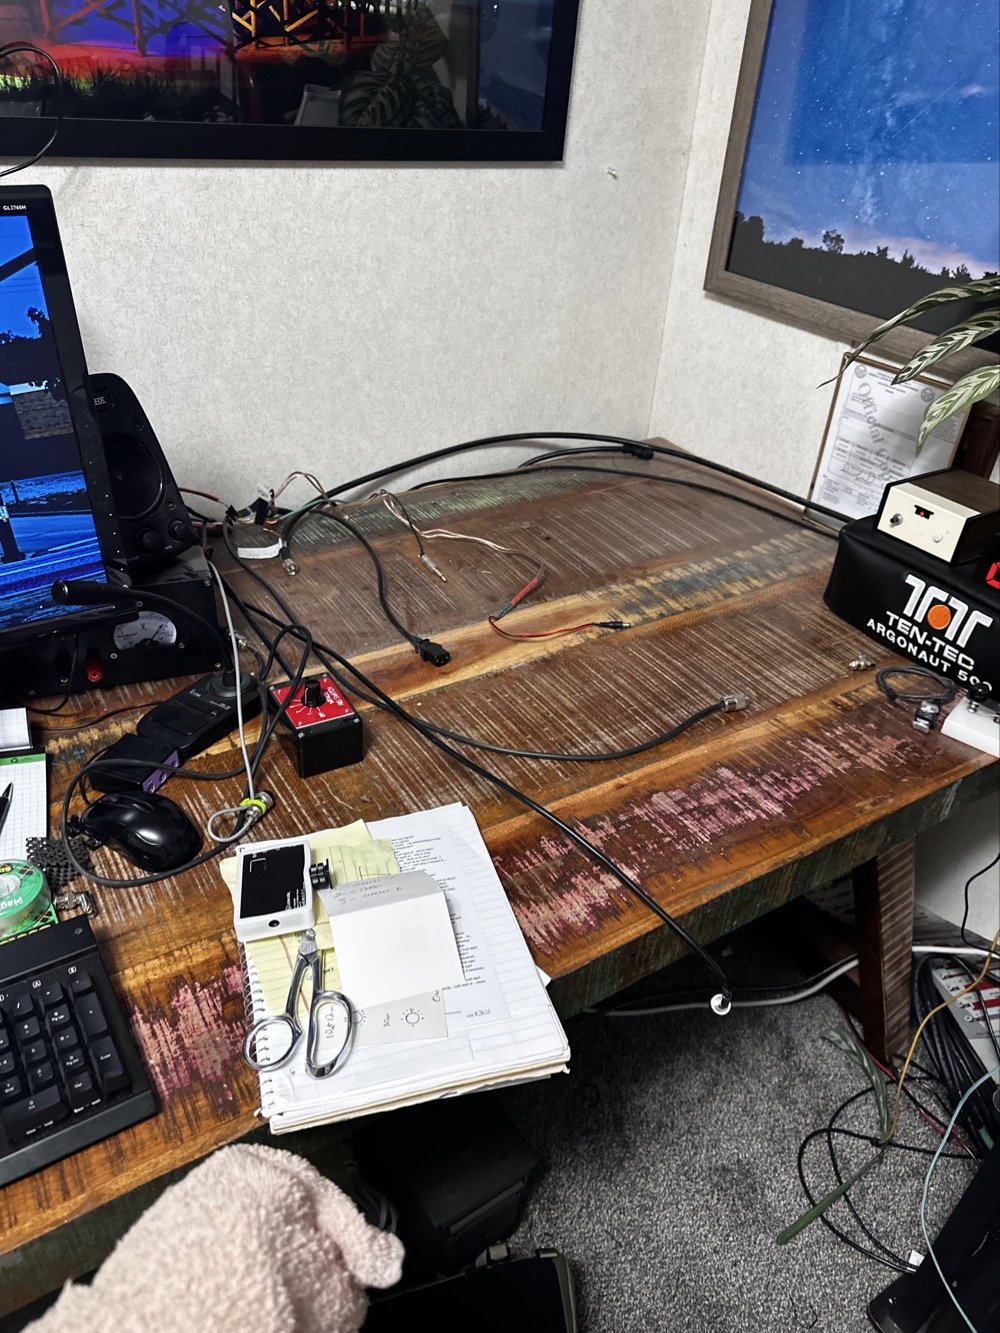
So, to lead off, my “hunter” station finally went through an update. I tore out the entire system to get the TenTec Omni 6+ station out as it needs some service.
This took three days to get it broken down, sorted and separated and finally reassembled without the Omni 6+ station so it can goto the Radiosmith for repairs. I was going to just sell it for parts, but since posting about it I have had several Hams email me about what is probably the problem. This isnt near as bad as I first thought so I will hopefully be able to use it soon.
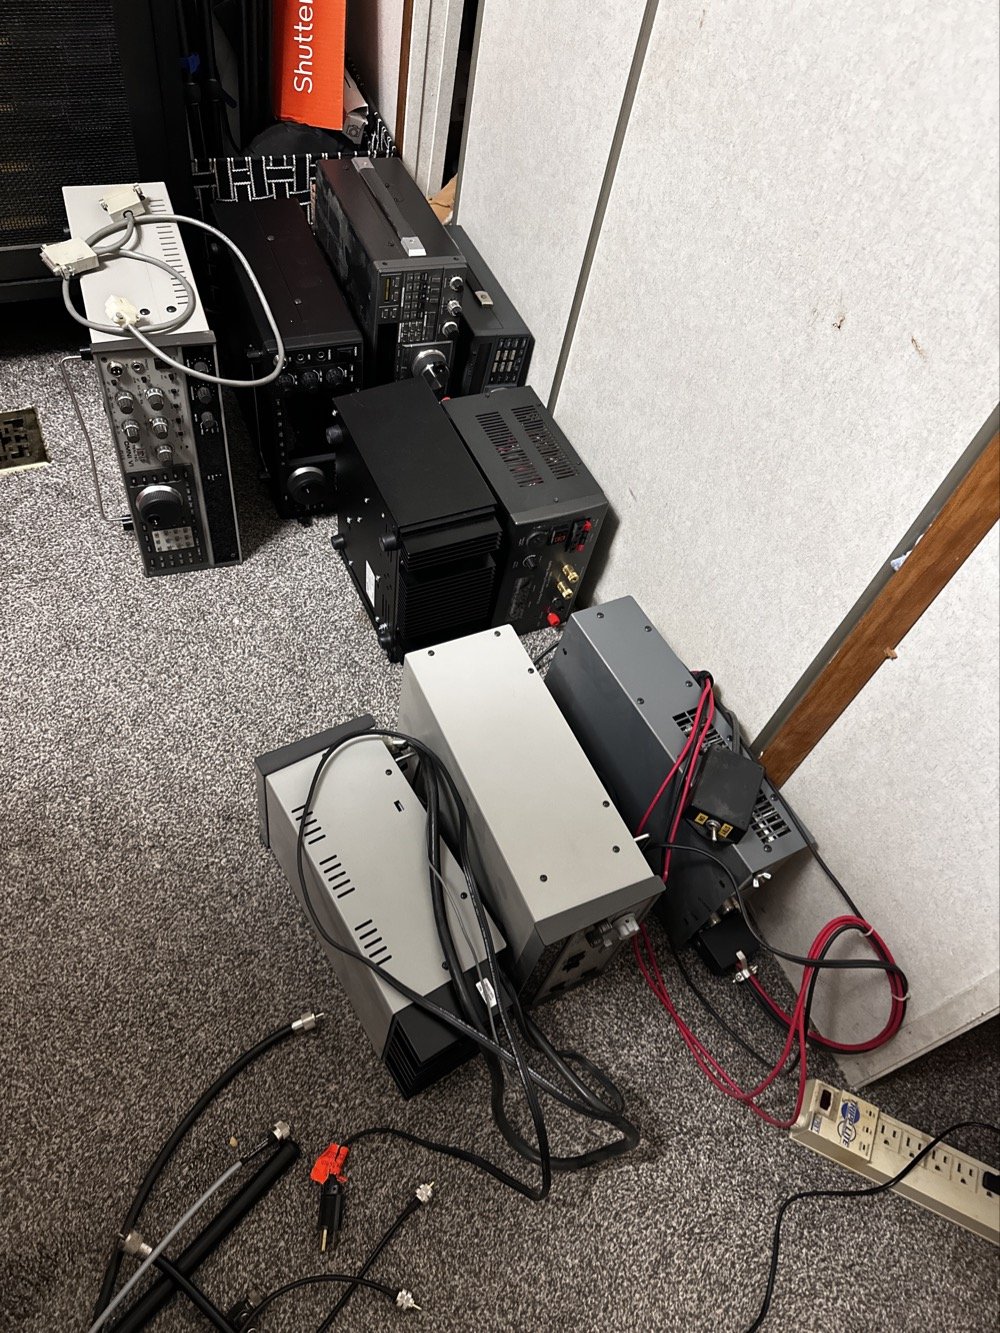
This is what it looks like to break down a normal ham shack so you can remove a part THAT IS ON THE BOTTOM! Haha. It figures that the bottom radio would be the one to fail on me first. It was during this transition that I had the Yaesu FT-736 go down too. Coincidentally at this exact time…. Hmmm.
Here is a link to a short video about what I found, Link to video: https://youtube.com/shorts/pQbP4yRiXAg?is=4TWSAL9qMet0UAhd
The long and short of it is that I did some troubleshooting with my oscilloscope and found that I had audio coming into the audio processing board at a low level but the board was essentially dead. The audio amplifier IC only had .556 volts instead of 13.8vdc which is what it was supposed to be… So I tore the radio apart and had trouble with the connectors on the board. The connectors were really tight and I was chewing them up to get them to release. Instead of destroying it in the attempt to get it apart, I started looking at the power delivery and found that it was probably a bad solder joint or something like that. I decided to run a fresh power wire and solder it directly to the audio amp IC. I added a 1 ohm resistor as that was in the original print so it would work properly and POOF! It came back to life!
Once this repair was done, I was able to reassemble the stack and get the radios back on the air.
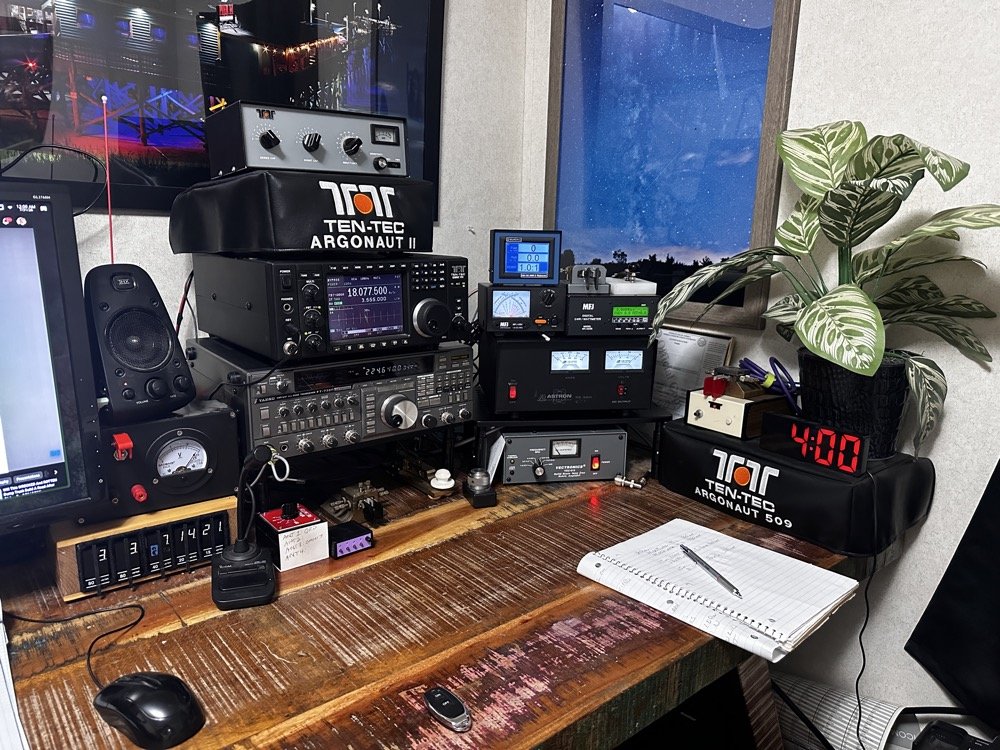
This is what the station looks like right now. Once the Omni 6+ is out of the shop and back in operation, I plan to sell the Omni 7 as I really want an Elecraft rig in the shack. I am thinking a K3 or K3S, but I am without an Elecraft radio at this time and that bothers me a little. I like the Omni 7 but it just doesnt scratch the itch for me like the Omni 6+ does. You can also see the Scout 555 band modules in this photo, I finally got the holder out an added to the shack for those too. Look at all that space that I have now, thanks to a tip from KG4WBI about some adjustable stands, I was able to elevate the radios and that allowed me to store the CW gear underneath them…
On to the park activation!
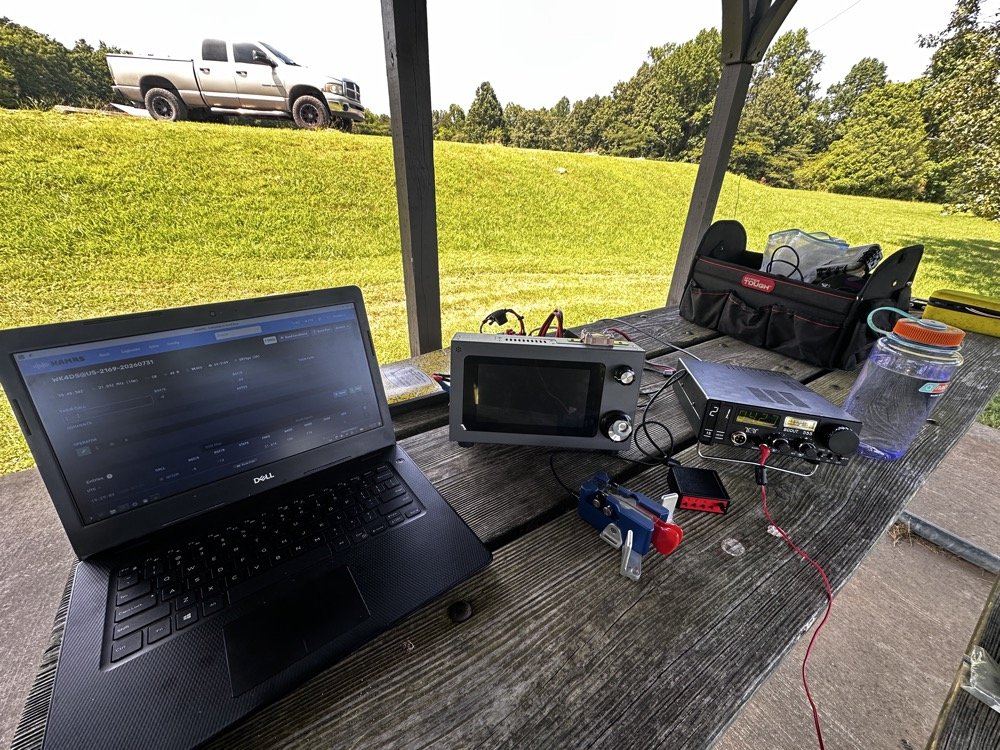
Today, I chose to operate on just two modes, but. I wanted to run 5 bands. this can be accomplished with just one of the radios I used, the sBitx, but I love using my TenTec Scout 555 for CW so I brought it out for that mode. The sBitx is a joy to use on FT8 now and JJ’s crew has it working even better on the current release of the software package.
Just scroll down a couple of posts to see my thoughts on this new release. I setup on 15 meters first as it looked like it was doing well. I only got one CW and one FT8 contact on that band! Well, deflated by this reailty check, I went to 20 meters to get the activation locked in before I wandered off to the higher bands to play. Well, even 20 meters was not that great, I finally got the ten I needed to lock n the activation while there, but it took a while. A lot longer than it normally takes me to land 10 contacts from Georgia, that is for sure.
After that I moved up to 12 meters where I worked quite a few DX stations as well as several US ops on FT8. I dont remember if I worked anyone on CW, I really dont think I did, maybe one… The bulk of the QSOs was on FT8, I finally decided to give 10 meters a shot… this went really bad. I think I made one contact on 10 meters before I gave up and went to 17 meters to see what I could do. I worked a few stations there and finally called it quits after about 2 hours with 23 calls in the log.
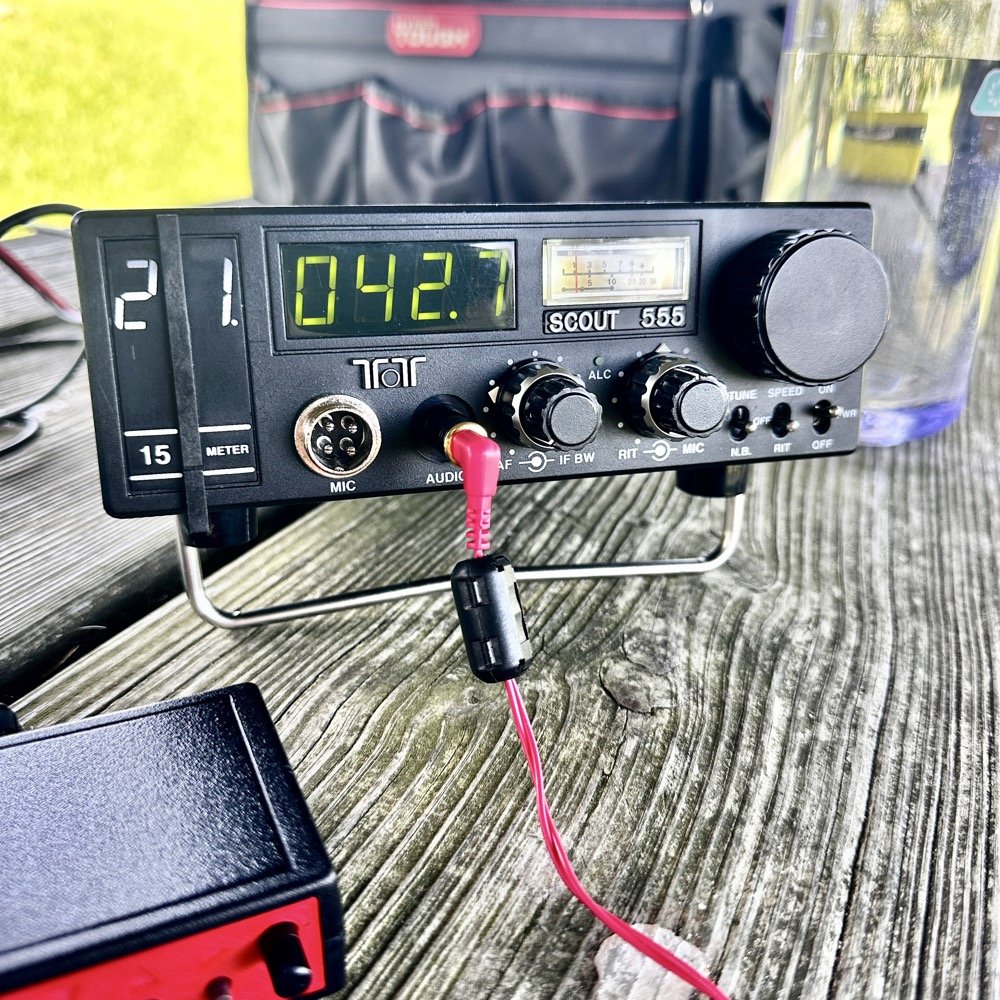
I have absolutely fallen in love with these silly little radios. They make such great CW machines! They also work pretty good for SSB too but I dont use that very often. I think this was a great idea from TenTec and I for one am glad to be able to have a few of these radios.
They do have a fault at this age though. The audio from the speaker is not great for weak signals. All of my Scouts exhibit the same issue. There is a low level “whine” on the audio. Something inside the radio is adding this noise. The answer for this is simple…ear buds and minimum volume. That is my trick. Use earbuds and turn the volume way down… This is an old trick I was taught years ago to be able to hear weak signal CW…….
Could I tear into the radio and find the problem in the radio audio chain? Yeah…is the juice worth the squeeze? Not really when I can use this trick instead. Ear buds work better than headphones as they require a much lower level of power. What happens is the internal radio noise is not amplified in the later audio chain when you do this. It is really neat how the signal will just float to the surface as you get the volume just right. It acts almost like a rf gain of sorts. There is a sweet spot as minimum volume will just show you the audio noise in the radio. But it you look at the volume knob in the above photo, you can see where I was running it at. I also find that if you open up the Jones filter a little, weak signals will get louder too. You can see where I run this adjustment as well in the photo above.
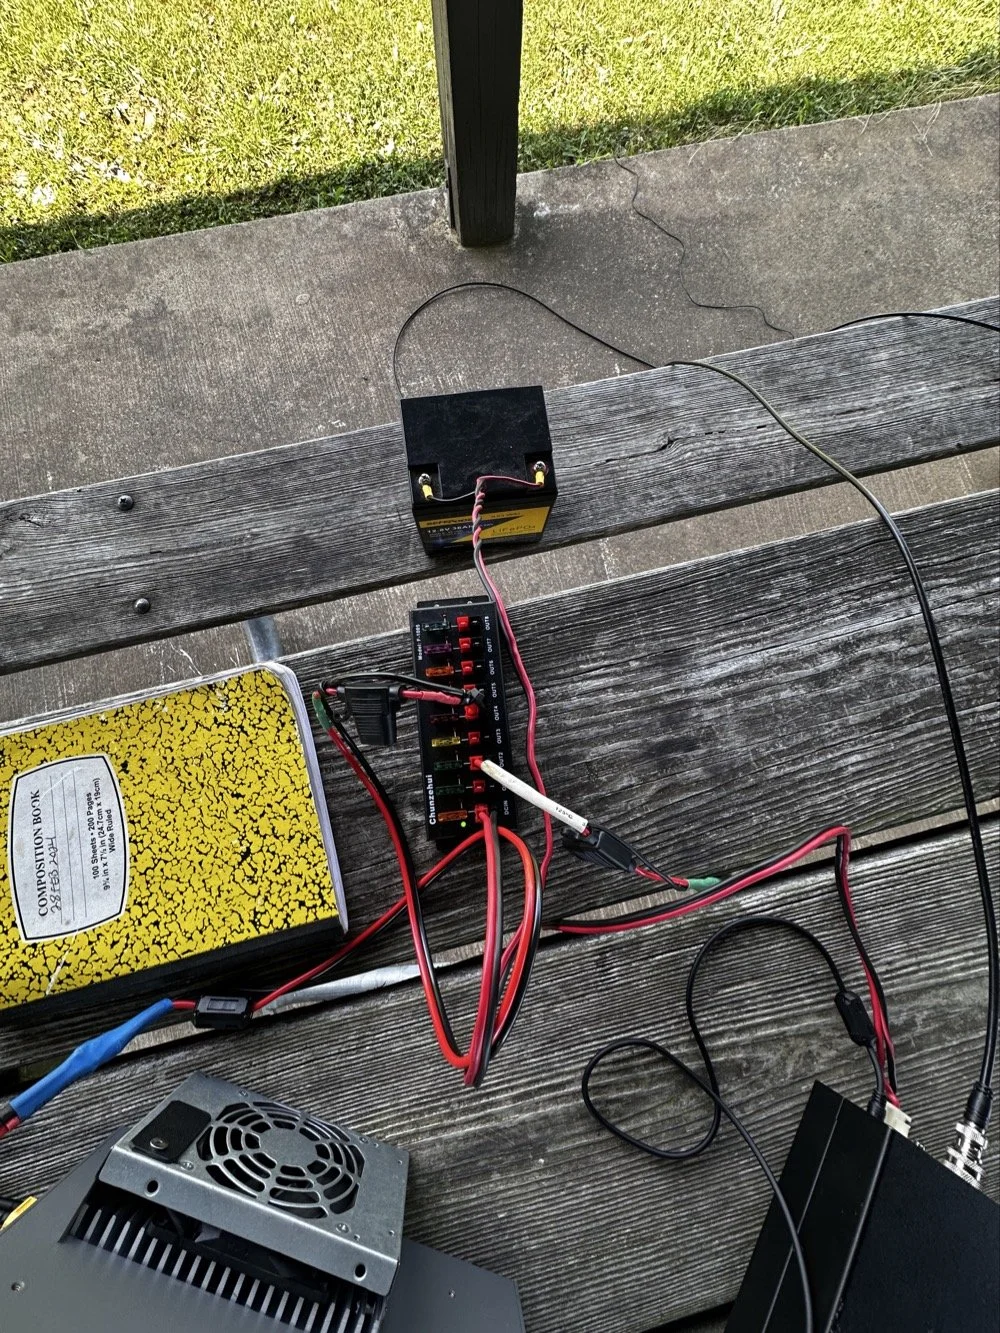
These two photos show the power system and the antenna matching system. The power was delivered via a 36aH LiFeP battery from Amazon, which is plenty of power for a radio running 40 watts. Like 4 hours of constant transmit levels of energy. All day for normal operation…
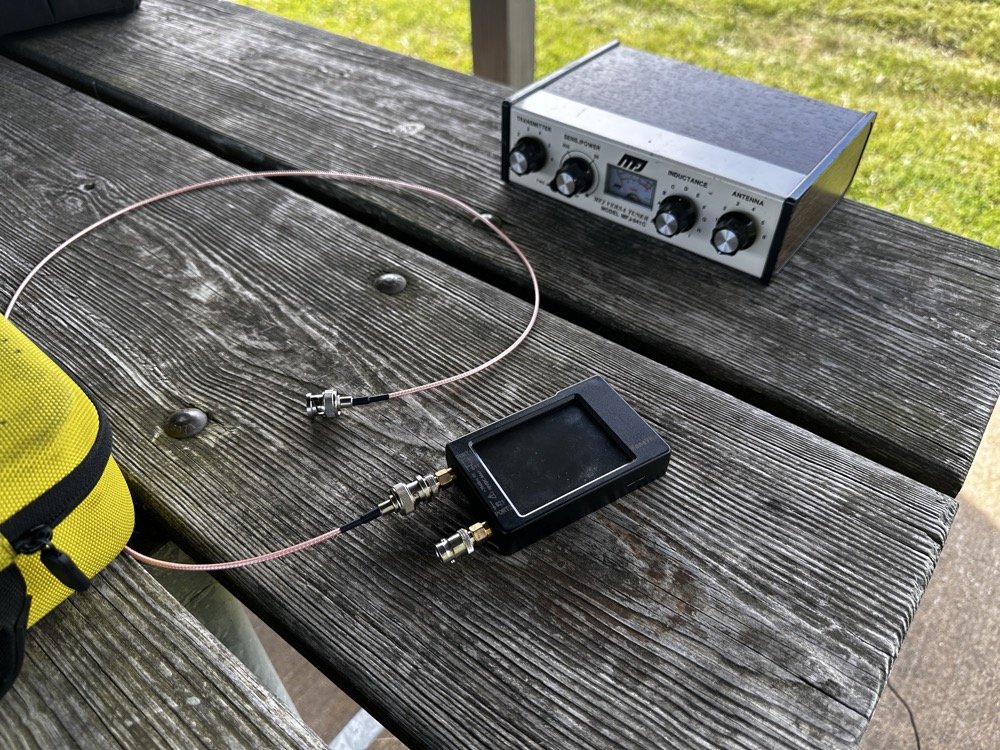
The antenna tuner is the MFJ941 as it has connections for a wire antenna built into it. I like this tuner as it will match a pretty bad antenna to your radio pretty easily. I use the nanoVNA to set the tuner and just plug the radio back into it when I get the trace happy on the VNA. These things are the best antenna analyzers on the market in my opinion. I can buy litearlly a half a dozen of these instruments for the cost of one commercial antenna analyzer. Not to mention they willl do many more things that a analyzer will not do…lots of things.
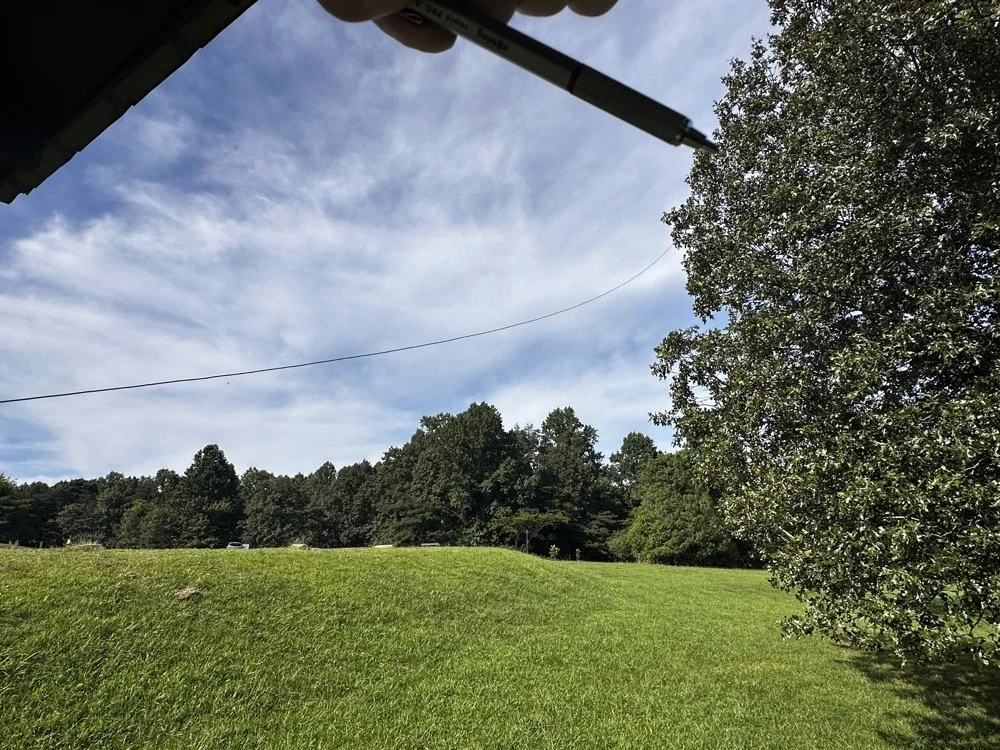
Below shows the antenna and I am pointing out where it is attached to the tree. The top of the wire is probably 25’ off the ground and comes down to the corner of the pavilion at about 7’ above grade. This worked well today but I have no idea what the radiation lobes look like. Since the wire is 41’ long, it has to be crazy on 12 and 10 meters but I was able to make some contacts so it was good enough. I like running wire antennas when I can, they seem to pull in weak signals better than my telescoping vertical.
The next two photos show the display of the sBitx running version 5.4 software. There is alot of data, but it isnt too much. I am running the native FT8 application here and the bottom photo shows me working PU7MJD in Brazil on 12 meters. This is why I wanted this radio. When the other modes are dead (no one was running CW on 12 meters) then I can still work someone.
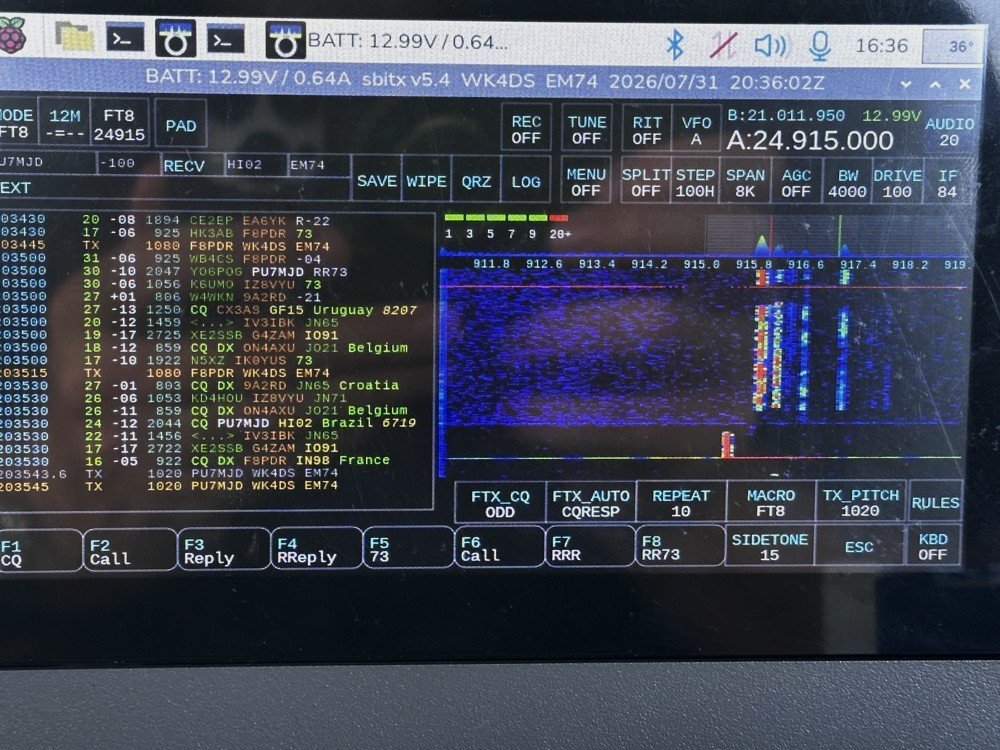
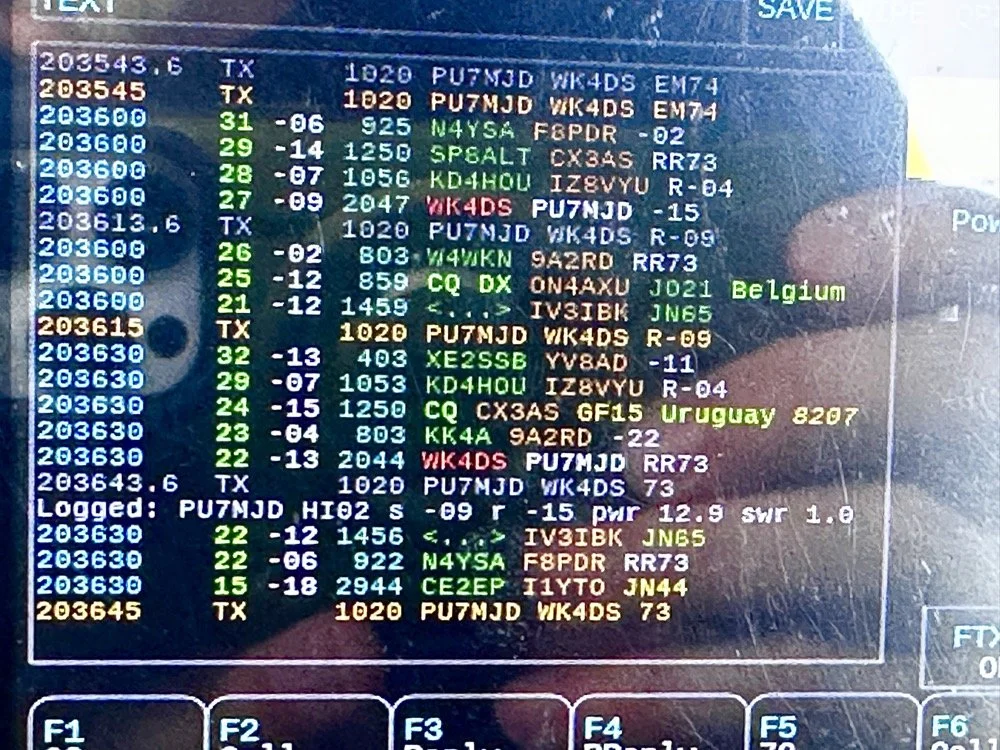
The color coding of the display is great and easy to use!
After a couple of hours of operating, I called it quits for the day and packed up. These are the kinds of activations that I actually enjoy. There was no pile ups today and I made over 20 QSOs too. FT8 is an easy mode to use on the sBitx and allows me to do things like get photos for my blog while it sends CQ and such. I still like to drive the radio though so I dont just let it run free. I need to test the CW keying on my next outing to see how much it also improved.
You can help support this channel by using these Amazon Affiliate Links as well:
QRP/Portable Radios:
Antennas & Tuning:
CW Equipment:
Power & Accessories:
Organization & Transport:
BONUS ITEMS (Optional 16-20):
Until next time…73,
David
WK4DS

60m Band Module Part 5: SSB Operation
Getting SSB to work on a converted band module for 60 meters is tougher than I thought. It takes mods in the radio too…or it is not possible at all. One or the other is the fate of this TenTec Scout 555 HF radio and the 60 meter band module project.
If this is your first time seeing this project, please go back and take a look at the full series so you will be up to speed on this project.
- Part 1: Initial Conversion and Filter Design
- Part 2: Crystal Selection and Mixer Circuits
- Part 3: Field Testing and Troubleshooting
The Single Side Band Problem
Today, we are taking a look at the TenTec Scout 555 60m band module that we built and figure out how to make it work on single side band properly. This band module was created by using a donor 80 m band module and from there things were changed and re-tuned to make it work on the 60 m amateur radio band.
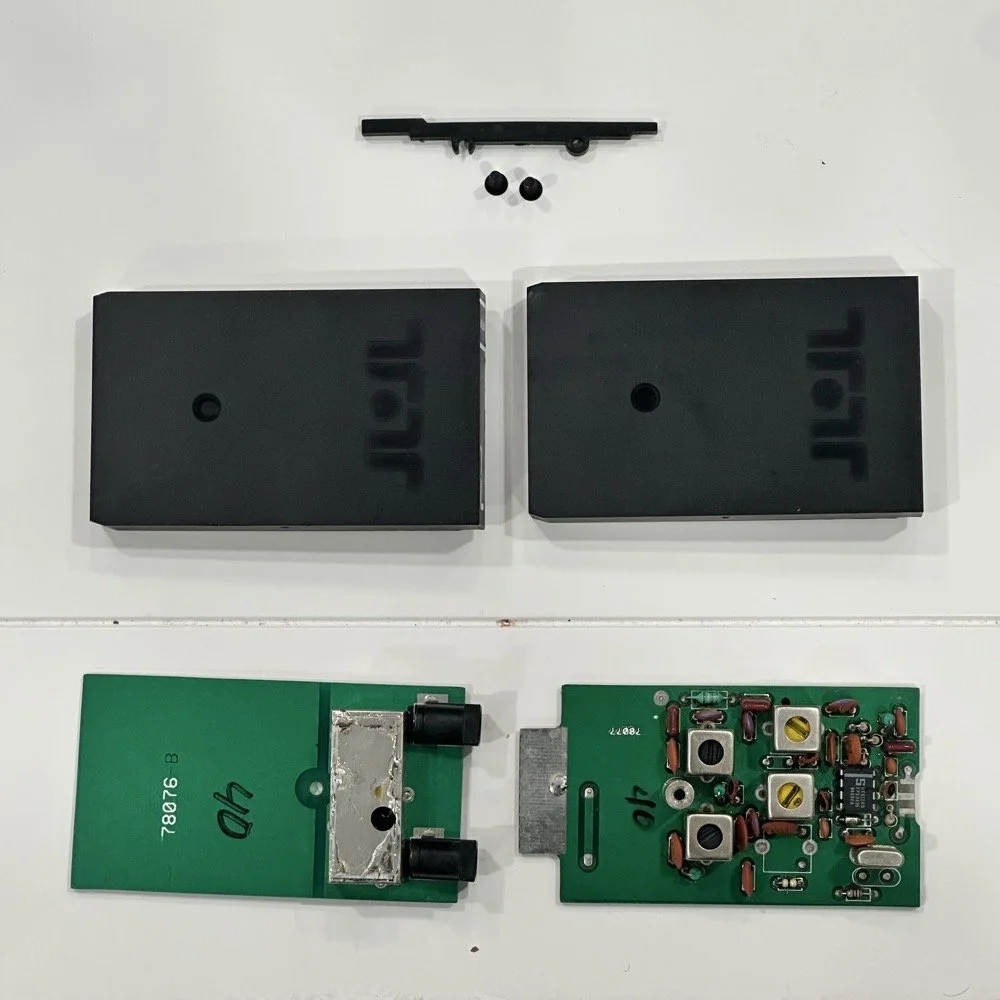
One thing that has turned up though is that the 80 m band module operates on lower side band. To get the side band correctly oriented for the 60 m band I need it to transmit on the upper side band. This is not the normal convention for amateur radio operation though. The normal convention is as follows; bands 30 meters and lower, such as 40, 80, 160 and so on, will use lower side band. All bands 20 meters and above use upper side band instead. Someone a long time ago decided this was how we will do things going forward and here we are. Well for some reason, the 60 meter band is not like the other lower bands. It is using upper side band so I have to figure this out. The next step I have to do is figure out how the radio determines what band module is installed, and which side band it chooses. The radio automatically chooses either upper or lower side band, depending on the band module in use. So something is either telling the radio to monitor the actual frequency or it is looking at the band modules themselves and it is determining it that way somehow. All we have to do is figure out how it’s determining it and tell it to choose something different. Simple enough.
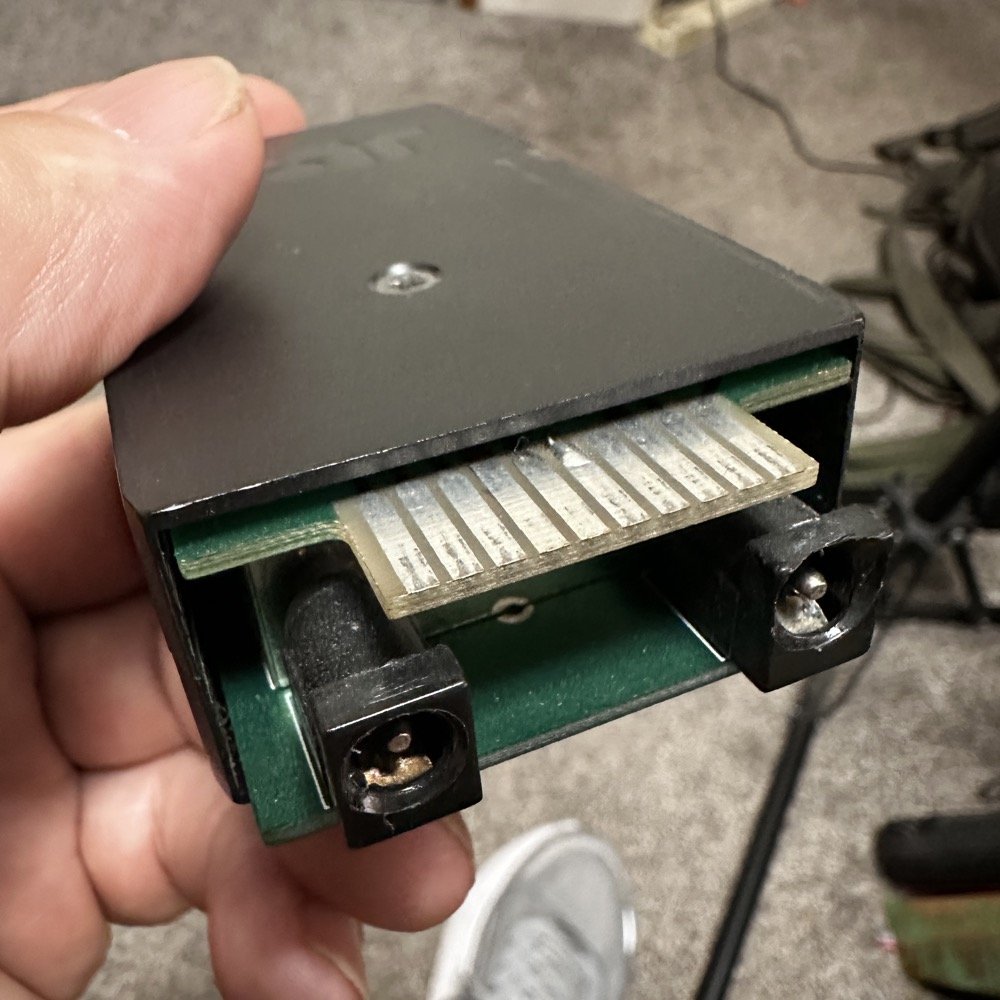
40 meter band module showing the soldered in ground jumper installed on pin 6.
Finding what triggers the shift from upper to lower side band
Everything we need to figure this out is in the TenTec Scout 555 owners manual. The manual has an complete set of schematic diagrams on the radio inside. I first start by looking at the band module schematic itself and found that there is a pin marked “band” with a jumper shown on it. This is a very suspicious connection and has me very interested in this particular pin. So this is where I’m going to start my journey since this sounds like it is what tells the radio which band the it is operating on. The next thing I had to do was figure out where it went in the radio, so I dig out the prints and found what follows…
The first image is an exert from the schematic of the band module itself showing pin 6 “band” being grounded with an optional jumper.
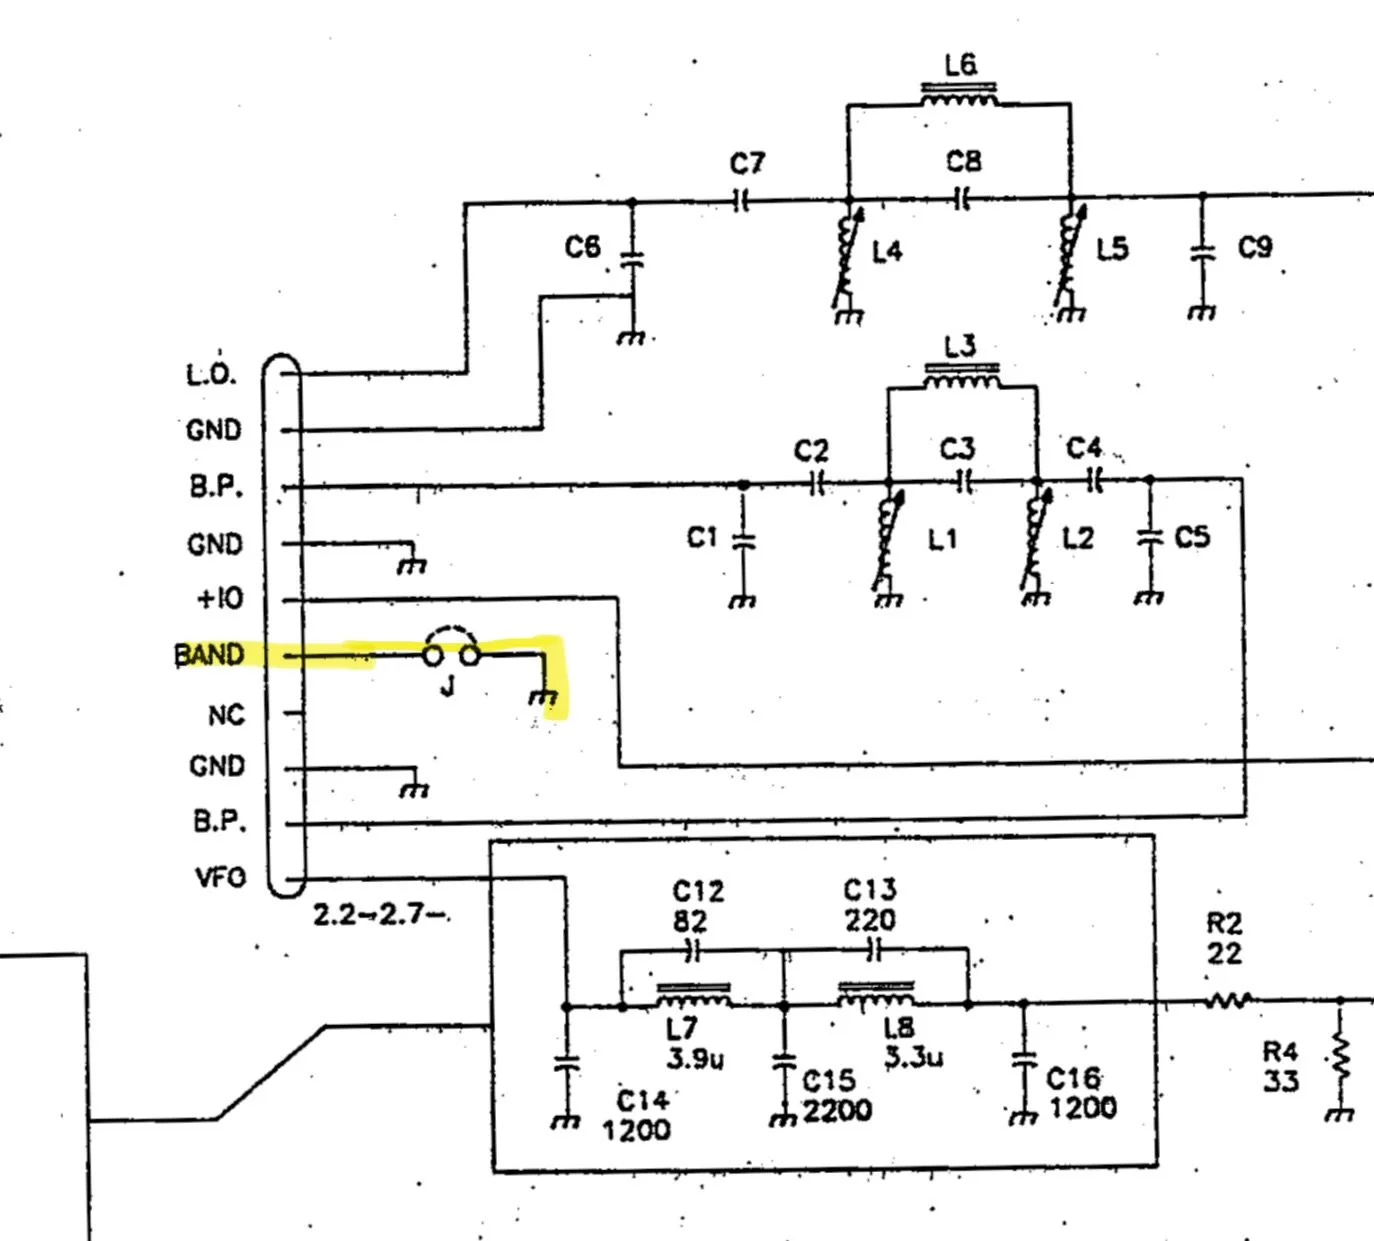
Band Module Edge Connector Pinout showing Pin 6 as the “Band” pin.
The next stop for this circuit is the Low Level driver board and it lands on a pin on connector 48.
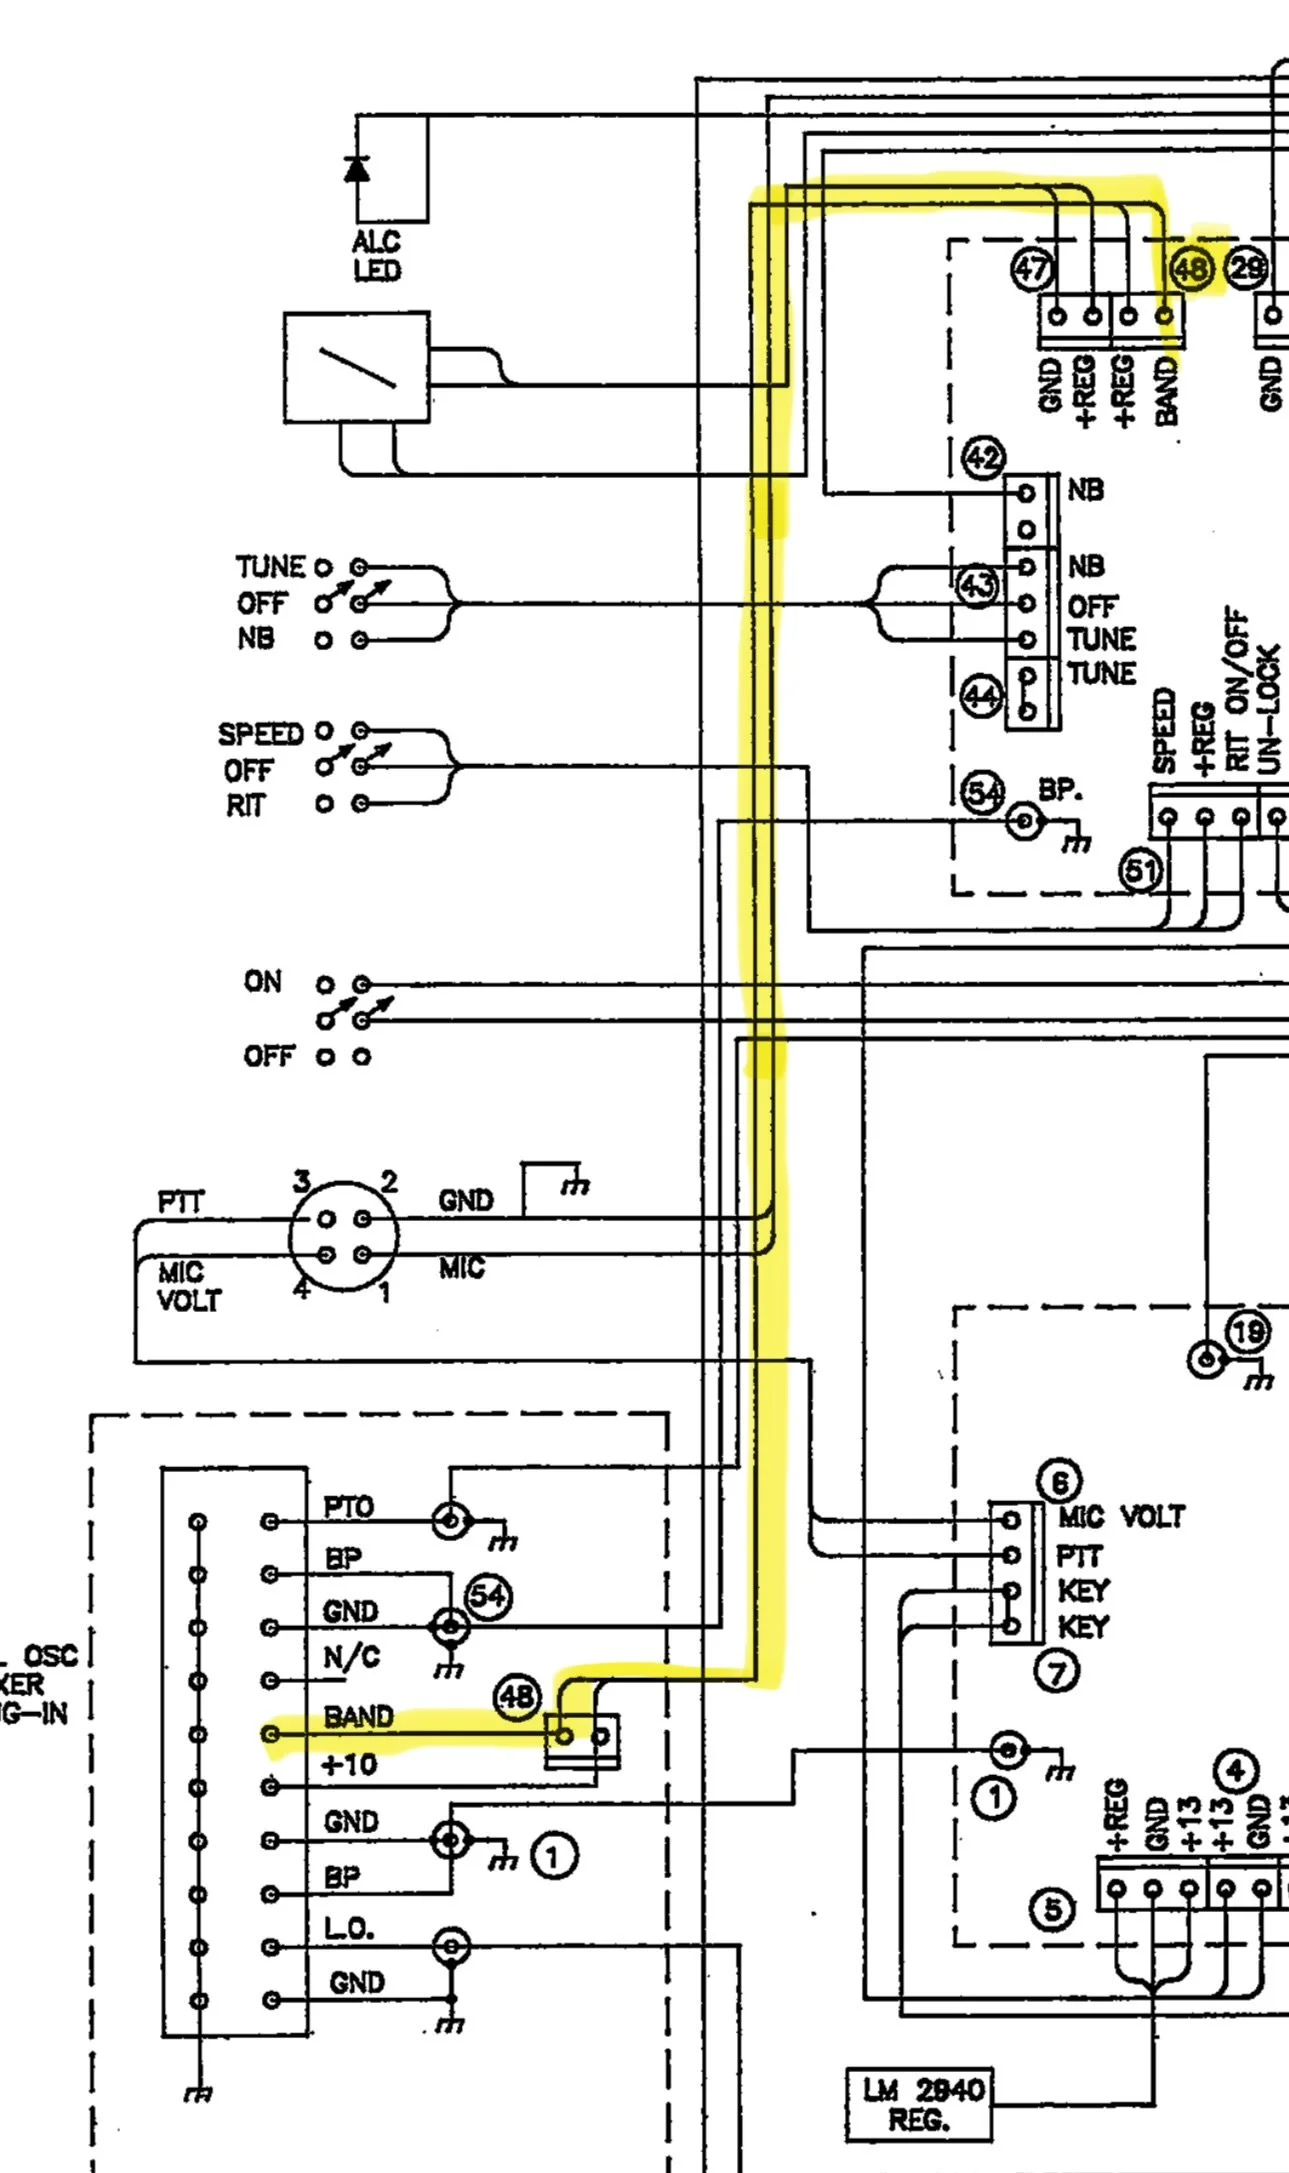
Section of the Low Level Driver Board Schematic showing the path from the “band” pin on the module edge connector up to a pin on cable 48.
It then travels along cable 48 over to the Low Level Driver board.
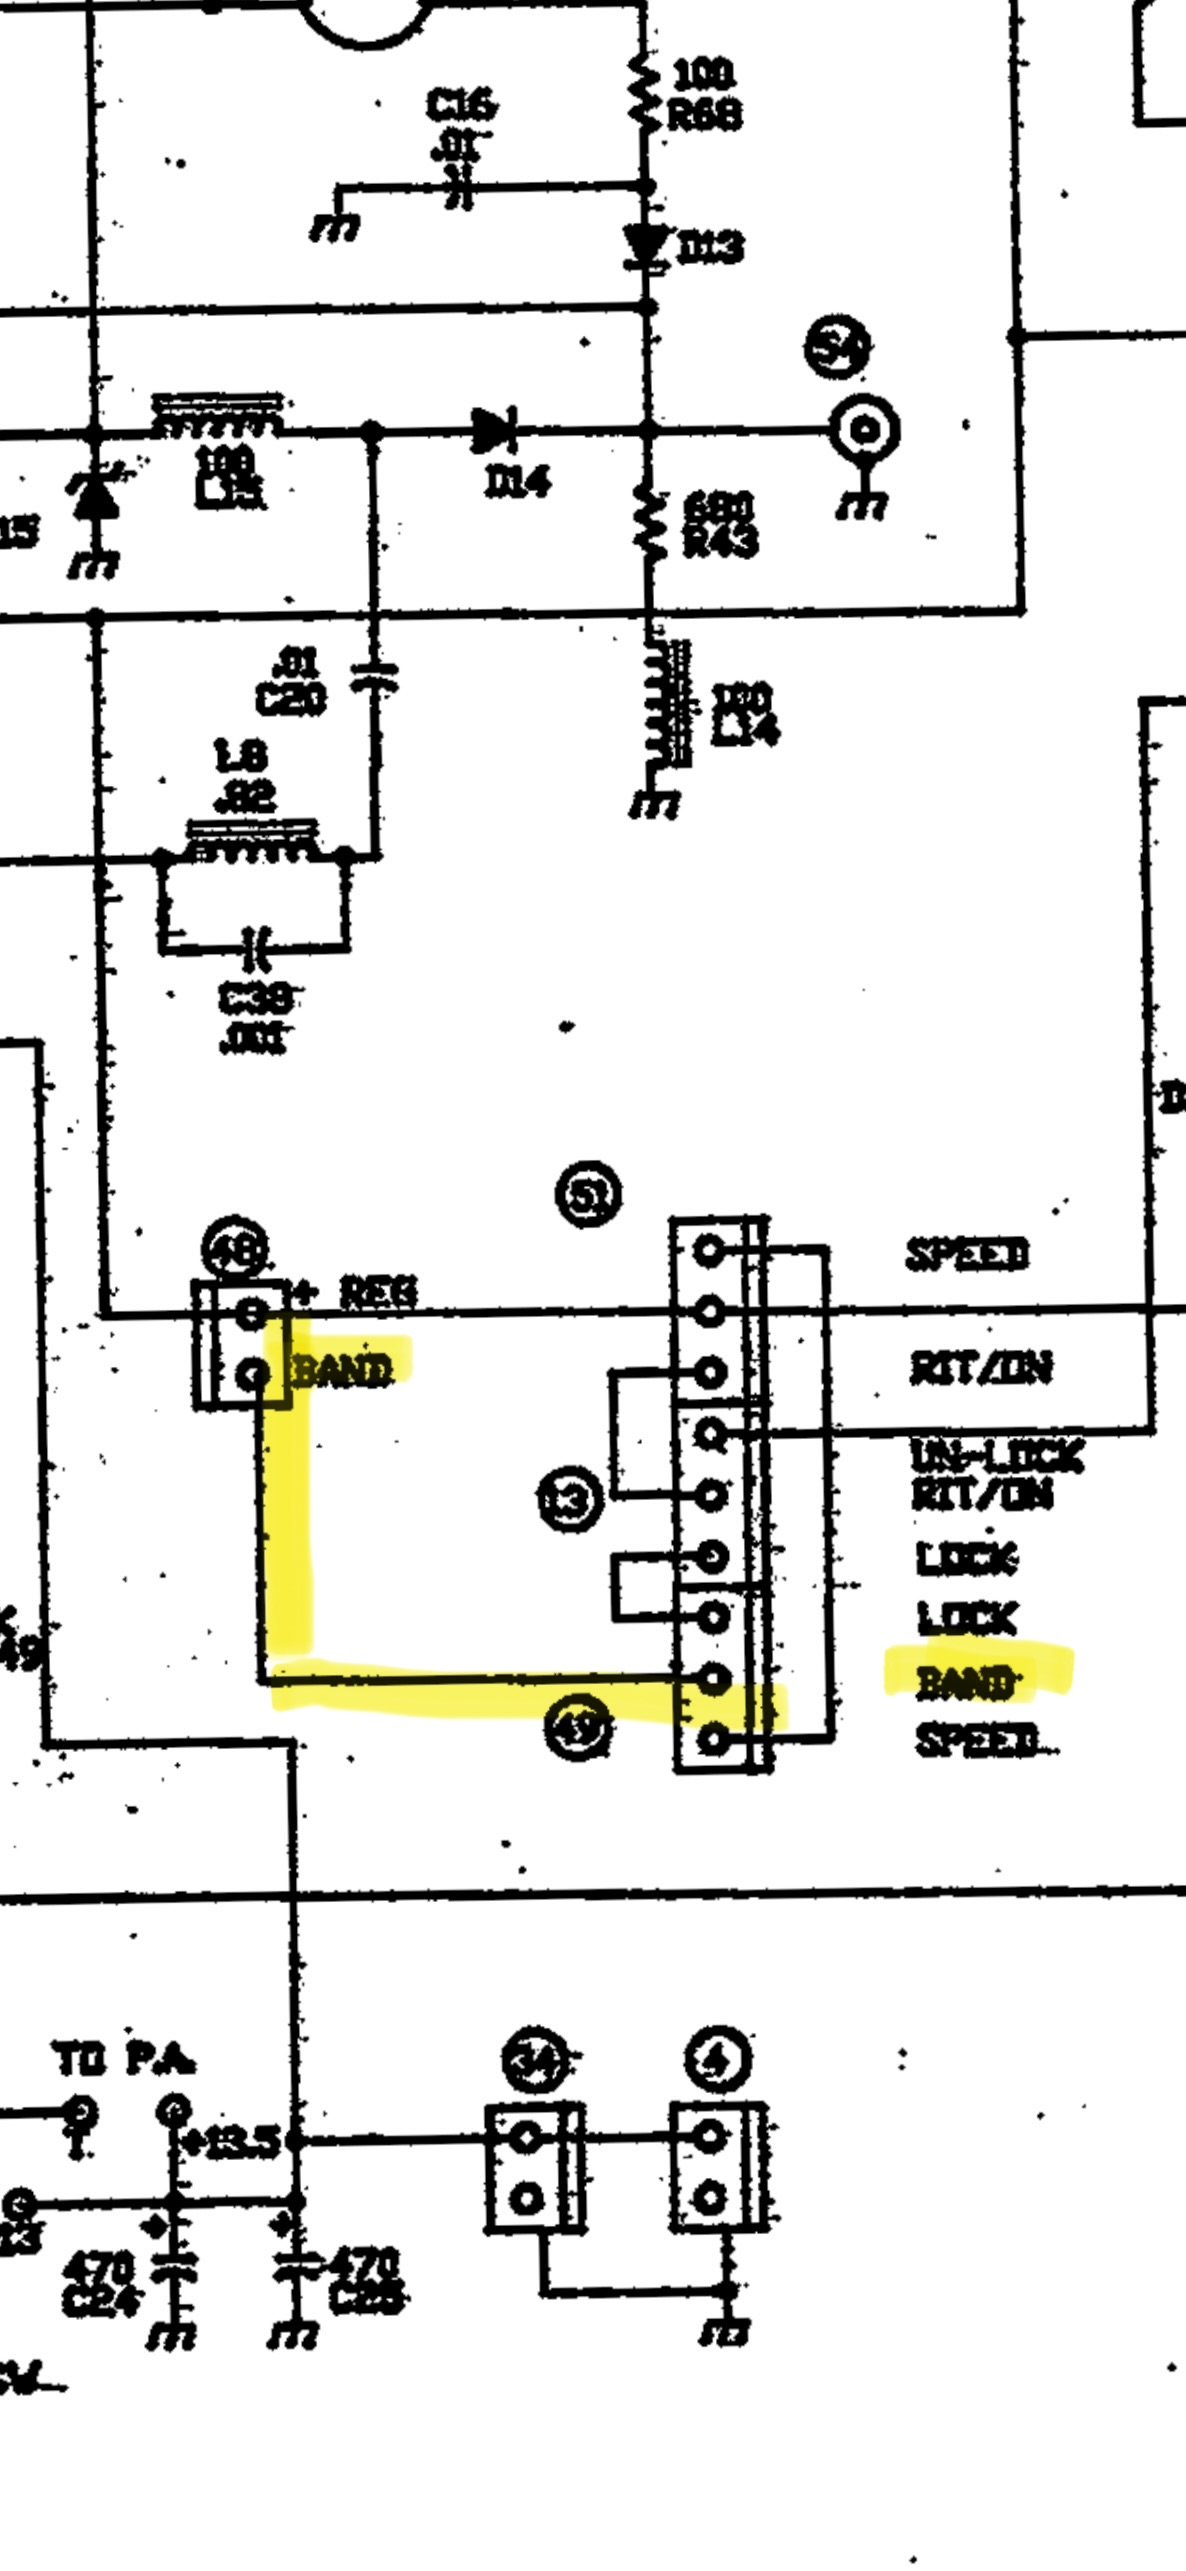
Low Level Driver board wiring showing connector 48 and 49 for the “band” selector.
The next place it went was from connector 48 to connector 49 on the low level driver board where it exited the low level driver board. I am going to be honest here, this wiring makes no sense other than to add two points of corrosion with bayonet connectors that are not needed. There was no reason to goto the LLD board just to exit the board without doing any work with this signal from the band module. Yet, so is life…
It leaves connector 49 on the low-level driver board and goes to the Logic board. Once on the logic board, it goes to pin 10 on the PIC16C57 controller Chip. This chip is probably being used to control all sorts of stuff, but this pin is being pulled low when the band module is grounded and it is being pulled high through R14 (4.7K ohm) resistor when the band module is not jumped to ground.
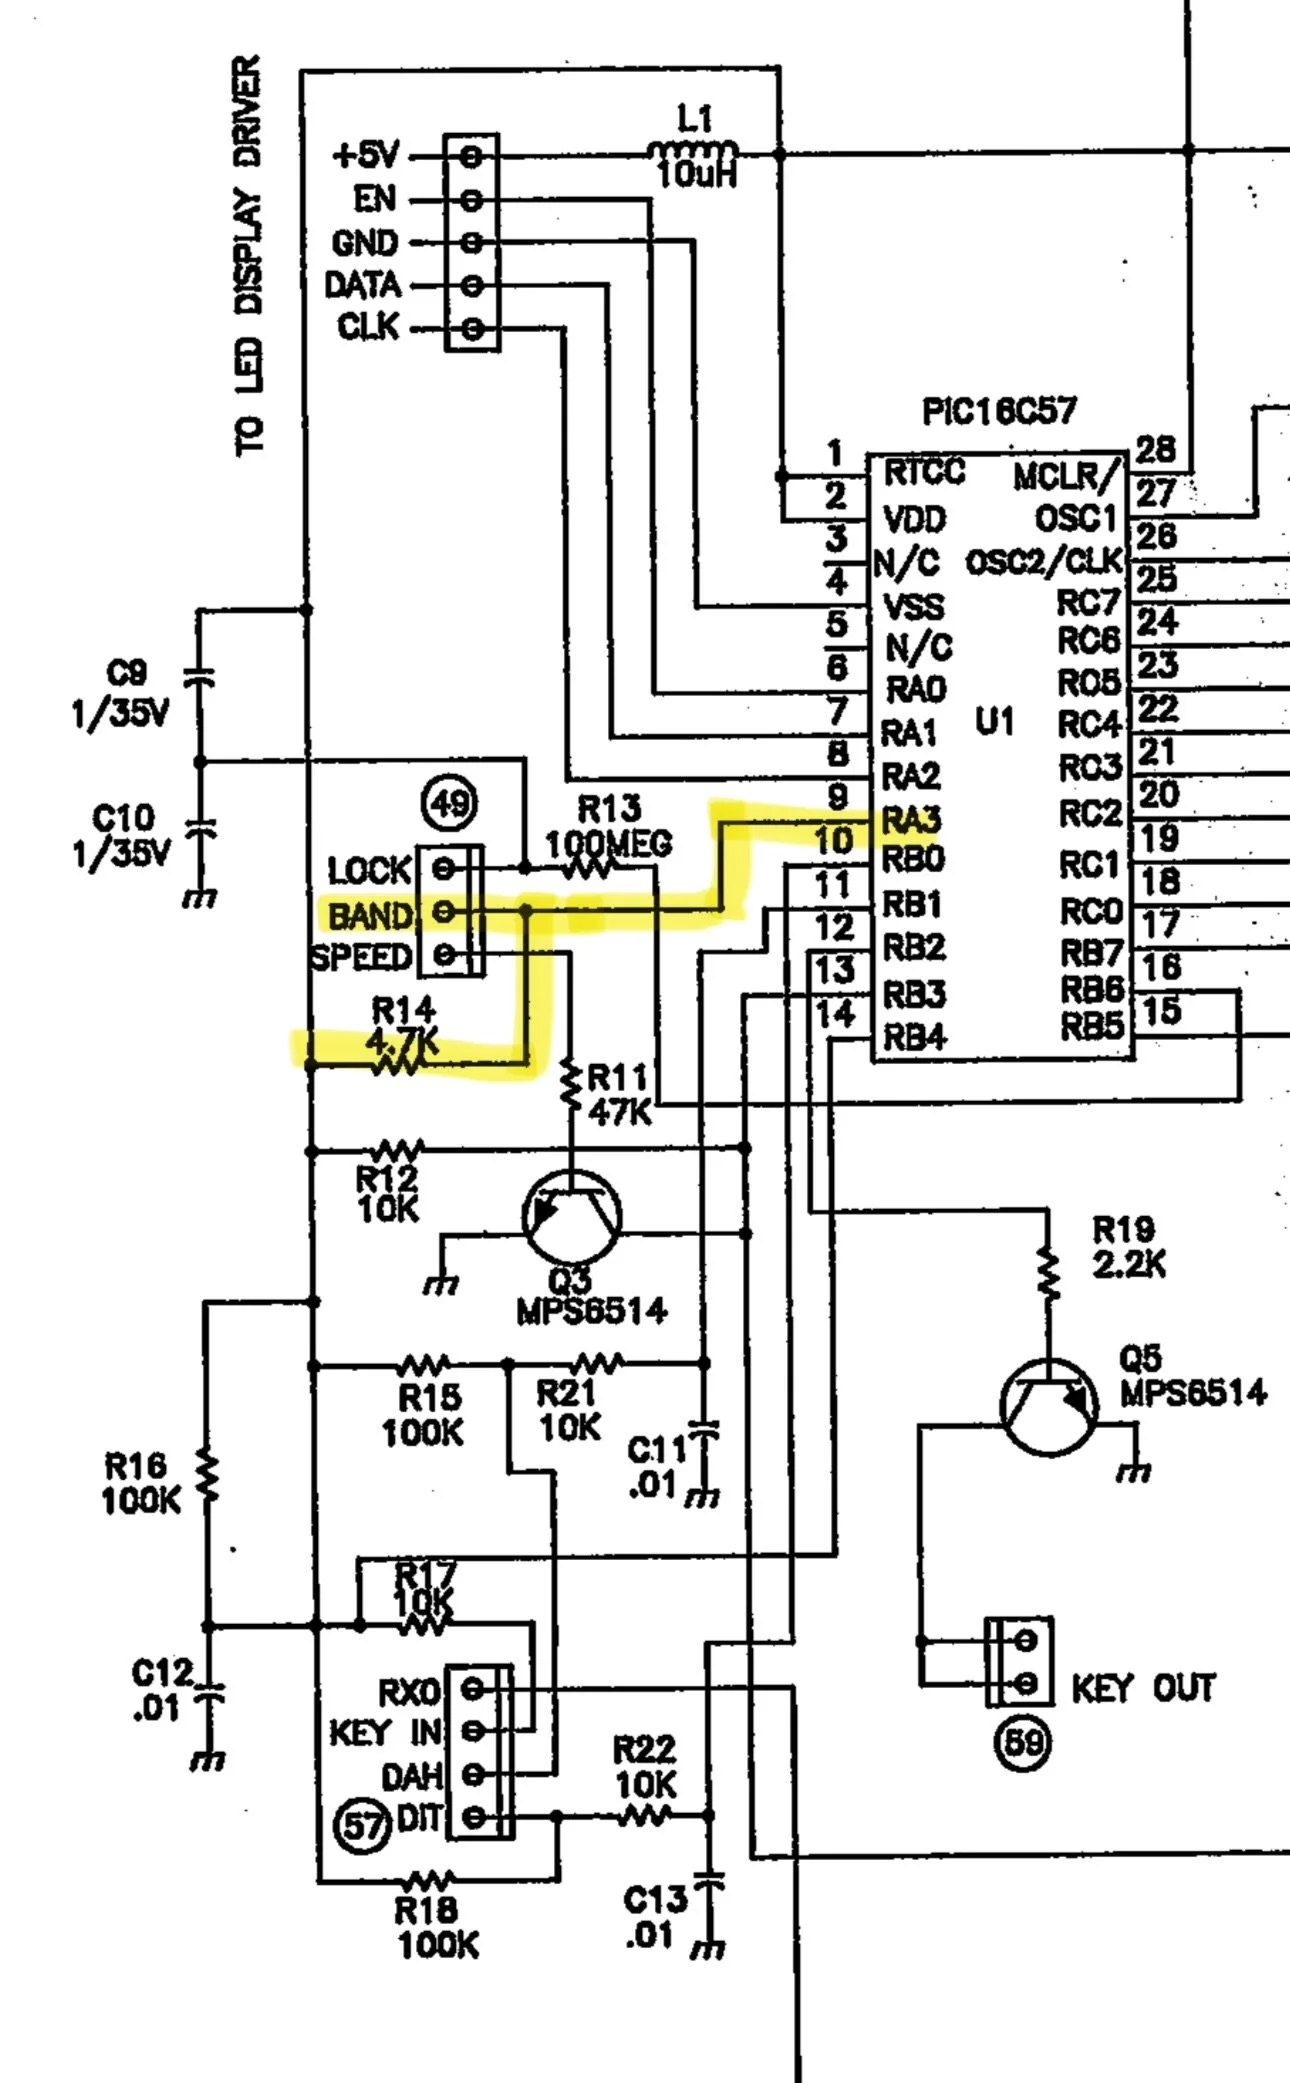
After tracking it down to the PIC controller, I have come to the conclusion that if you pull this line low (tied to ground), it determines one side band mode and if it is left ungrounded, it is pulled high by a pull up resistor to set another side band mode. So I went and retrieved my multi-meter and checked a full set of band modules to see and this is what I found:
10m - open
12m - open
15m - open
20m - open
30m - shorted
40m - shorted
80m - shorted
160m - shorted
60m Single Side Band on a TenTec Scout 555 is hard!
Once I saw this pattern I knew that this was how it knew what each mode needed to be. It had no way of knowing which band, but it knew which side band mode…or so I thought… As fate would have it, I learned something else today. I took my 60m band module to the workbench and de-soldered this ground contact so it would transmit on upper side band. Knowing that I didn’t touch any of the other stuff in the module I merrily trotted back to the shack to test it out.
Turns out more happens with the radio than just choosing the side band… Turns out there is a second thing that happens when you cut this trace. You see when you look at the chart of the frequency path on the NA5M website, you see that 30 meters and below, the 6.142mhz IF is subtracted from the Local Oscillator sum and 20 meters and above it is added. So when I cut the trace, the radio now transmitted on 17.616mhz and not 5.332mhz! Yeah, sure, now I had upper side band but now I was on the other end of the world from where I needed to be… Little good having upper side band does me if I am off frequency by over 10mhz!!!
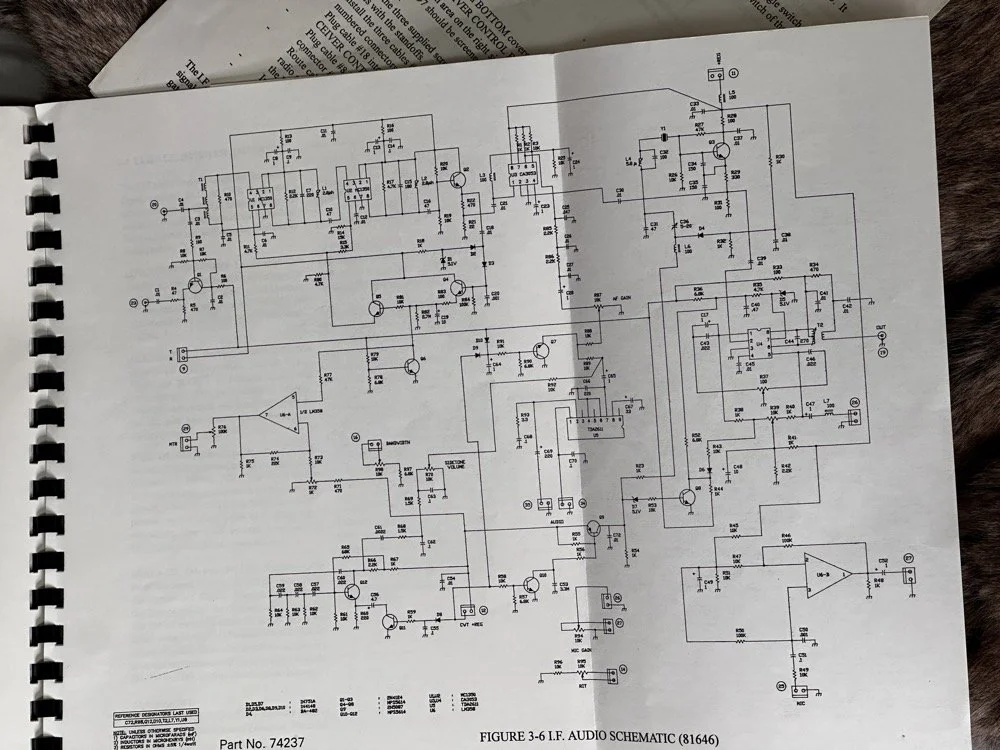
I figured out the following:
The band module has a pin on the edge connector that when grounded, makes the radio operate on lower side band and it subtracts the 6.142mhz IF from the signal. When it is open, the exact opposite happens. So what I need is for the radio to be like a “low band” module for the mixer, but use upper side band for the voice and some of the data modes. This is the problem I need to solve and the answer was on YouTube. After looking at the problem for a while and understanding how the two sidebands are literal mirror images of each other spaced out from the center frequency. I finally found a fellow ham from Australia that had the answer. Simply flip the audio frequencies only and adjust the radio as if it were lower side band. This sounds silly till you see his video. I currently have center tapped audio transformers on the way so I can build a circuit that mixes a 2500hz tone with the audio stream as the audio passes through a diode ring mixer. This will invert the frequencies when it does this. If his video is not fake, I will have solved the SSB problem on the Scout 60 module. Sure it will take an homebrew external converter module, but at least it will work! I have to invert the audio on both transmit and receive so I have to control the microphone input as well as the speaker output. The speaker is easy as I can simple grab the headphone jack audio and process it to a set of headphones or external speaker, but I will have to put microphone connectors on the unit as well so I can intercept the audio from the microphone as well as have it trip a relay when you press the “push to talk” button. All of this should be pretty easy to accomplish so I am confident this will work.
So here is the plan, I want to use that pin right beside the “band” pin on the module edge connector to ground it. Then I can route that to a new plug on the back of the radio to allow me to control a relay with it. This will “enable” the reversing circuit to get the audio corrected for use with this module. Since all the other band modules don’t use this pin, it will only work with the 60 meter module. This is if I have to build the circuit outside of the radio too. If I can get it to fit inside the radio, then I can make the whole thing look original and not need a small adapter to correct the sound and microphone audio. Other wise, I will be piping it through a converter box with the ring mixer in it and a relay to switch the path from transmit to receiver.
The TenTec Scout 555 owners manual has a lot of the information that I need to make this happen, but it doesn’t tell you everything. It mostly describes circuits so you understand what your adjusting it, to trim it back in and get it running right.This means you have to figure out what is going on with the circuits so you can understand how to modify them. This is the hard part for me. For now, at least, the SSB problem remains. I hope to be able to solve it, but right now it looks a little unlikely…unless you know something that I dont and see it in the photo of the schematic above.. haha. If you see a possible solve, please email me or leave a comment and lets talk about it, I am really enjoying this project and would love to get that one last mode to work right.
You can help support this channel by using these Amazon Affiliate Links as well:
QRP/Portable Radios:
Antennas & Tuning:
CW Equipment:
Power & Accessories:
Organization & Transport:
BONUS ITEMS (Optional 16-20):
73
WK4DS - David

UPDATE - sBitx V3 with Firmware version 5.4
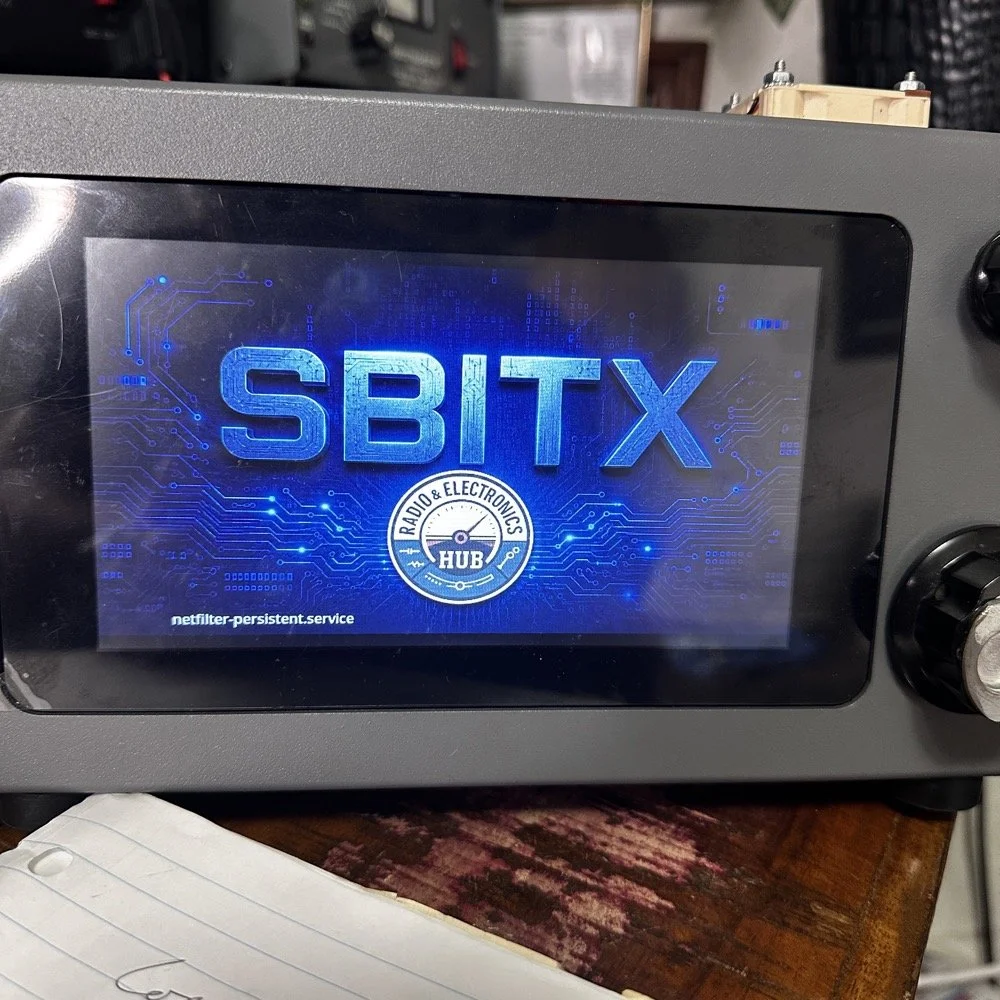
So the dev team working on the sBitx software suite (unpaid I might add so I suggest you drop in on them and give them a donation for all this time and enegry they have put into this for the community) has dropped ther latest version of the sBitx SDR firmware and it is version 5.4 and let me tell you, this is incredible!
Highlights of the new firmware for the sBitx Software Defined Radio
This is taken directly from the drexjj GitHub repo page so I dont get something wrong. Goto this link to see more about this project and to help support the team.
Here is the list for JUST THIS RELEASE!
v5.4
New Features:
sBitx IQ improvements
enhanced VFO, complex mixing and down-converting
improved processing of I and Q data in the sBitx receiving pipeline
AGC function and AM detector changes to work in updated pipeline
FM Mode and Squelch
Added FM mode and squelch control for use on 10M and transnverters
Text console can scroll back to view and work with up to 500 lines of history, in all modes
Added support for Touch Display 2 and larger displays
Makes it easier to touch and see the buttons on a Touch Display 2 or external display
New file is read upon sbitx startup called display_settings.ini where you can set the display type or resolution
display_type=1 is for the original, older 7 inch touch display
display_type=2 is for the newer 7 inch touch display
ui_scale can be changed for use with a larger display
Added styles option to customize the sBitx application.
Text size, font, color, and types are now supported.
Styles templates are stored in the data folder as tpl files.
If there is a file named user_style.tpl in the sbitx data folder, then it will load it on sbitx startup.
If the user_style.tpl file is not found then it will load default_style.tpl if it is present.
If none of these files are located, then it will load the factory style we are all used to.
There are sample styles in the data folder that can be loaded. Just have to rename one of them to user_style.tpl
Added mode_bal to hw_settings.ini to balance LSB and CWR to USB and CW.
0.8 is a reasonable value.
Also harmonized filter band edges.
removed old ssb_val
Controlled Envelope Single Sideband (CESSB)
enable via the button in menu 1 or the 'cessb on' command
Added Tune function to FTx modes
Added NBFM mode with CTCSS and Squelch
Added squelch control to AM mode
Added option to use USB audio devices for sound routing (speaker/phones and mic input)
The options are in the Set dialog box in Menu 1
Added Out-Of-Band and license class indicators
Shows color strips or shading for bands edges and US license class
Each file can be customized outside the USA
More details and instructions in the oob_limits files in the data folder
Added ALC power limits by band, if RF power exceeds limit it is folded back to limit
Default is off until a limit is set in hw_settings.ini by adding line max_watts=nn to band data after f_stop
When activated message is given in spectrum between Power and VSWR
Power reduction is released when RF power drops below bamd limit
Added swrsweep
usage: select a band then either
enter cmd swrsweep n, n where n is the number of sample frequencies or
in menu 1 set SWRSTEP to the number of samples and click on SWRSWP
uses TNPWR to sample vswr at the n sample points evenly spaced between band limits
displays results in console
esc key cancels sweep
Added time out feature to SWR alert
SWR alert ends after 10 seconds without needing to first transmit with SWR less than max_vswr
Added HPSDR 'Protocol 1' support to provide sbitx I and Q data to external SDR apps over WiFi or ethernet
Starts when sbitx starts, console will show "hpsdr: streaming STARTED" when SDR app discovers and connects
Good support for SDR app receiver functions
XMIT not yet supported, will require CAT/Hamlib connection
Changes:
GUI
Moved Direct Frequency Keypad to a new button called PAD and added quick buttons
Swapped button placement on main display
Moved eptt & vfolock to menu 2
Menu 1 is reserved for mostly audio related controls
CW Decoder
Fixed colors of sent and received text on console, use new lines when doing T/R switch
Only displays cw stats (WPM, dot/dash ratio) when they are meaningful
Less garbage ouput when only noise is present
Replace sliding window in denoise function with EMA filter
Improved accuracy with better weak signal performance
Replaced viterbi with simpler classifier
Simplified code of own TX decode process
Set BW to 50 when using decoder is recommended
Web interface
Added more controls
Gridmap new options: Square or round Grid dots; Seen Grids; Unlogged Grids;
Power and VSWR readings updated more often, from every second to every 1/2 second
Updates are now as fast as bridge reads allow
Minimum power for VSWR calculation increased to help eliminate invalid reads at very low powers
Fixes:
APF init Bug
Fixed a bug where APF would not initialize properly
Audio Cleanup
Made a small change to cleanup the static between TX to RX
APM sampling improved for better regularity
VSWR initialization when user disabled fixed
max_vswr=0 now restored as no max vswr protection at startup
Fixed scope intensity where it now loads and restores previous setting
Fixed Macro loading and F1-F8 buttons when changing modes
Web Gridmap red Grid dots now shown when QSO is logged
Fixed expansion of SENTRSTCUT in macros
Downloading and burning an image to your microSD card
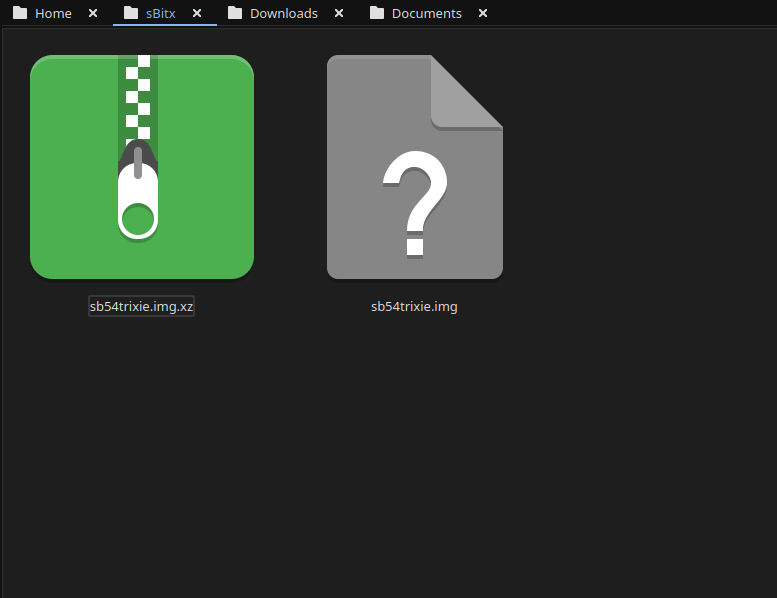
Firs thing you need to do is go download the new image. The new image is a zip file so you have to extract it and then you can move on to step 2… This is where you use a tool like Balena Etcher to write the disk image to a micro SD card. I use 32GB cards since it is what the radio started out with. They seem to work just fine to be honest. I did have to write the image twice for some reason. The first time the image would not boot past the splash screen so I re-burned it and then it worked fine. Balena Etcher is an easy to learn tool that makes this process pretty simple to be honest. If your using Linux it might take a little to get it running, but google will tell you what to do here as well. I ended up running it in my terminal so I could shutoff the sand box feature. I know this is probably a bad idea to remove the sandbox but I have confidence in Etcher so I am good with it. Launching it from the terminal, you are presented with this panel. The first one is where you choose the disk image you want to burn, the second one chooses the media (hard drive, memory card or the like) and then you click flash and wait… It will take a few minutes and you are presented with a ready to use version of the sBitx software ver. 5.4. You still need to copy a couple of files from your existing version of the sBitx you are using. It is not a big deal to do this as you just need to copy them to a USB memory stick so you can later put the back when you swap micro SD cards in the radio.
The next step for me, involved me taking my radio apart some what. I use the on board Raspberry Pi micro SD card slot on the Pi. This means I have to take the front of the radio loose from the chassis and open the radio enough to be able to swap out the two sd cards. Dont make my mistake and use the same card for both images. Make sure you use a new card for the new image and save the old one in case something goes wrong so you can go back to the working version while you solve the problem. This is pretty easy and only requires you to remove 4 screws to succeed. Once the new card is installed, you are off to the races! Just power up the radio as normal, being sure to have either a dummy load or a tuned antenna attached as it will auto launch the radio app and if it is on FT8 it just might start answering a CQ if your not ready! HaHa! The card really is easy to reach, just be careful to not unplug anything like the video cable you see right next to the card. I have my cable wrapped in copper tape and grounded to help reduce RF hash from the Pi, this is a hack that actually works really well. This cable is one of the prime culprits of rf hash in this radio so just doing this one mod will improve your experience a lot.
This is the new splash screen that you are greeted with while the software package loads everything. I really like this new look the dev team brought to this release. Once the software loads, it will auto launch the sBitx radio app and you will have the view below. It is in FT8 mode here since I was last using this mode and band. There are some things you need to do before you start using the radio, such as entering into Menu 1, then touching the “Set” button and in here you will enter your callsign and grid locator you are currently operating in. This is used for logging and digital modes. But it helps to do this first thing so you dont forget. I also keep a note about this in my case so I dont forget to do this step when I am out traveling and activating POTA parks with this radio.
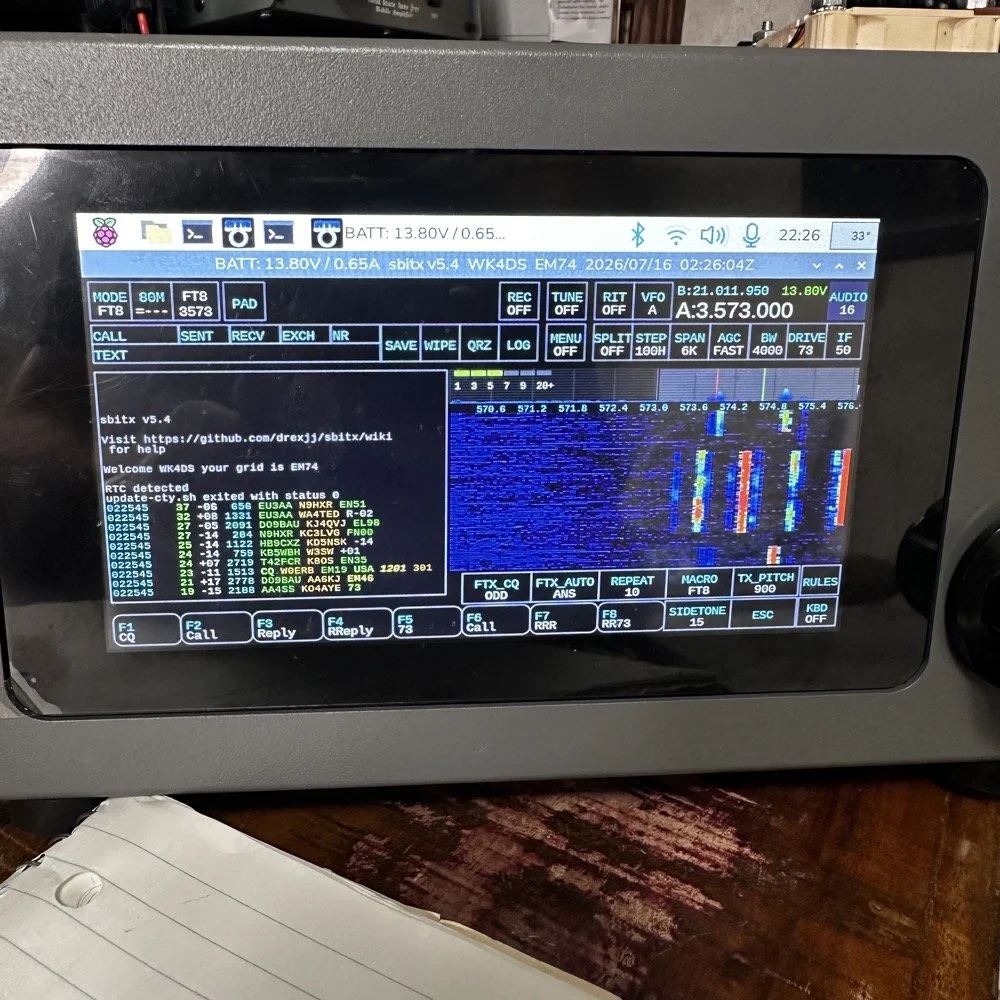
Personal thoughts about the HF Signals sBitx SDR radio
I only use my sBitx for a couple of modes. FT8, FT4 and CW. I rarely use SSB or any other voice mode for that matter. I just prefer CW to be honest. That being said, I tested out the keying on the current release and it works perfectly for me. I normally dont run over about 22WPM though so if you work faster than me, just know I wont be speeding up with this radio…lol. I can get decent code out of it at 25WPM, but now we are getting into the realm of my skills not being up to the task too… sooooooo. I dont know which is to blame past this point.. HAHA!
I like FT8 as it will work when the bands seem to be closed for even CW. That is nice if you are activating a POTA park and the band closes on CW with 8 calls in your log. This way I can hop over on to FT8 and more often than not, I will get those needed calls in the log and probably more, in spite of the fact that the output power on a band like 15 meters will only be about 12 to 15 watts depending on battery level. I can get a lot more output power on the low bands but on the higher bands I will not get a lot of power out. This just further solidifies my stance on using FT8 in poor band conditions and the ability to make contacts with it natively in the radio. I would like to say something else about this radio. I really like the community around it. Sure there will be the occasional disagreement here and there. It is a group of humans after all… But for the most part, it is a group of experimenters and coders and general operators that love to tinker with their machines as much as operate them.
Speaking of images on disks. Over the last few years I have amassed a small collection of different images. You might think this is silly, but there is a method to this madness. You see, for one, I have a full collection of images starting with the factory shipped version that came with the radio. The factory version is the one with 381 written on it, as this is the serial number of my radio. I have a copy of the Field Day release and the first 64 bit release. As time passed and new versions were released, I get them and burn them to a new card and save the old one. I can install any one of these cards and it will instantly become that version radio again. That is pretty cool. Honestly though, the other reason I keep them all is that there is logbook data stored on them as well as the later versions all have my config files on them that I can get to should the card in the radio die for some odd reason.
Another really good idea for a person getting one of these radios is to use the disk copier app and make a backup of your image on a new micro SD card. This way should the one in the radio die, you can simply replace it and keep going…right after you make a new back up. The reason I keep circling back to this is that these card are not the most reliable on earth. All of mine have worked well, but there has been some people that have had their card get corrupted and dont have a backup. That is tough spot to be in to be honest. Anyway, I thought I would share a little about one of my favorite radios and what is going on with it.
You can help support this channel by using these Amazon Affiliate Links as well:
QRP/Portable Radios:
Antennas & Tuning:
CW Equipment:
Power & Accessories:
Organization & Transport:
BONUS ITEMS (Optional 16-20):
73
WK4DS - David

Activating with the TenTec Scout 555 after a 2 month hiatus!
When you love CW, you tend to migrate to certain kinds of radios. I migrated to TenTec and Elecraft rigs mostly, with a few smaller radios thrown in for good measure. I love TenTec radios for CW operation as they seem to have been tailor made for the mode. They work well as SSB machines too, but they REALLY shine on CW. Since we all know this about me, it is a given that if I want to activate with a simple radio that isn’t a lot of fuss, that I will choose the Scout 555 or mt Argonaut 5 over about anything else in the shack.
When you love CW, you tend to migrate to certain kinds of radios. I migrated to TenTec and Elecraft rigs mostly, with a few smaller radios thrown in for good measure. I love TenTec radios for CW operation as they seem to have been tailor made for the mode. They work well as SSB machines too, but they REALLY shine on CW. Since we all know this about me, it is a given that if I want to activate with a simple radio that isn’t a lot of fuss, that I will choose the Scout 555 or mt Argonaut 5 over about anything else in the shack.
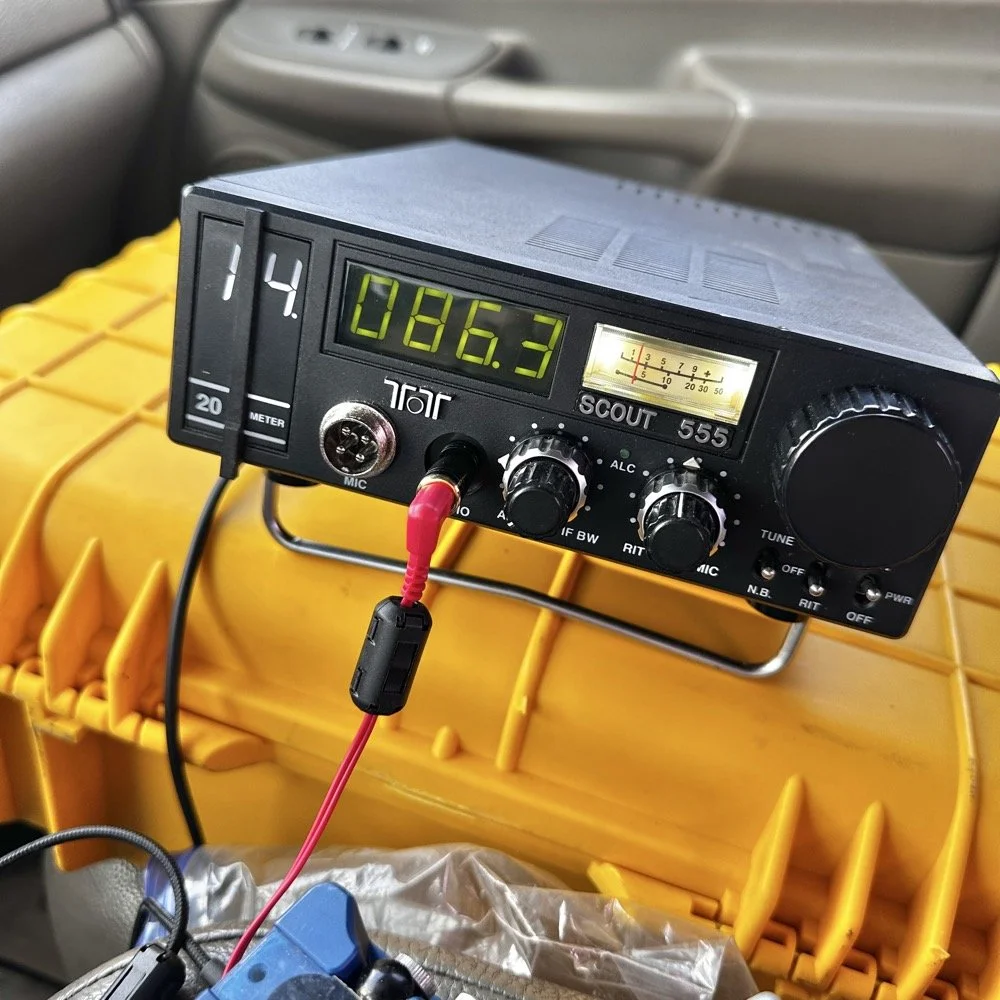
TenTec Scout 555 ham radio running cw on 20 meters
Setting up a POTA station at a local state park
When people start out activating a park in POTA, they tend to want to go to a local park first to get the bugs out of their kit. I am no different here. The only real exception is that I love going back to this park over and over. Back to the subject at hand though, I normally setup in a similar manner every time I go to a park. It usually goes something like this.
Find a spot that I can back into the parking space since my antenna mount is built for my receiver hitch on my truck and I prefer to lay ground radials so I don’t want people running over them when they drive by.
Once backed into the space, I will deploy the antenna first. I do this for a couple of reasons. First is that I want to get it up as fast as possible to avoid rain if it is imminent. Second I will spend some time tinkering with the antenna system to see what it does on the nanoVNA and this is kind of fun to me by itself. Antenna theory is fascinating and I love looking at how these devices work. Once I have the vertical up, radials deployed and the coax ran to the truck cab, I move on to the next step.
Tune the antenna to the band I am going to use. This seems obvious, but I have forgotten to do it in the past and it doesn’t work well unless I do it… I use the nanoVNA and I will usually tune the vertical first by collapsing it till I am close to the desired frequency, then I will move the radials around till I have the best SWR possible with the system I have deployed. Usually this lands me between 1.1 and 1.5:1 SWR at the base of the antenna.
Get out the radio and deploy it in the front passenger seat of the truck like you see in the photo above. I use the storage case for the radio as a table to sit it on. This works really well. I keep the keyer and cables for everything in the case with the radio. This even includes the earbuds I use with it. The only thing not in the case with the radio is the Begali Traveler key as it lives in a case of its own.
Setup the computer to log with (if I brought it) or get out the pens and notebook. Go ahead and write all the pertinent data in the log or computer before I start calling CQ.
Spot my activation on the POTA website before calling CQ as well. This has turned into a mess for me in the past to be honest so I do this step before calling QRL too. I want the whole system to be primed prior to starting the activation proper.
Call QRL and find a clear frequency before launching into calling CQ. This is a big deal to me and a step I make a deliberate effort to do so I don’t walk on someones QSO that I cant hear immediately.
Once all of this is done, which takes only a few minutes in reality, I start calling CQ and get going. Now I also understand that my spot and my actual operating frequency might differ due to people being on a frequency that I chose to start with, but this isnt too big of a problem as the RBN will usually update it pretty quickly once I start calling CQ.
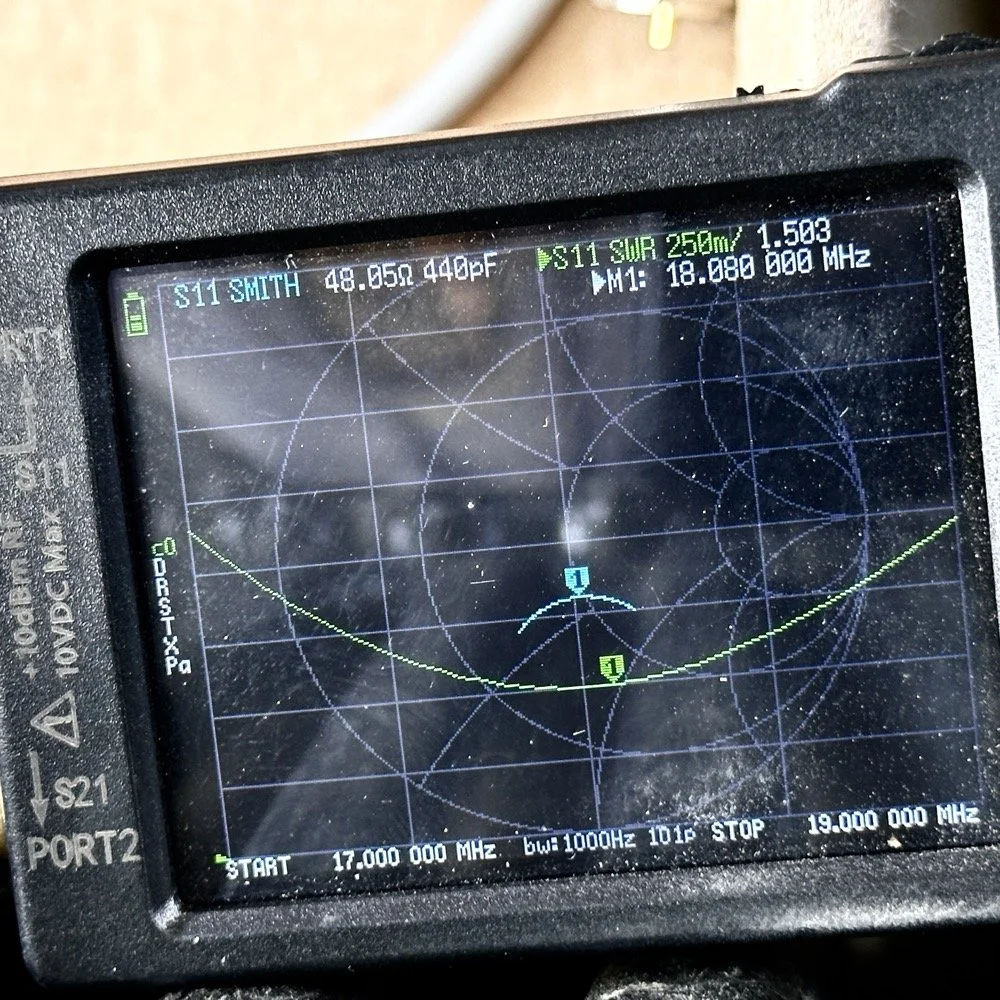
Tuning the antenna for use on a band.
As you can see in the above photo, I have already tuned the antenna for use on the 17 meter band. It is centered on the CW portion of the band and I have also tuned the radials to get the lowest SWR possible with the setup like it is. With it like this, I think I am going to use this plot to figure the inductance and capacitance on the Smith chart to see what it would take to get it to 50 ohms resistive or as close as possible to that. This is why I use the nanoVNA too. You can see the plot of SWR versus time here on a portion of the radio spectrum of my choosing. This time I chose 17mHz to 19mHz and the marker is set to 18.080mHz for my point of reference. With it set like it is, I can also see it is at 48.05 ohms of impedance and it is capacitive 440pF as well. I can take this data directly into the Smith chart and calculate the needed components easily.
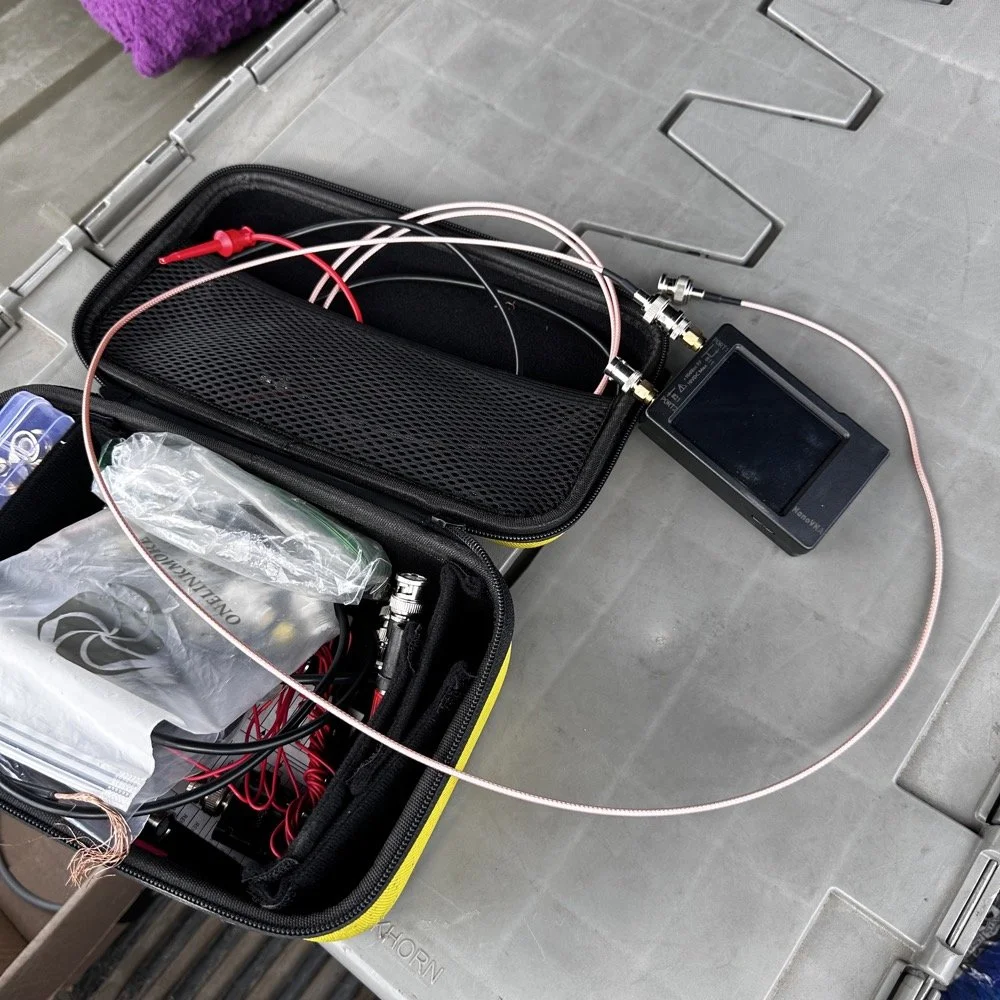
This is the setup I use currently. I find it easier to use this small jumper than trying to read the nanoVNA directly connected to the base of the antenna. The sun makes it very hard to read this device and adding the short jumper allows me to put it in the shade. Also, just look at how small this instrument is compared to regular antenna analyzers… That one thing in itself makes it a winner in my book.
The procedure for tuning goes a little like this. I will first get the antenna put together. This whip is long enough that it will tune to about 12 mHz if fully extended. This is good as it will allow me to shorten it to 20 meters by simply collapsing a few sections. Then when it gets close, I will pull down the bottom section a little at a time till the curve looks like what you see above on t he nanoVNA. I try to get my rough tune by shortening the top first as those sections are smaller in diameter and doing this will allow for the passband to be the widest possible. I can usually get the whole CW portion of the band this way on everything except 80 meters which has a huge area for CW… also this vertical is woefully short for that band anyway…but that is a different conversation.
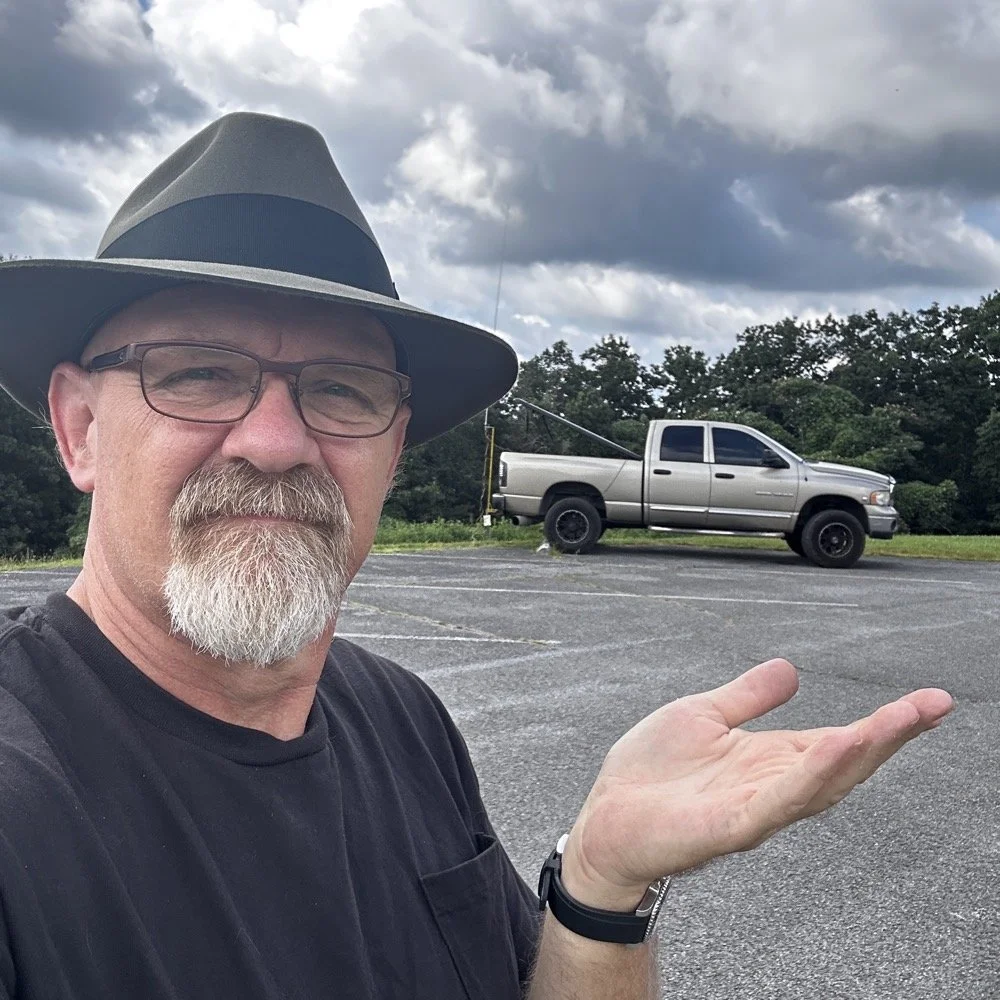
The operating position for POTA
The truck will usually look like this when it is up and operational. I really like operating out of my truck, it is so simple for me now that I have the system dialed in. POTA can look like a lot of things and I find it interesting how each one of us comes up with a unique setup for our uses. I prefer to setup in my truck for a couple of reasons. The main one is that in the summer, I can run the AC and keep cool! The second one is that I can access my truck power as I have a diesel and that means I have two batteries in the truck. I dont run over about 40 watts with any of my POTA rigs so this never depletes the batteries even when I setup for several hours. Plus I can simply crank the truck to recharge the batteries too… win win.
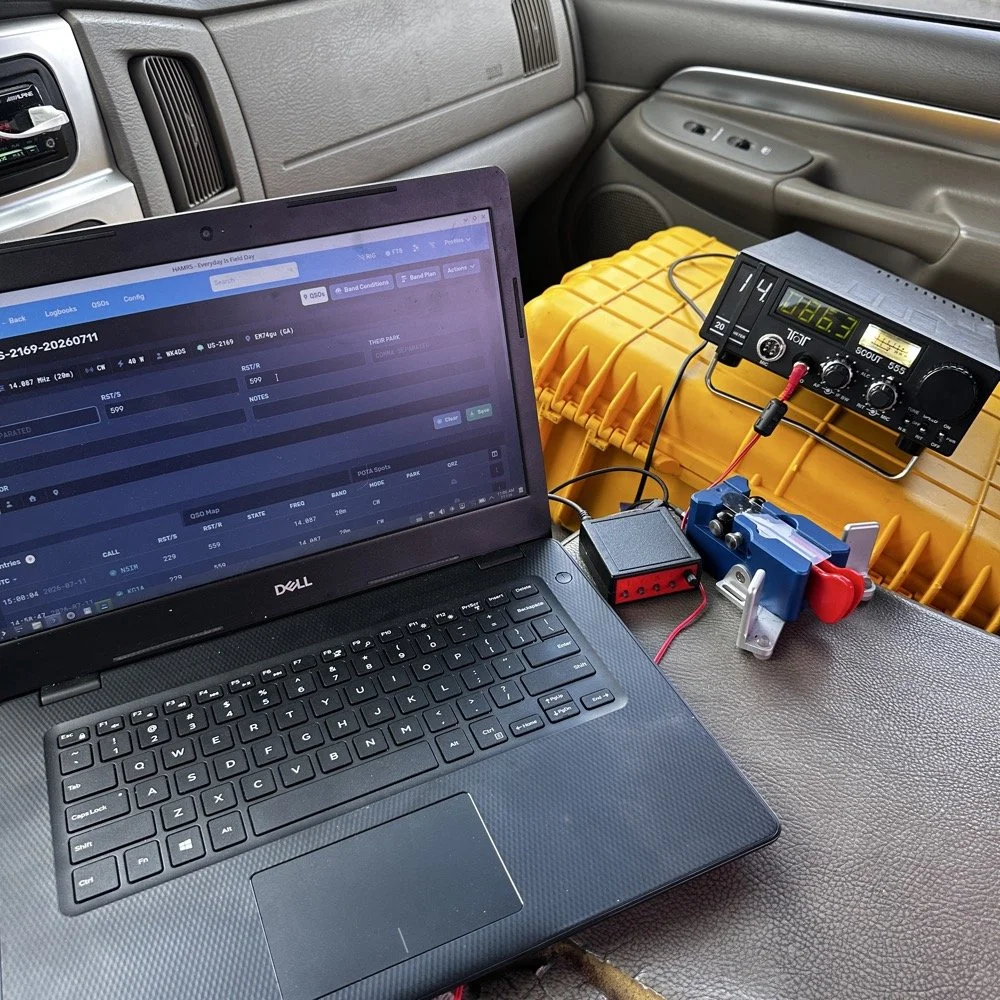
This is the operating position for this day. It looks like this on most days as it is the fastest way for me to get on the air with my POTA rigs. You have the Dell Inspiron computer running Linux Open Mandriva, a Hamgadgets Keyer, the Begali Traveler CW paddle, and the TenTec Scout 555 portable HF radio. This is a solid rig for someone who wants to run SSB or CW and maybe could get this to work with an external sound card for some of the digital modes too. My friend, Roger KG4WHI, has gotten a Scout to do FT8 so i know it is possible.
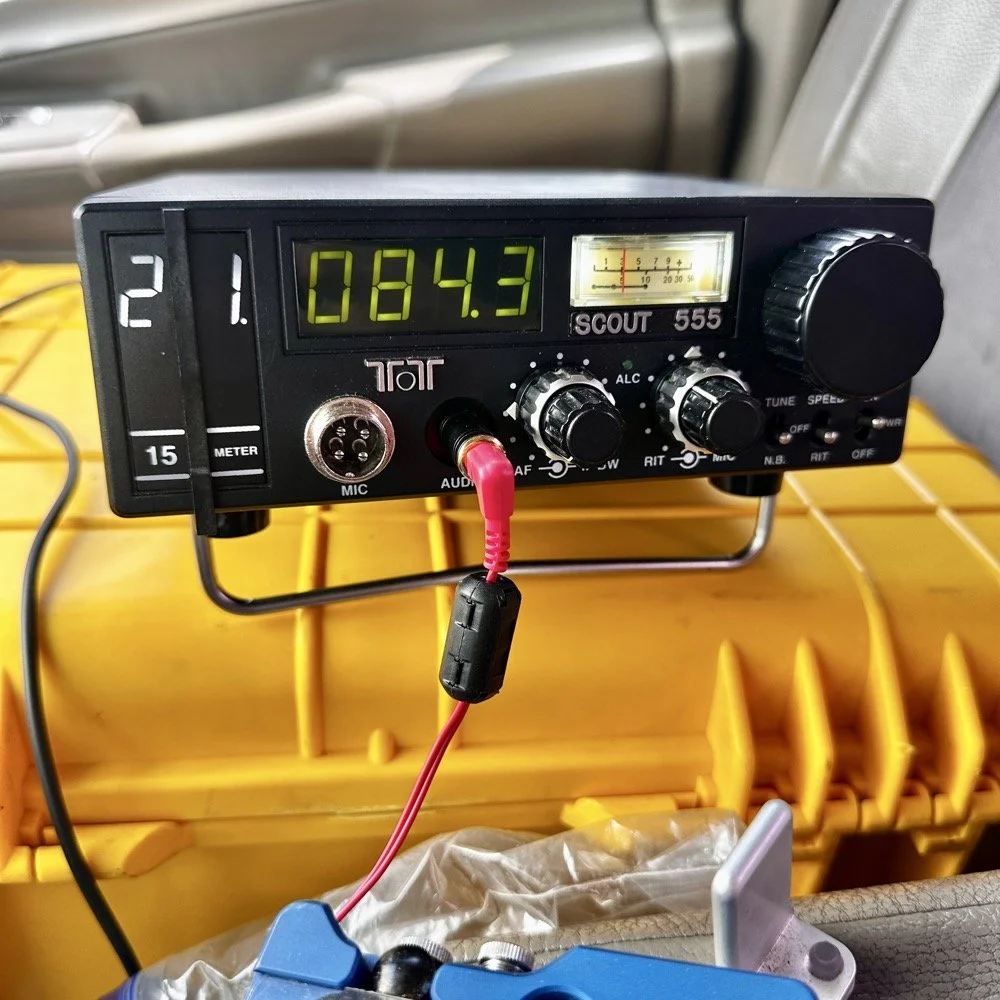
This was the last band I operated on today. I started on 20 meters, made a dozen or so contacts then moved to 17 meters where I made probably 16 more and then I finally finished with me making 2 on 15 meters if memory serves me right. It wasn’t many, but I was able to get a couple in the log on 15 meters as well. Shoot I was even able to get a Spaniard in the log today. They were weak but I was able to get decent copy on them. It is always a good day when you can add DX to the log on a POTA activation in the USA. You can also see something else in this photo. This is how low I hold the volume when I operate a radio on CW. You want the volume just above the noise floor. This allows you to hear stations that would normally be impossible if the volume was turned up just a little more than this. It is a phenomenon that I learned a long time ago and it is real. It works on any radio too.but you have to wear good headphones for it to work.
All in all it was a great day with 30 contacts in the log from all over the country and one from the EU. I decided to break the system down as a storm front started to roll in so I would not have to do it in the rain… haha. This turned out to be accurate as it started raining cats and dogs right after I left the park too. That was a close one…
You can help support this channel by using these Amazon Affiliate Links as well:
QRP/Portable Radios:
Antennas & Tuning:
CW Equipment:
Power & Accessories:
Organization & Transport:
BONUS ITEMS (Optional 16-20):
Till next time, I hope you have favorable conditions and the DX is calling! POTA on and 73!
David
WK4DS

Ft Pulaski POTA Activation & Noise
When I went to Tybee Island Georgia recently, I had no idea that I would be within minutes of a POTA park! Ft Pulaski National Monument is park number US-0930 is right outside of town and I was able to get a couple of hours free to ride over and setup a radio to see if I could get my 10 within the window of time I had.
When I went to Tybee Island Georgia recently, I had no idea that I would be within minutes of a POTA park! Ft Pulaski National Monument is park number US-0930 is right outside of town and I was able to get a couple of hours free to ride over and setup a radio to see if I could get my 10 within the window of time I had.
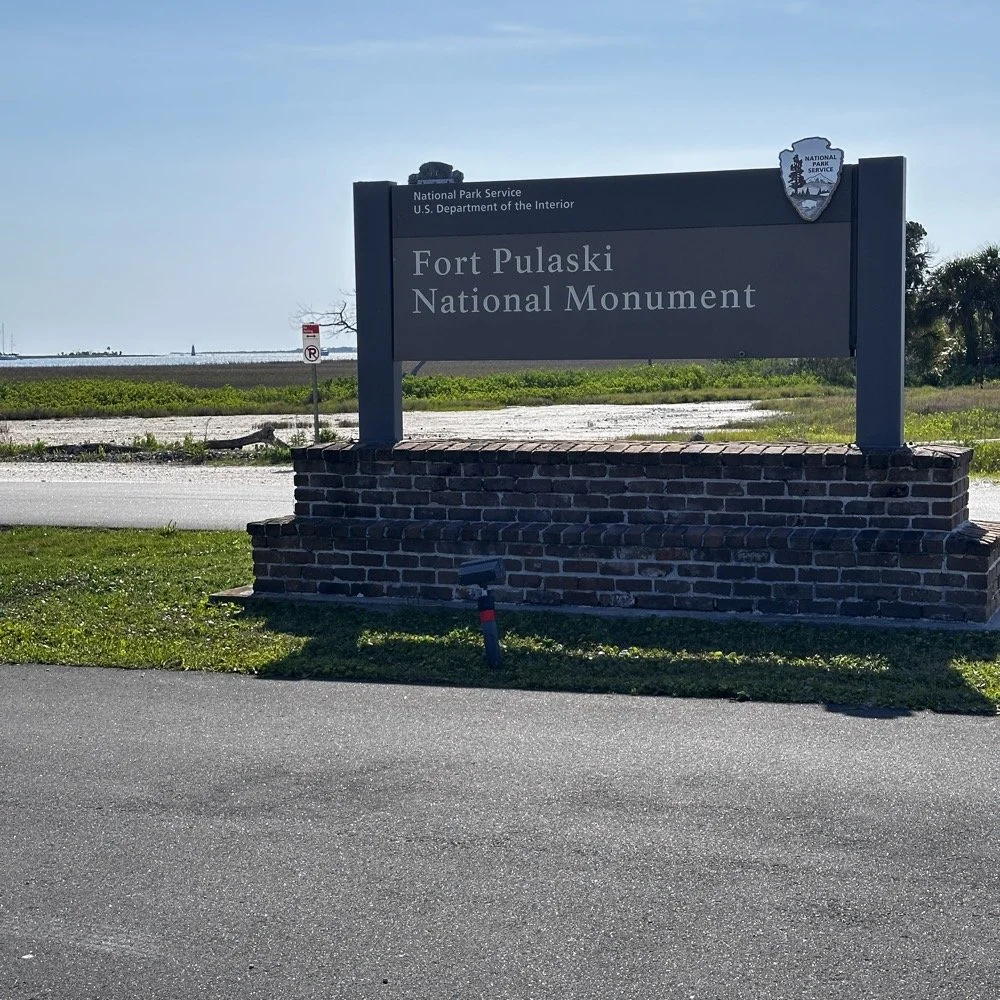
Military POTA park - US-0930 Ft. Pulaski National Monument
When I arrived at the park entrance, I was greeted with a pay station manned by a park employee. The actual fort is across a bridge once you pay the fee…but…there is a loop hole here. You see, the entirety of the park covers way more land than just where the fort is located…way more. The marshland all around the area is also inside the park boundaries. Well, it just so happens that there is about 7 parking spaces OUTSIDE the park entrance! These are for people that want to walk on the footpath that runs along side the road heading out to Tybee Island. The foot path is actually the old railroad bed, but the national park service does a great job of keeping in up for people to ride bicycles and walk on. So I parked in this area for two reasons. One, it is free to park here…and two, it is way faster to setup since I didn’t have to mess with paying to get into the park and then driving to the other side of the bridge to search for a good spot to setup the antenna.
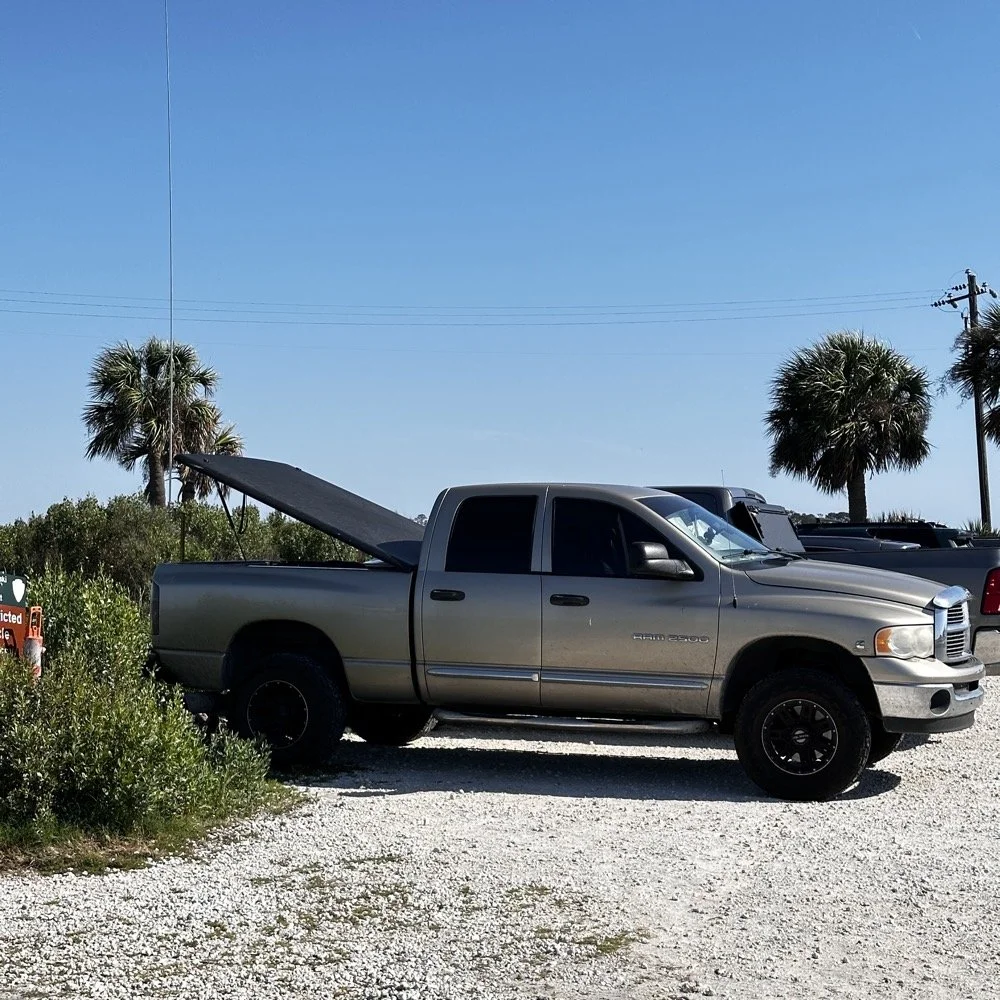
Setting up a temporary POTA radio station
Today I used the 18’ whip and just simply hopped on 20 meters to start with to make sure I got my minimum of ten QSOs in the log before I ran out of time. I had really high hopes for this location too since I am VERY near the ocean here. We all know salt water adds several dB to your signal! haha. See those power lines and that pole in the background? Hold that thought.
I ran the radio into the cab as usual since I needed the power from the truck to run the radio today. I also didn’t plan on running anything other than the TenTec Scout 555 radio today as I was not sure how long it would take to get the activation in the bag, so I figured I would stick to something I knew would get the job done…CW. It was at this point that I also realized that since I had not planned to activate a park on this short trip that I didn’t bother to bring my logging computer either… dumb, real dumb… It was back to the old reliable paper logbook for this one. I keep a composition notebook in the truck just for this occasion and a couple of pens just in case I forget to bring one of those as well. So I was good to go for logging.
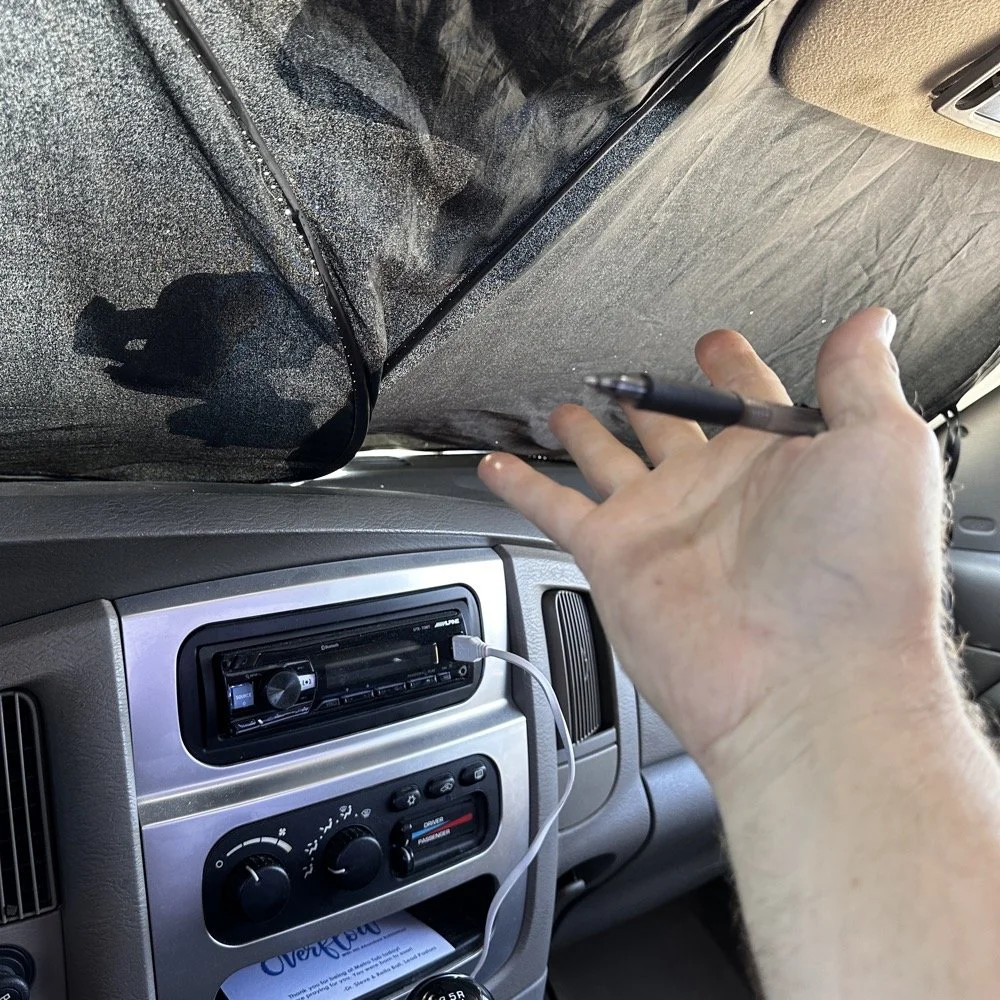
Here is something that a lot of people don’t consider. How to keep the hot sun from baking you alive in your car while activating. I simply put up my window shade and rolled down the windows to let the breeze into the truck and it made it very tolerable. The TenTec Scout 555 amateur transceiver has become one of my all time favorite POTA radios at this point. The simple nature of the design, the excellent CW operation and the novelty of the band modules makes it a lot of fun for me to use. Having the window shade in place made seeing the display on the Scout as well as keeping the heat at bay a good thing.
Below you can see how I transport the radio and some of the band modules that I keep in the case with it. At some point I am going to finish adding the one or two missing from the set as I have quite a few in the house so I just need to do it. Also notice the one special one in the case. That 60 meter band module is special. It is the only one on earth that I am aware of at this point. To learn more about it follow this link to see the blog post series where I build this module out of an 80 meter donor module. I keep this radio in a quality hard case to protect it from dust and impact damage as well as water as you can see the water seal on the lid in the photo as well. I also print “field manuals” for all my radios and keep them in the case. TenTec owners manuals have everything you need to keep the radio going, up to an including alignment procedures and a full set of schematic diagrams. Also in the case is the CW memory keyer and under the radio is assorted cables for connecting the keyer and the power cable as well. Another thing of note is the PL259 to BNC adapter that I keep on the radio. This standardizes all my coax cables for POTA to BNC cables only. I don’t run more than 50 watts on my radios so I can use BNC connectors without problems and these work really well. They are fast to connect and break down and work really well. The only down sides I can find are they lack water proofing, and are fragile to some degree as compared to PL259 connectors.
My CW key for today was the Begali Traveler portable CW key. This dual lever paddle key is one of my favorite keys and stays in the truck at all times now. MY N3ZN key that Tony built stays in the camper and I am working on getting that station up and running soon with an EFHW for 80 meters on it. I am hoping that I will be able to get 40, 20, 15 and 10 without much issue as well with that antenna. I have the transformer built, I just need to hang the wire at this point…anyway, enough with that rabbit hole and back to the activation!
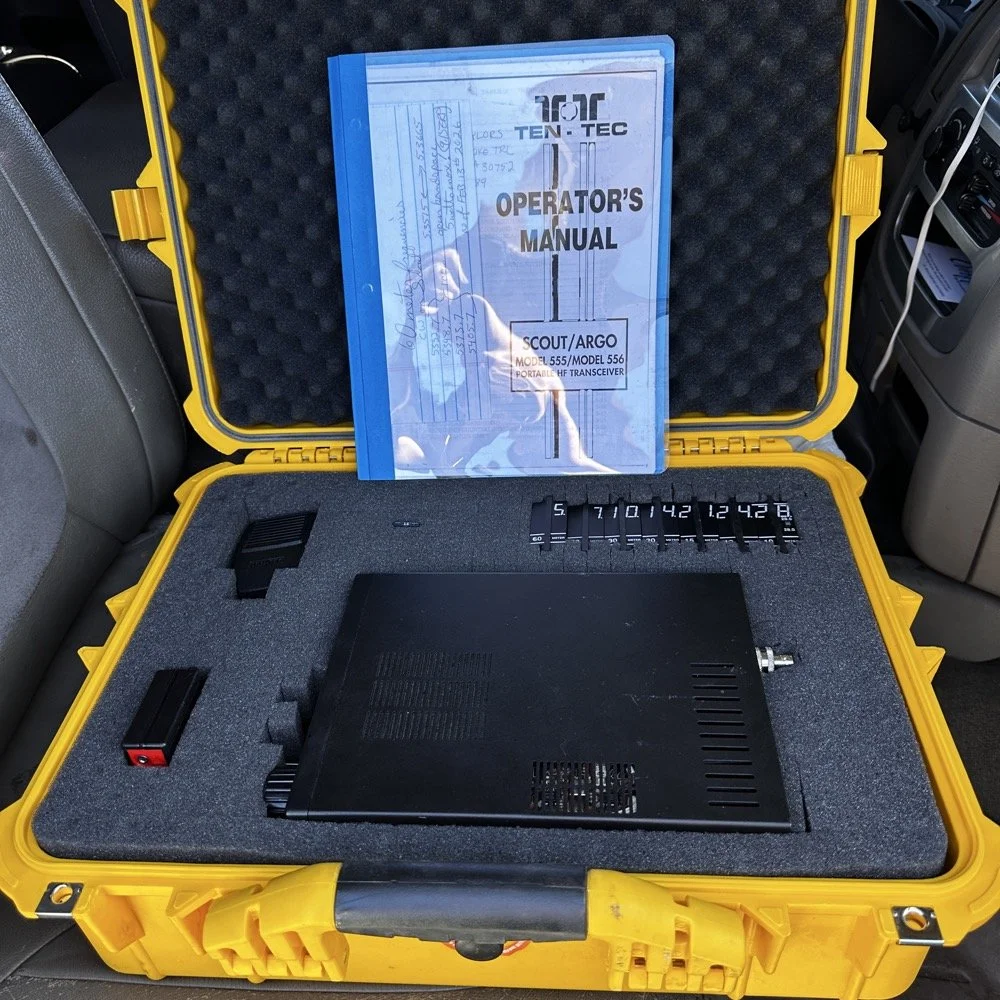
Properly cased TenTec Scout 555 ham radio with hard case.
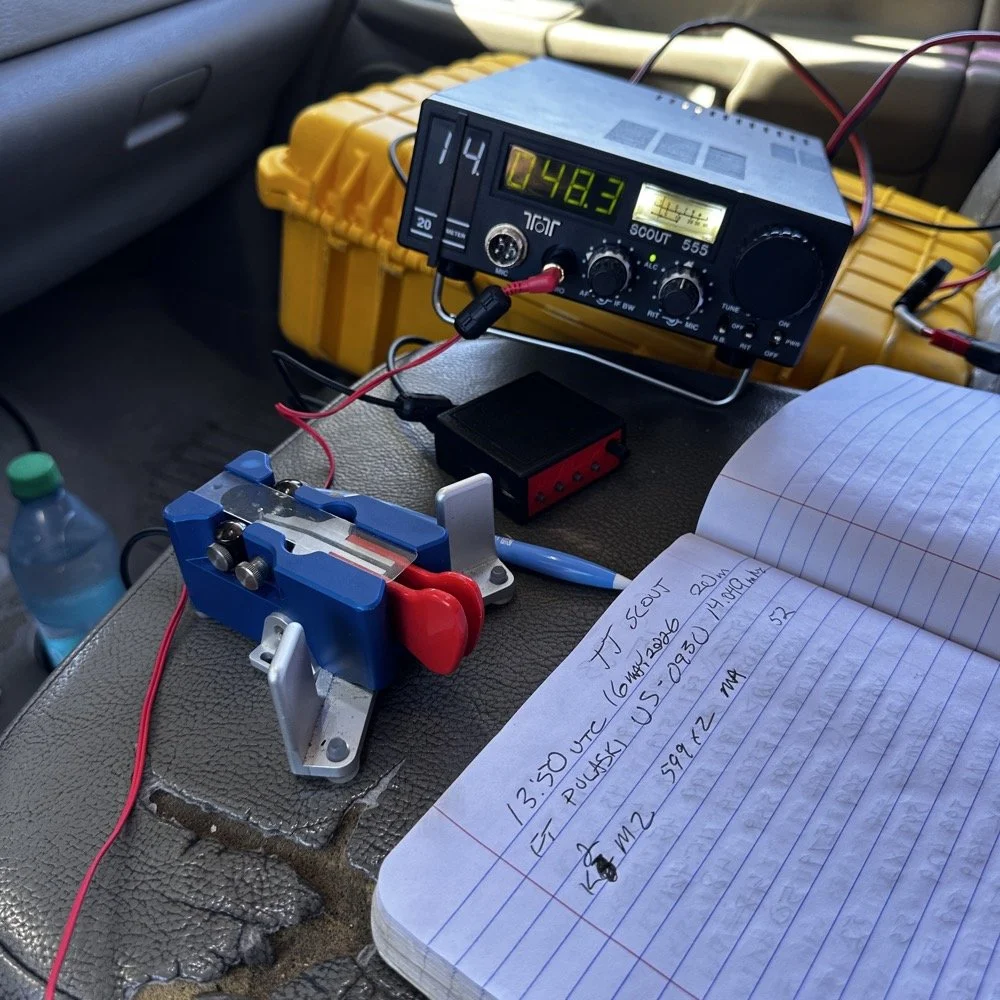
Solving power line noise on your TenTec Scout 555 ham radio!
The next few photos tell a tale about the power lines you saw earlier in the story. You see, when I powered up the radio, there was this terrible power line noise on the whole band, It was strong too… I was deflated to think that I had went to all this trouble only to be shut down with a bad power line connection nearby… I don’t have an external RF gain control on the radio at all, it is internally controlled by the ALC circuit from what I can tell. So there is no way to remove this noise with RF Gain… The noise was a little over S6 creating a really high noise floor to work with. Then I remembered that this particular radio came equipped with the optional Noise Blanker module installed from the TenTec factory! I flipped the switch and magically the noise just…vanished…
The noise floor dropped a solid 2.5 S units and that made a HUGE difference in my ability to hear weaker stations trying to call me. People will say that an S unit is not a big deal, well it is a big deal when it is measuring band noise! Suddenly stations were coming out of the noise and I could hear them! This was the very first time I have EVER used a Noise Blanker and it actually did the job it was designed to do and help me hear stations on the air.
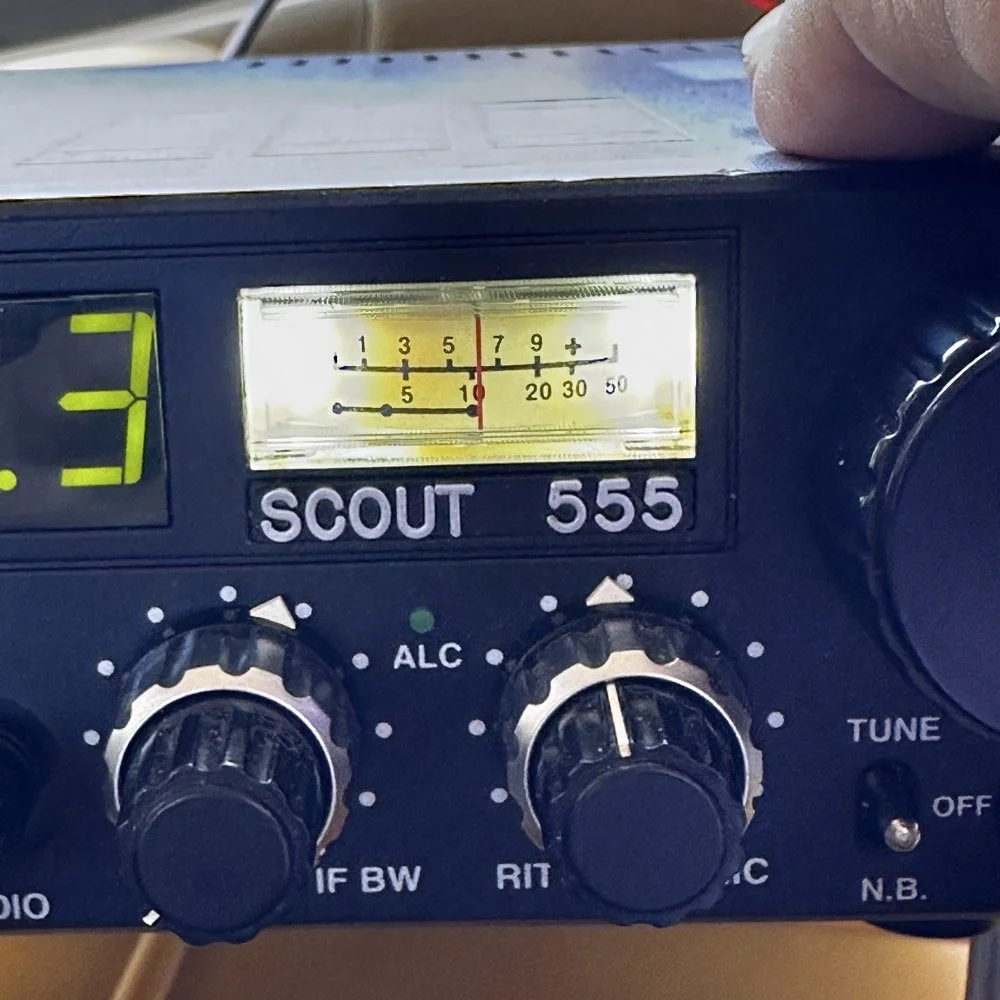
TenTec Scout 555 Radio with Noise Blanker turned off.
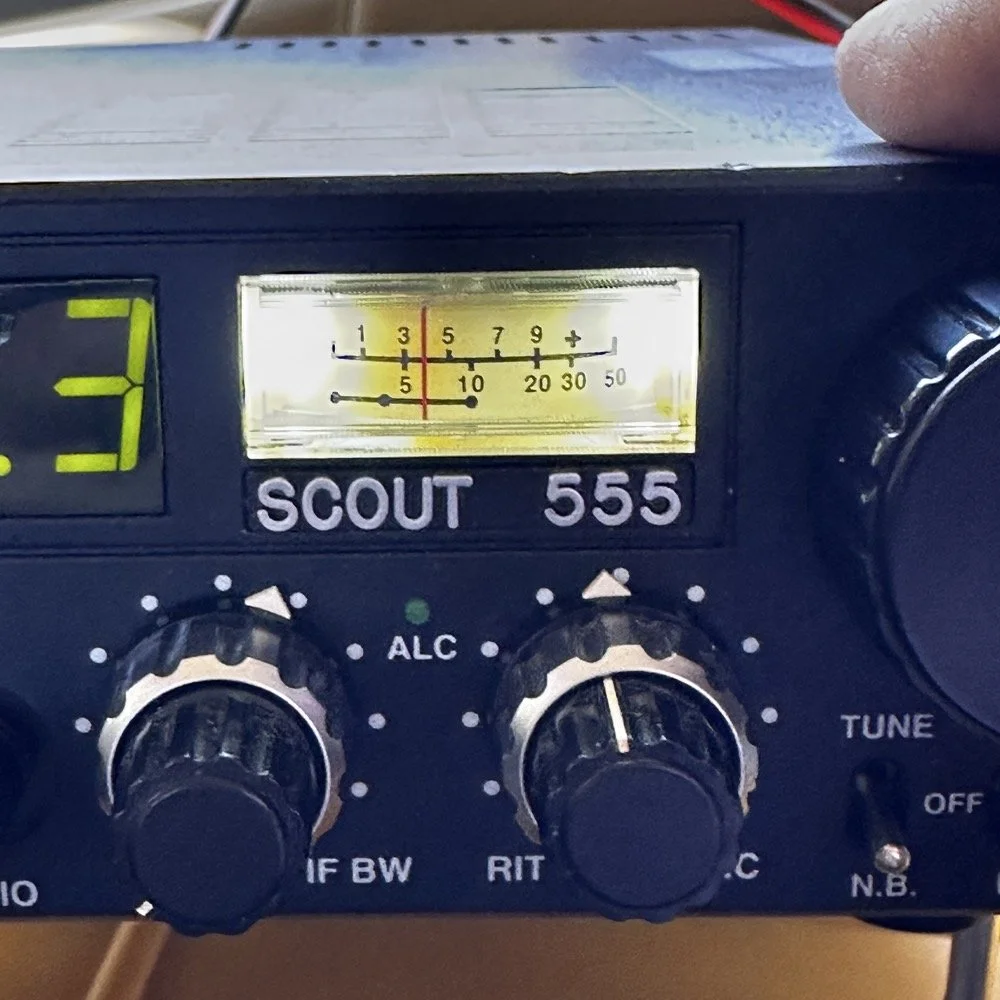
TenTec Scout 555 Radio with Noise Blanker turned on.
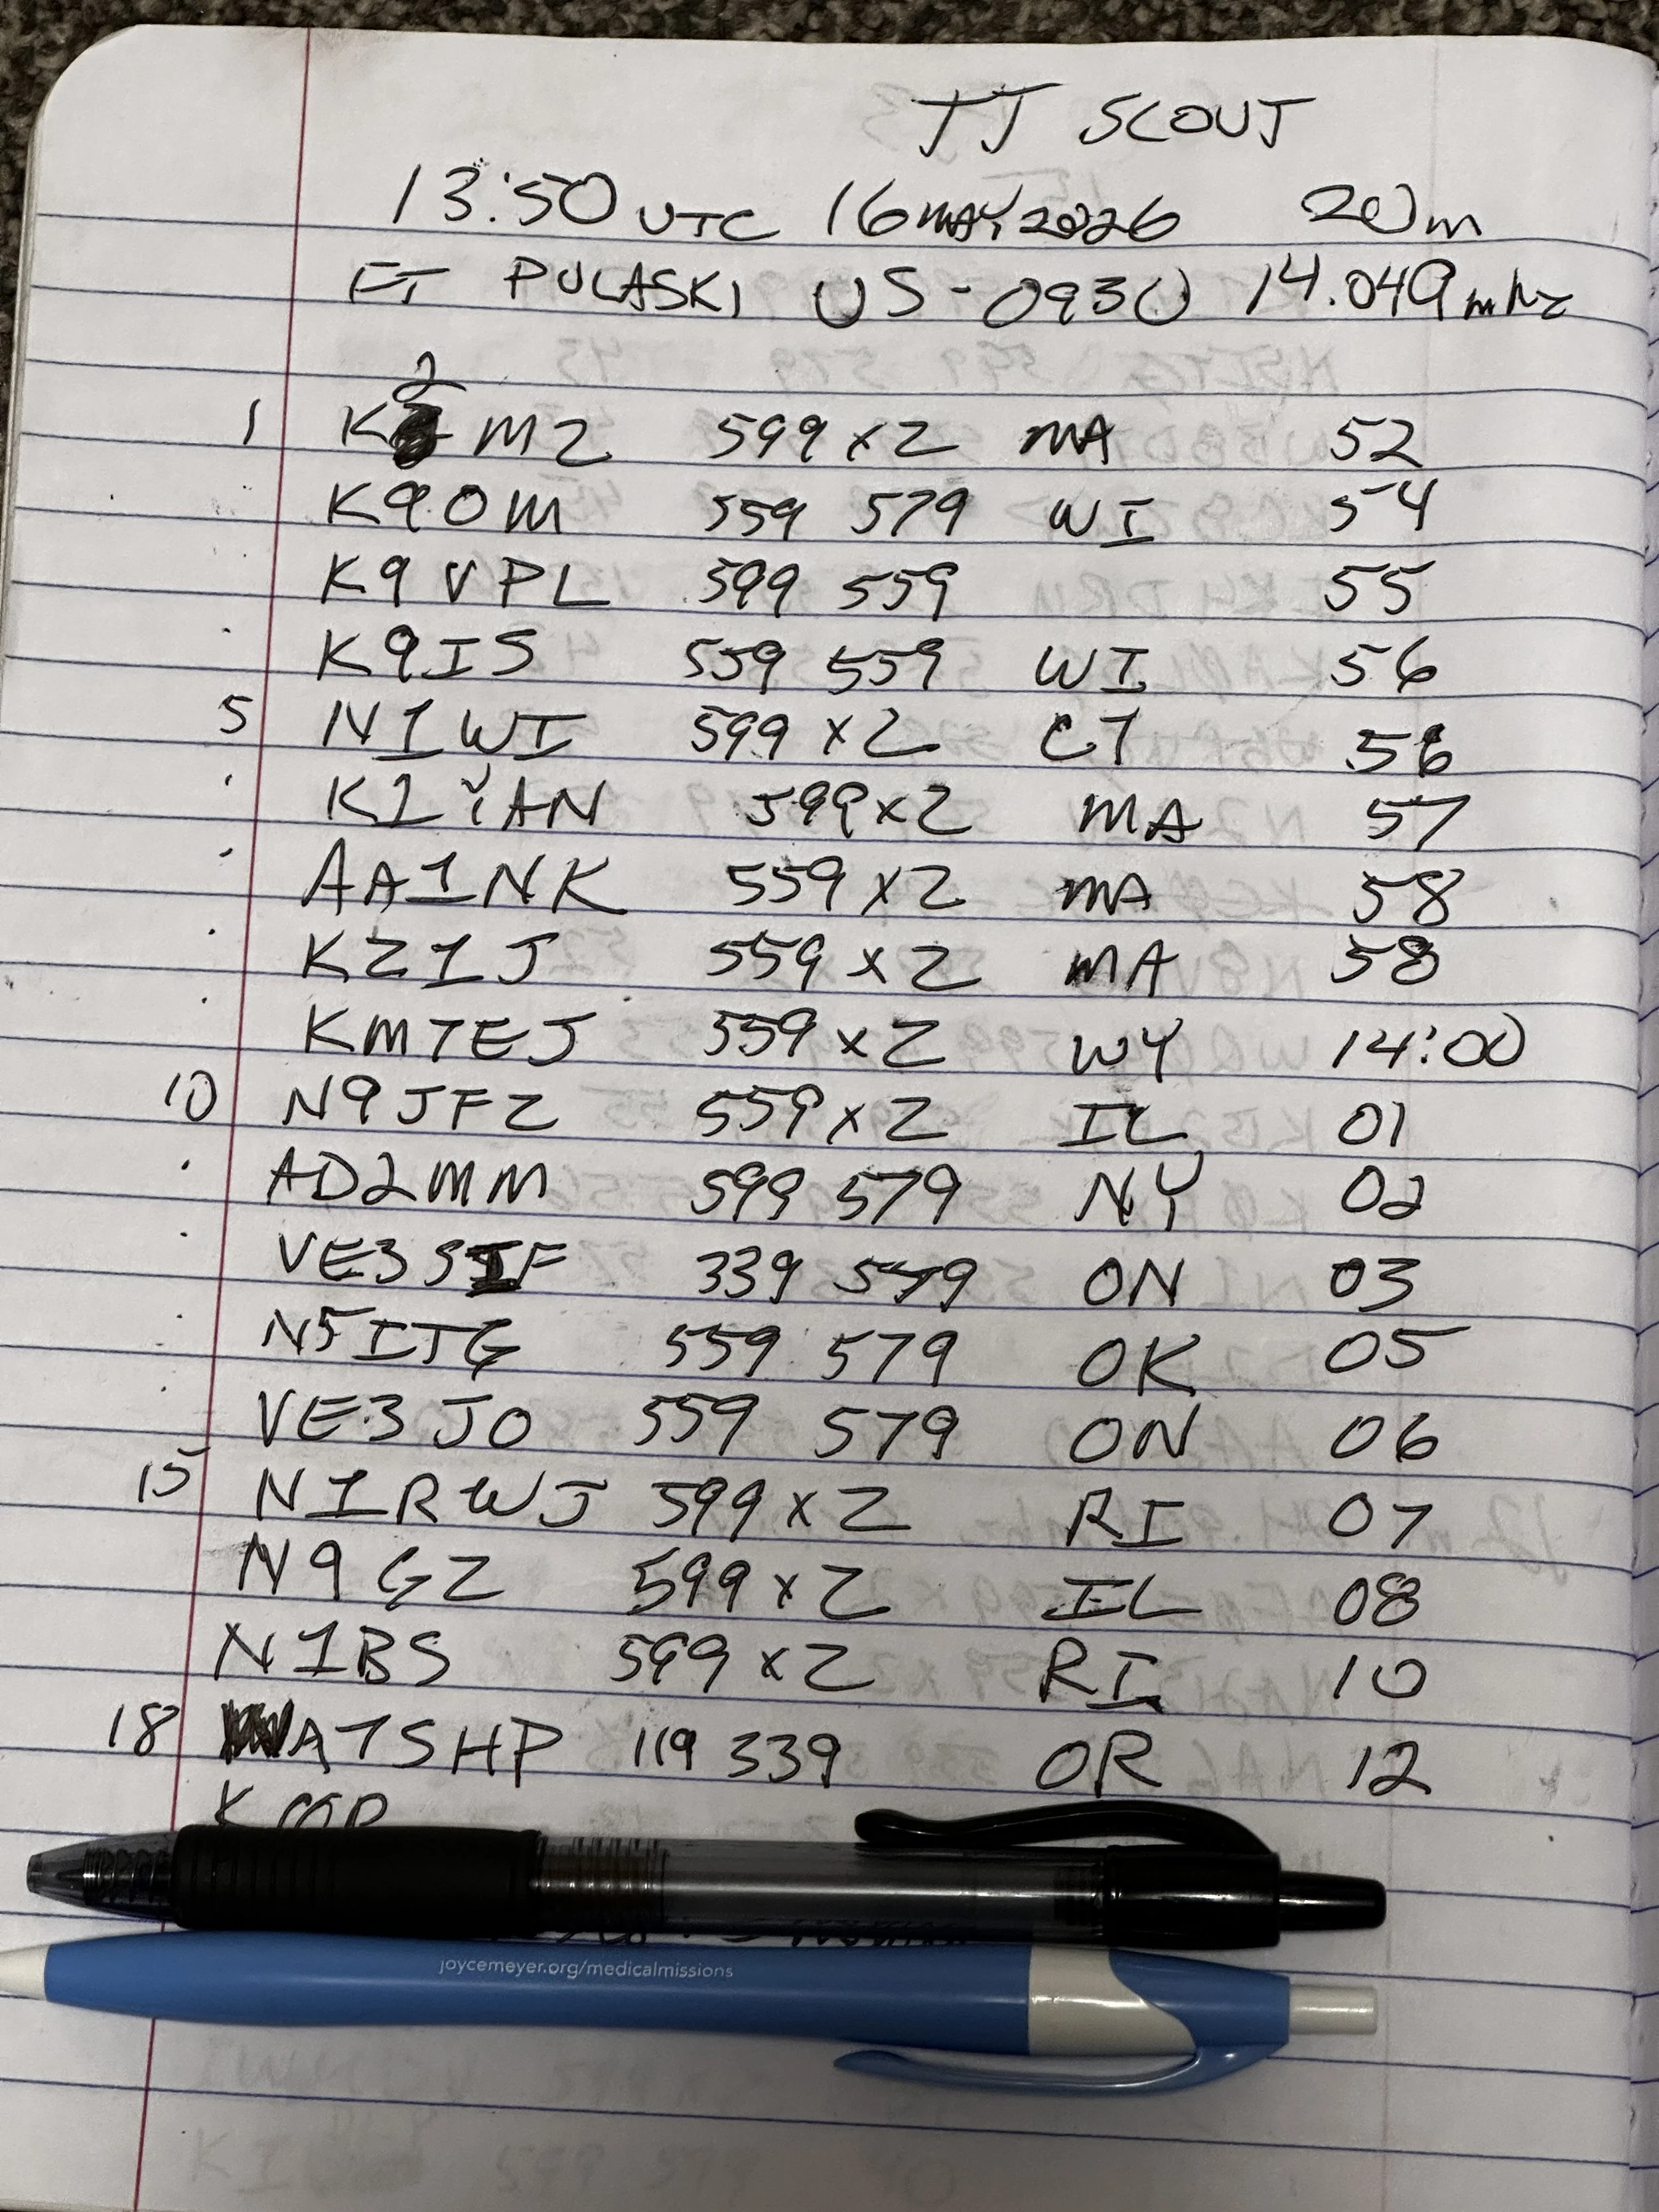
At the end of the day, I had worked 18 contacts, securing my activation and putting several old friends into my log as well. K9IS has been featured in the BLOG a couple of times now and I have many contacts with N1BS as well. It is always great to see callsigns in your log that you recognize. I did attempt 15 and 17 meters before I called it a wrap and packed up but worked exactly zero calls on those bands so I didn’t bother including the page where I just made some band notes and called it quits…lol. Anyway, this is a fun park once you get the noise blanker turned on and I highly recommend it.
Until next time,
73 - WK4DS
You can help support this website by using these Amazon Affiliate Links:
QRP/Portable Radios:
Antennas & Tuning:
CW Equipment:
Power & Accessories:
Organization & Transport:
BONUS ITEMS

Back on the Air for a POTA Activation
Today saw me back at US-2169 for the first time in a while…
Today saw me take the old Dodge over to my local park (US-2169) for a short activation. I have been busy in the machineshop these last few weeks so there has not been much time for POTA. I have actually not been to a park in several weeks and was starting to miss it.
Update on the park visitor center upgrade in progress. The grade work is done and they are framing the new building at this point. It is coming along nicely too.
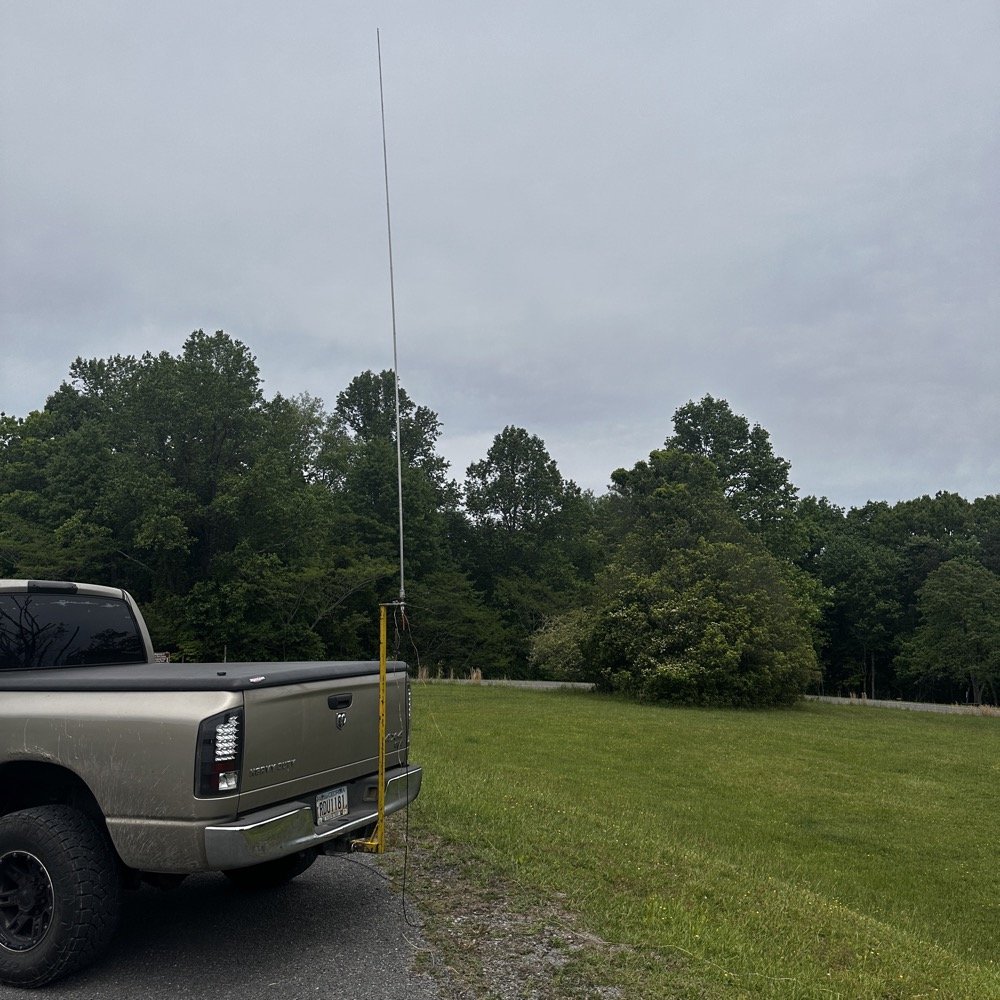
Setup of my POTA rig for HF operation
I went up to the frisbee golf course again as this is a great place to setup for POTA. A lot of people will use the nearby pavilion when they setup, but my antenna mount, being attached to the truck, makes it alot easier to operate from the truck. This is an amazon 18’4” whip that I bought, you can get one too at this link: Link to 18’4” whip on amazon Now, to just let you know, this is an affiliate link, but it doesn’t change the price from what I can tell… At the time of this writing, they were on sale for 27$, which is incredible!
Today I used the 18’ 4” foot vertical telescoping antenna and two radials attached to the base. Then ran a coax into the cab of the truck to the front seat where I normally set up the radio in the front passenger seat. Something I noticed today was that no matter what band I was on, the SWR plot would never get better than 1.5:1 (which is perfectly fine BTW) but I can normally get way better matches with different radials, which tells me that the radial length is more important that people let on…
Next, I chose the TenTec Scout 555 as it is a wonderful CW machine. It does have a little bit of drift in the VFO, while it warms up, but it is not enough for me to worry about. I started on 20 m in the CW portion of the band and hunted stations to start with. I worked another POTA site for a park to park contact before finding my own space and setting up there. I made 19 CW contacts on 20 m before I decided to move to 15 m to see what I could find there next.
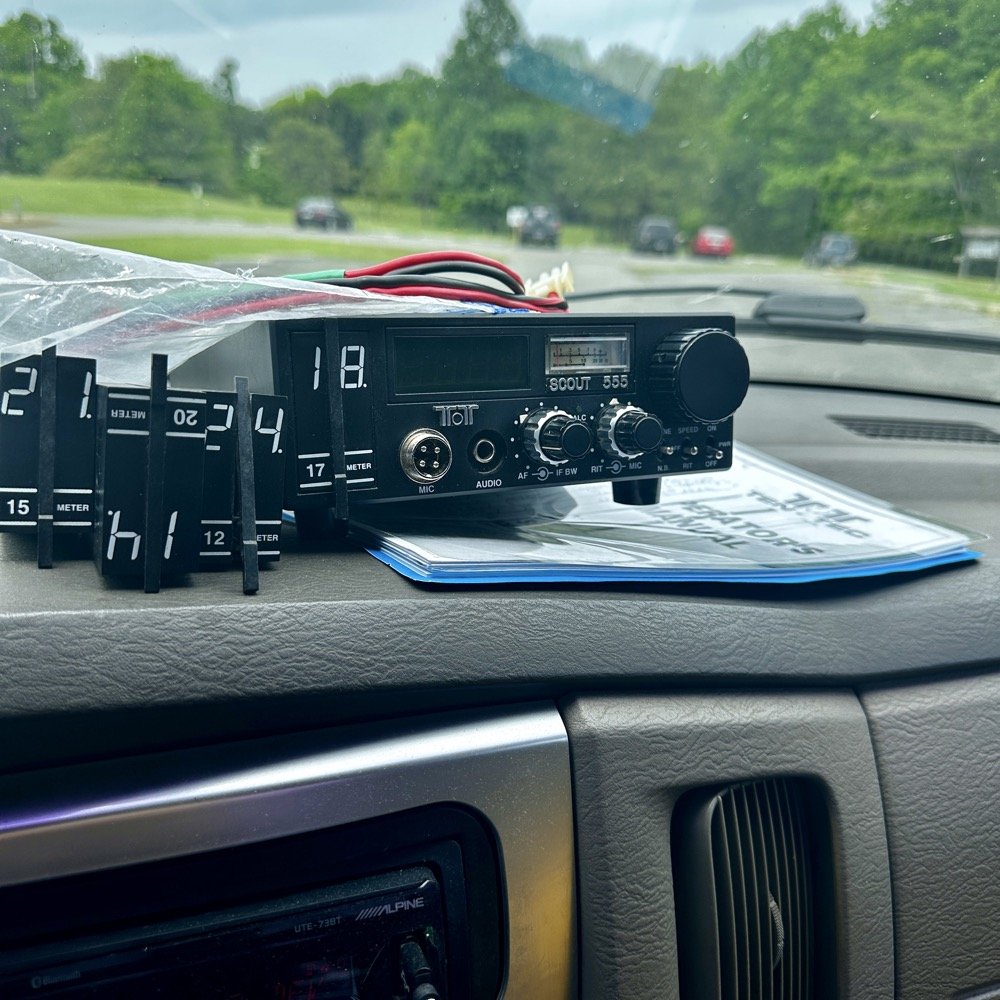
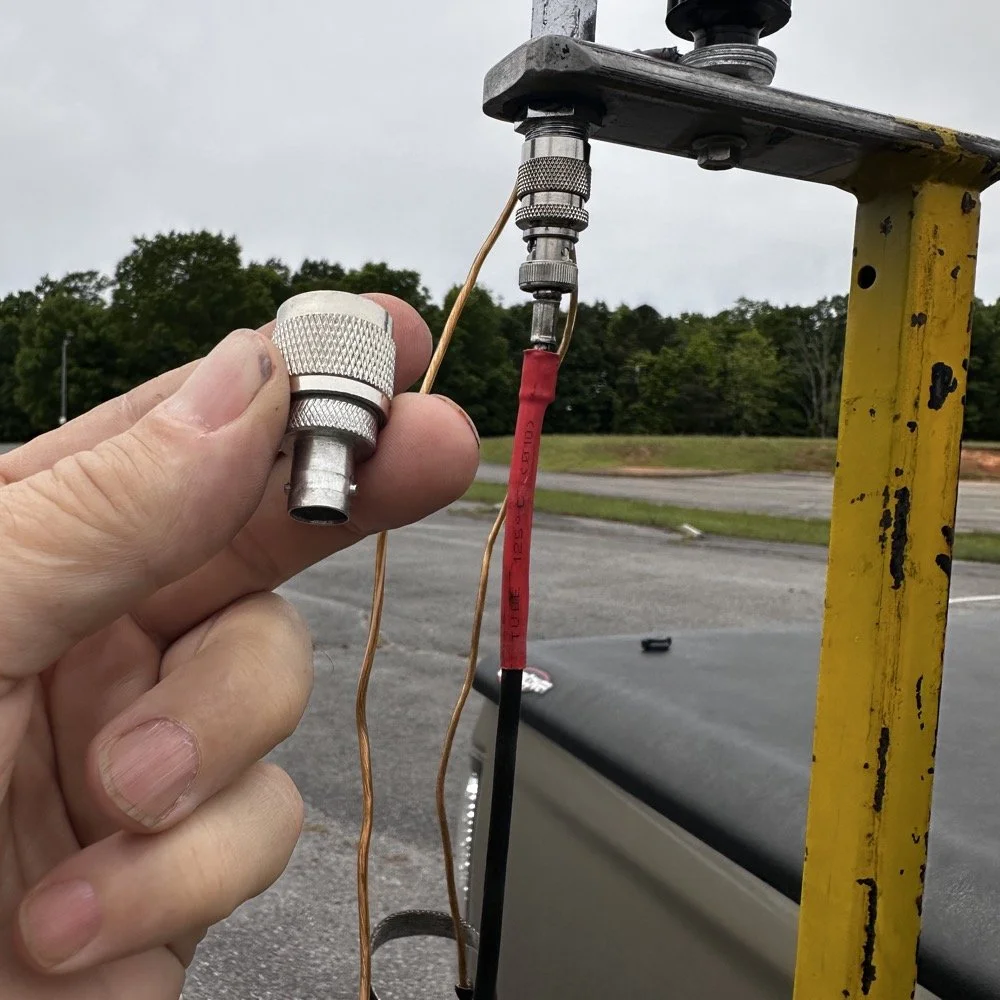
Pay attention to bad antenna connectors…
When connecting the antenna today, I had trouble getting the BNC to attach, upon closer inspection I had found that it was crushed from impacting something in the truck… Probably when it was in the red Chevy as there is less protection in the back of that truck as compared to how I store it in the Dodge. Oh, and yes, my heat shrink tubing on the coax has slipped back for some reason. I noticed it when I was breaking down and simply slid it back into place…haha. I did not notice this until I attempted to use it today to operate this activation.
I attempted to straighten the damaged BNC connector with my Leatherman as best as I could, but it didn’t work really all that well so I got in my adapters for my nano VNA and robbed the one that was in that pack and used it instead.
This is a great example of why you always carry spare parts for all of your connections so that you don’t get shut down because of something getting broken unintentionally that you are not aware of.
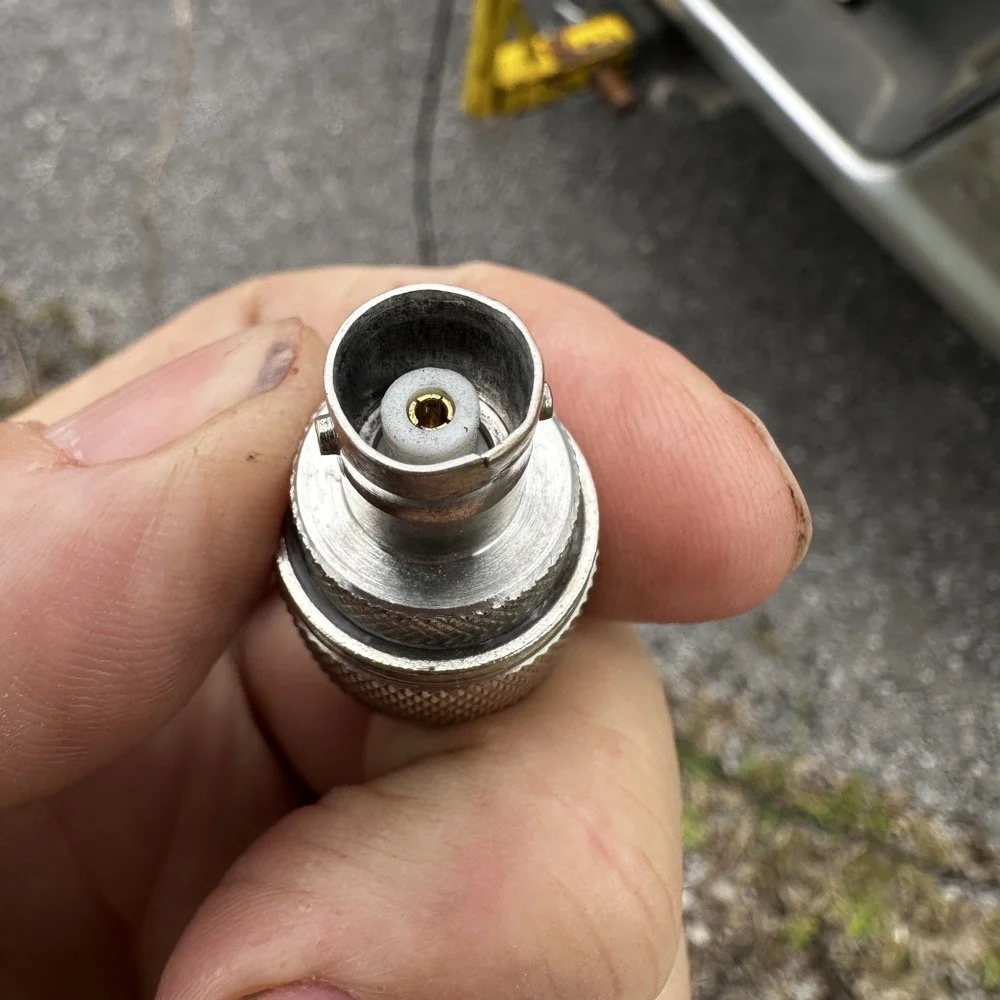
The HF Signals sBitx V3 and native internal FT8
Once I finished working CW on the Scout 555, I decided to get the sBitx out for a while to work some FT8. I really love using this radio for FT8 and CW in parks, it works so well and with the version 5.3 software, it has a metric ton of great features. The waterfall works well and the automatic modes in FT8 are really handy too. This radio is 25 watts on the lower bands and trails off to about 12 watts on 10 meters. This is plenty for me as I work a lot of QRP anyway so little to no power output is fine for the most part. Would it be nice to work with more, yes, but I can manage without it just fine.
Today I only used it for FT8, but I also will use it for CW from time to time. It is a little temperamental in CW since it is a Raspberry Pi 4 running in the background, but once you learn the keying, it works fine up to about 23WPM for me without too much issue. Using something like the Begali Traveler CW Key in the photo below also makes it more fun too. A really nice key is always a good thing to have with you.
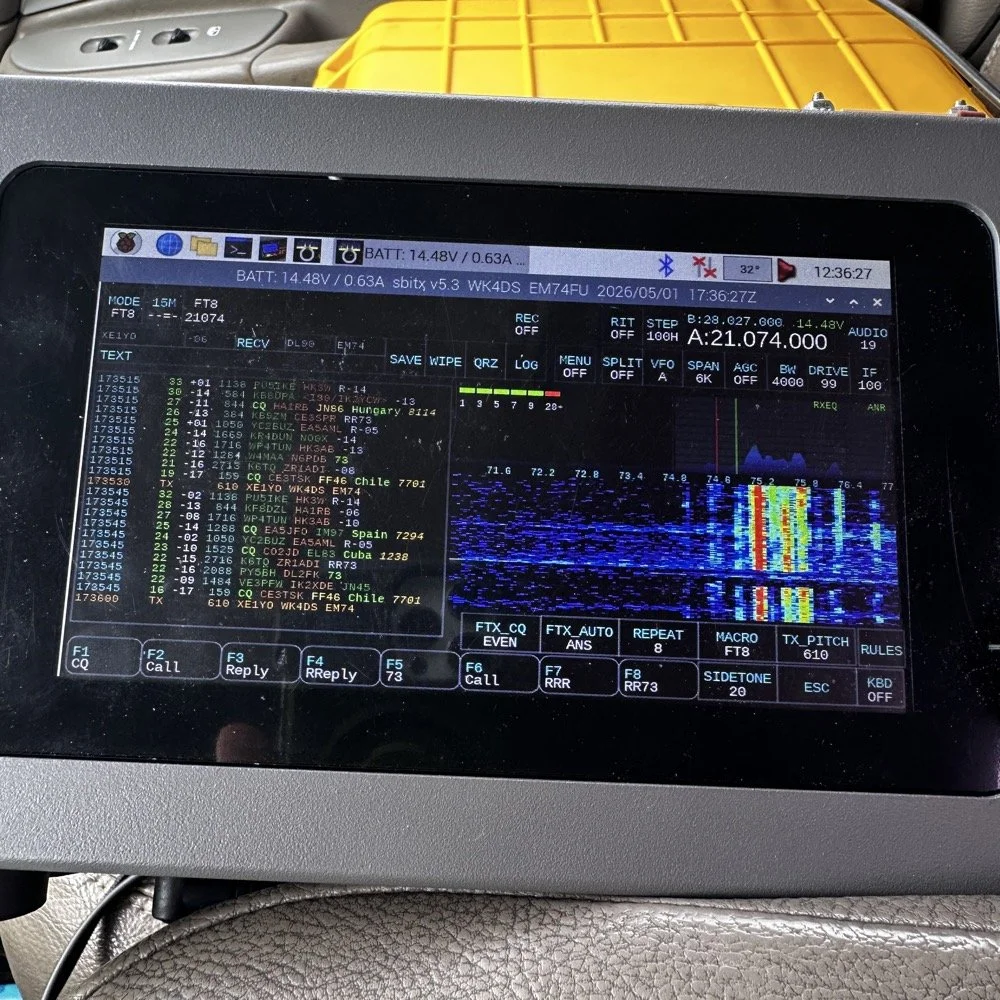
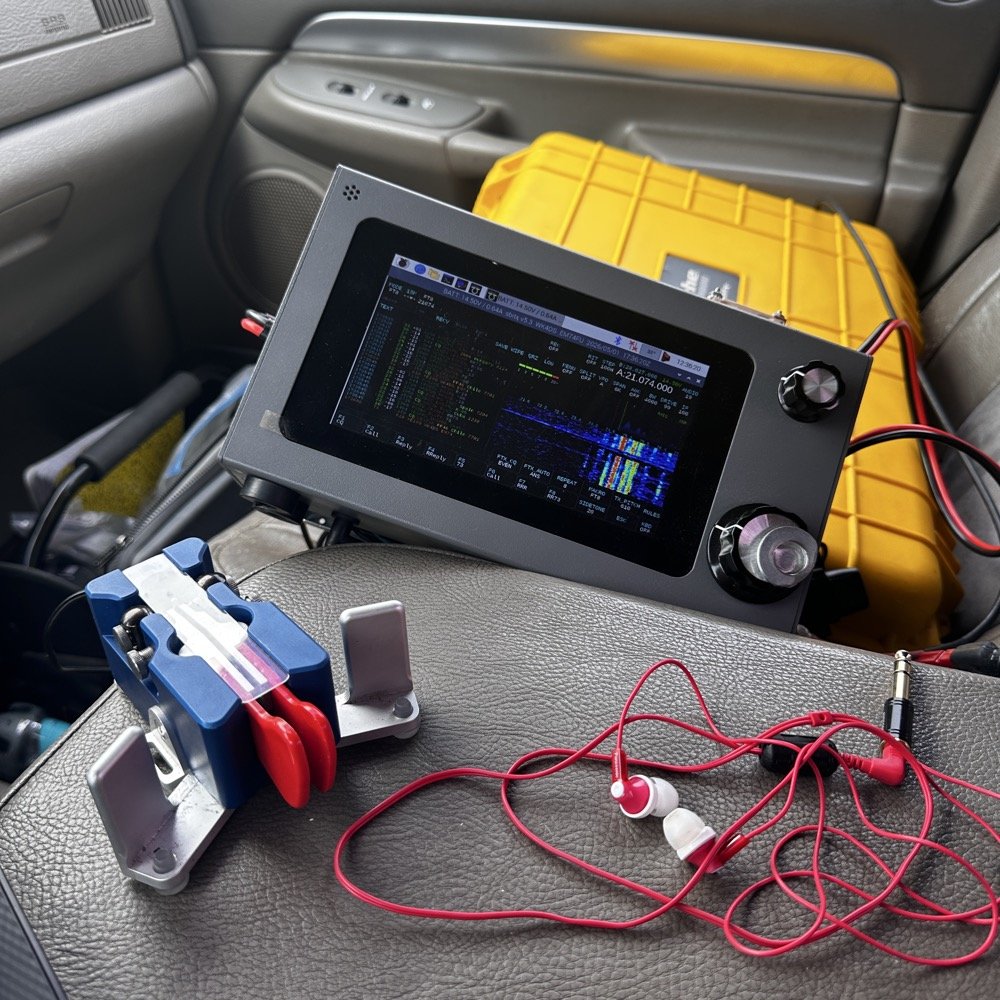
Once I worked a few FT8 contacts on 15 meters, I dropped down to 17 meters and worked a few more there before shutting down for the day and heading home.
I noticed when I was getting ready to leave that the truck motor was “squeaking” when it was idling and when I investigated further, I found that it was a pulley on my fan belt had a bad bearing in it. So I went to the auto-part store and got a new one to replace it with. Once home I was able to replace it in short order so that I would be ready for the next POTA outing that I wanted to go on. Sometimes things just come up and you have to take action…haha.
Thank you for following along and I look forward to sharing something with you again soon, till then 73!
You can help support this website by using these Amazon Affiliate Links:
QRP/Portable Radios:
Antennas & Tuning:
CW Equipment:
Power & Accessories:
Organization & Transport:
BONUS ITEMS

My first POTA 2fer, with a QRP radio, and a Solar Storm!
Today I activated US-0716 (Chickamauga Battlefield) for my first-ever POTA 2fer! Between solar storms, parking challenges, battery failures, and meeting Dan (K2DTS), this activation had it all. Here's what happened when Murphy's Law met a QRP radio during less than ideal conditions!
Today saw the old red Chevrolet transporting my POTA gear over to Chickamauga Battlefield National Military Park which is park number US-0716. I have activated this park many times in the past, but unbeknownst to me was that the location I usually used to activate this park also allows for the activation of the Trail of Tears National Trail as well as it follows old HWY 27 right through the park! I have been activating a 2fer for years now and had no idea…live and learn.
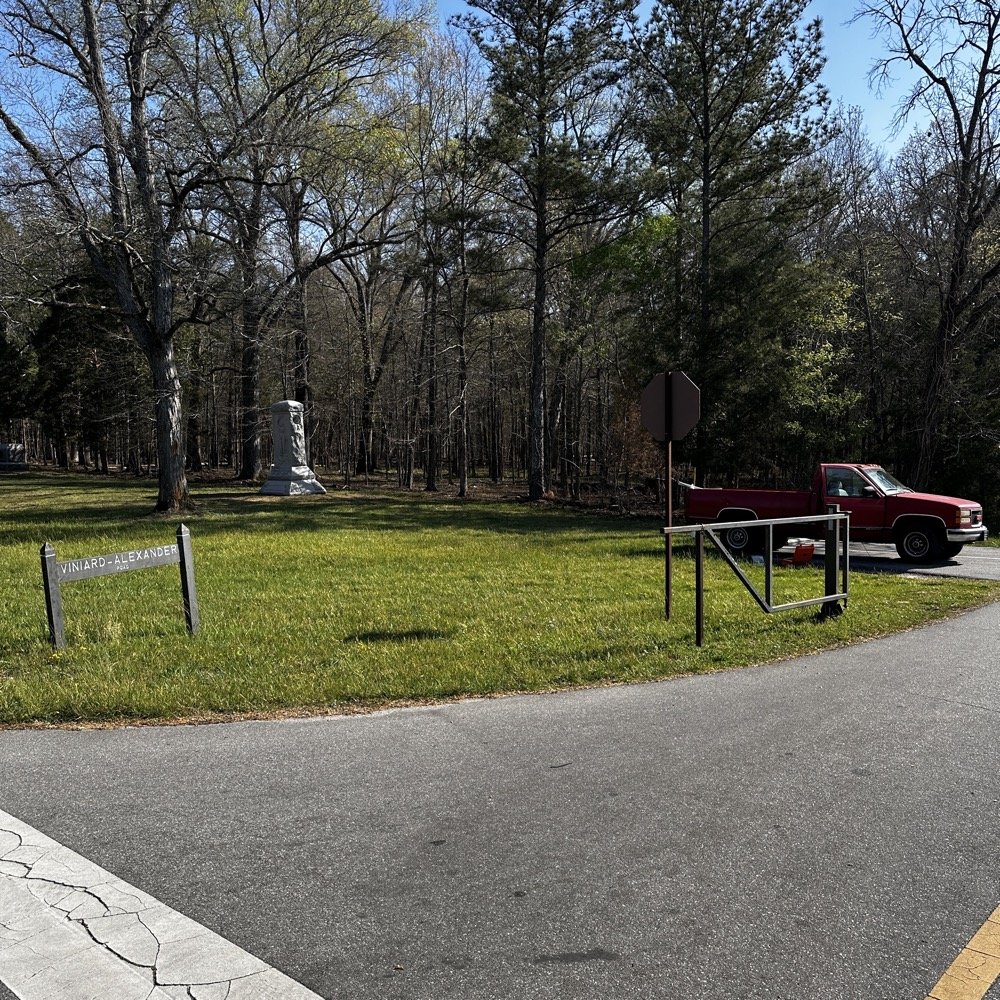
This “parking lot” has only 2 spaces in it, but it is close enough in proximity to the main road to allow for a 2fer when activating POTA
I arrived on station to find that only one spot was available and no one around the truck. This matters as Dan (K2DTS) had mentioned dropping by to see the CW setup and to observe a CW activation for a little while. Turns out the car in the other space was not him. He would arrive later, which was a much needed “shot in the arm” to lift my spirits. You see, today was one of those days when the sun was really angry while I was setup to activate. The solar K index was either 5 or 6 which isn’t good…especially for QRP… My QSO count today was not all that high, but I still had a relaxing and fun time at the park none the less.
This location works well with my truck mounted antenna setup that I built. I used my old reliable hamstick collection today to get on the air and true to form, they worked pretty well. I have also refined my tuning system as well. I will give you the quick rundown on how I do it now. This works especially well with hamsticks as you will soon see.
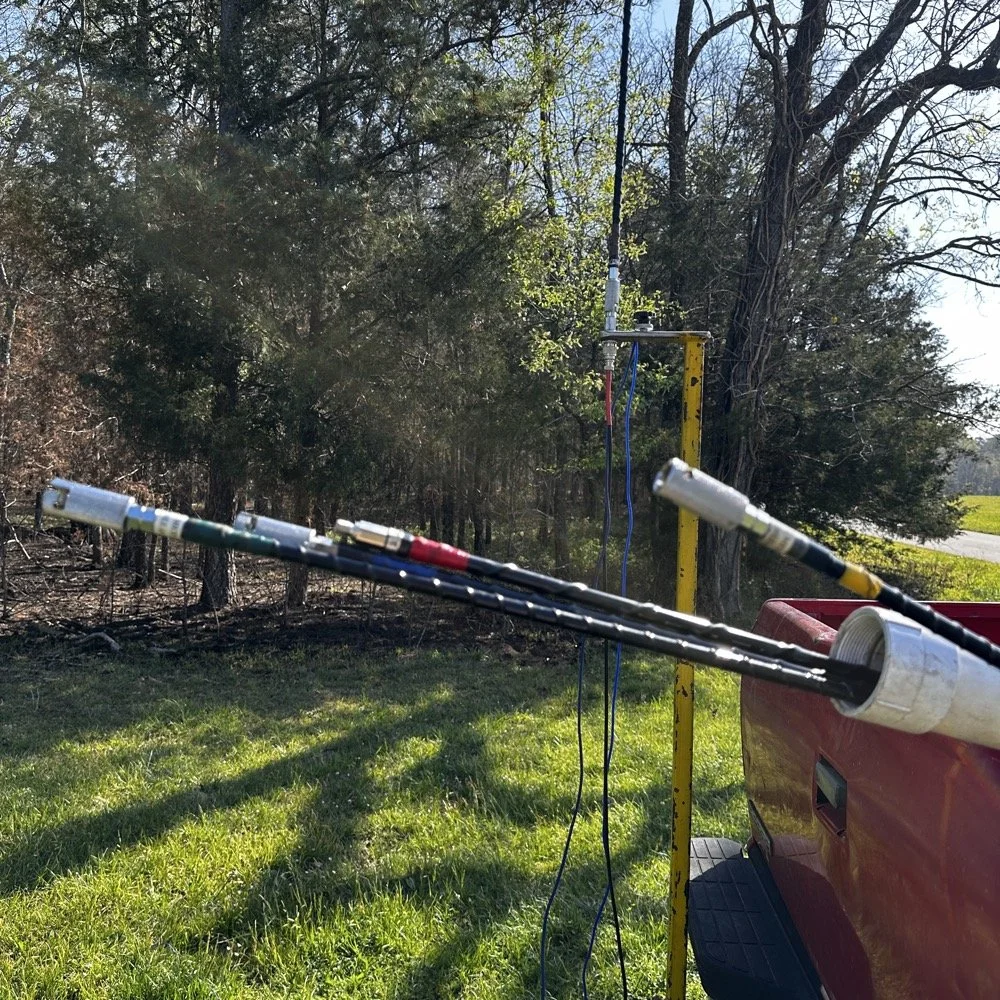
Hamsticks are a very viable antenna system for POTA activators. They are easy to setup and work reasonably well for their tiny size. They usually have good power handling so digital modes like FT8 and even good ole CW are not a problem for them. Of course SSB is always fine if they can handle CW…
My Hamstick Antenna System and Color Coding Setup
Above is my modest hamstick collection to date. This is the 5 bands I use the most and I wished I also had the 10 meter version as well…but I digress. It is a good idea to do something to tell them apart. The labels are not very durable from what i have seen and so I chose to color code mine with various colors of electrical tape instead. Red - 40meters; Blue - 30 meters; Yellow - 20 meters; Brown - 17 meters; and Green - 15 meters. These are what I have been using for a long time now and they work well. These are made by three different companies too so the brand doesn’t really seem to matter. I have also converted mine over to the QD attachment design so that I can change bands fairly fast…well it is faster than threading them into the socket…haha. I have owned and used this exact setup for quite some time now as you can see from this blog post I wrote a good while back.
I also store them inside a PVC pipe I made into a storage tube. It is almost 8’ long so I can keep the “stingers” on all the base load coils which prevents me from mixing the wrong tip with the wrong load coil. I built this tube steel mount to fit inside the 2” receiver on a pick up truck, this allows for it to do two things at once. 1) It allows the antenna to be setup quickly and easily on any vehicle with a standard receiver mount. 2) I also built it so that it makes the base of the antenna at around 6’ above the ground. Getting the antenna higher does help with take off angle so I made the decision to make it taller than most. This also made it possible to string some radials at various angles so I can play with the impedance by adjusting the radials. If you look close in the lower photo, you can just see the radials connected to the base of the mount and running down out of the frame. These were tuned for 17 meters like this and they worked incredibly well in this configuration. When you only have a few watts like with the Penntek TR-35, you need all the help you can get…haha.
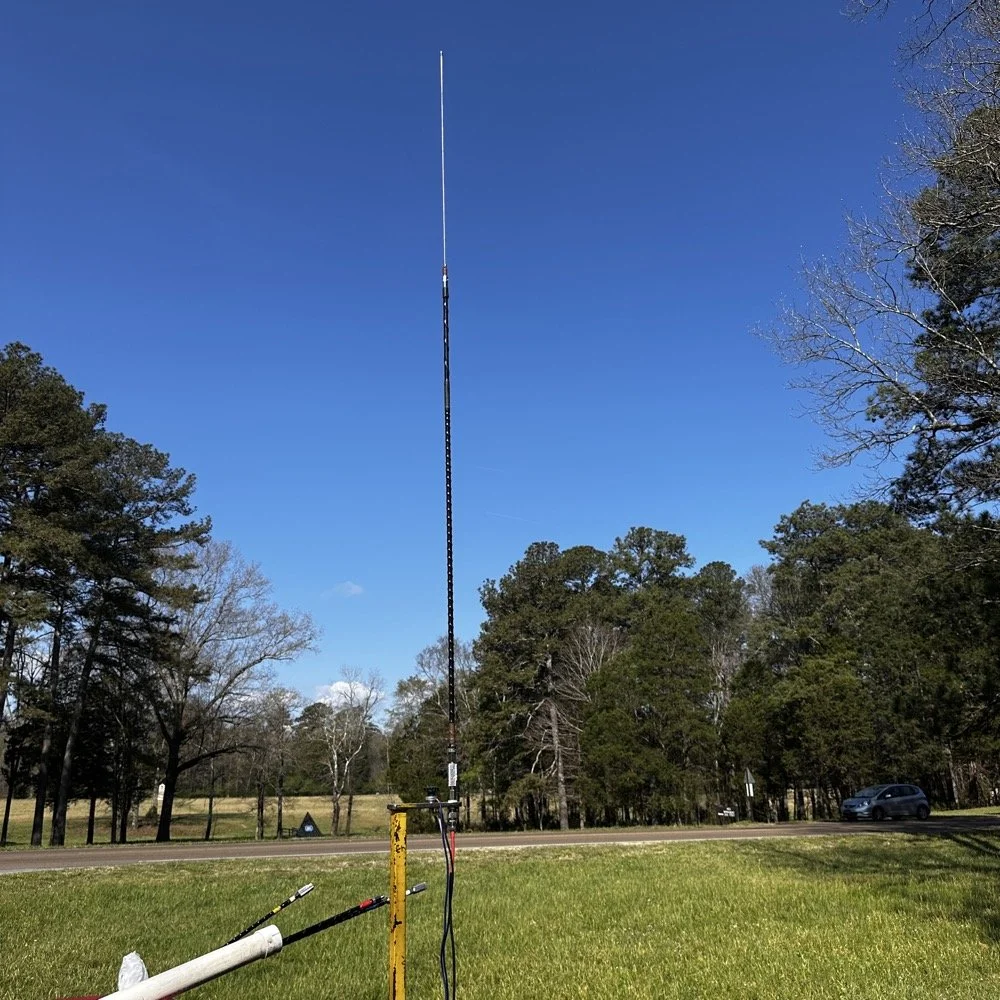
17 meter hamstick deployed during a POTA activation for CW and FT8 use. You can also see the highway in the background that is designated the Trail of Tears trail as well.
I setup in the passenger seat again, but to be honest, this was not ideal. I struggled to get all the stuff connected and stationary today. I also had a problem with the battery in the little power pack I had built…it was completely dead for some reason. I had used it recently but I didn’t think I had tanked it, anyway, not to be dissuaded I decided to get out the 8Ah battery and find a spot for it as well so I could power the station. You see, I needed the “power pack” so I would have a speaker. I figured that since Dan was going to drop by and hand out some, that I would make it to where he could hear the CW as well. This setup finally settled in and I was able to get on the air. This is when I figured out that the sun was angry…
I looked on the POTA spot page to look for a clear spot and there was only one other ham on the spot page, on 20 meters, in the middle of the day… Do you understand what this means? 20 meters is literally the honey pot of the HF bands when it comes to POTA. There is literally 2 dozen CW ops at times on this band and then there will be 2 on 17 meters. It will be that drastic and today there was me and one other guy in the Carolinas and that was it. Optimistic that I could at least get my ten in short order, I fired up the radio, dialed through the literal ghost town that was 20 meters and settled on a frequency around 14.063mhz and started calling CQ. It took about an hour to get my ten plus a few more, but I finally got them. In an attempt to get some stations I could hear in the noise, I even switch to headphones as you can hear MUCH weaker signals if you goto headphones over the external speaker that I am using. This trick didn’t work either as it turns out, that there has to be stations on the air for you to actually hear them… I had seemingly forgotten this minor detail on this day…lol.
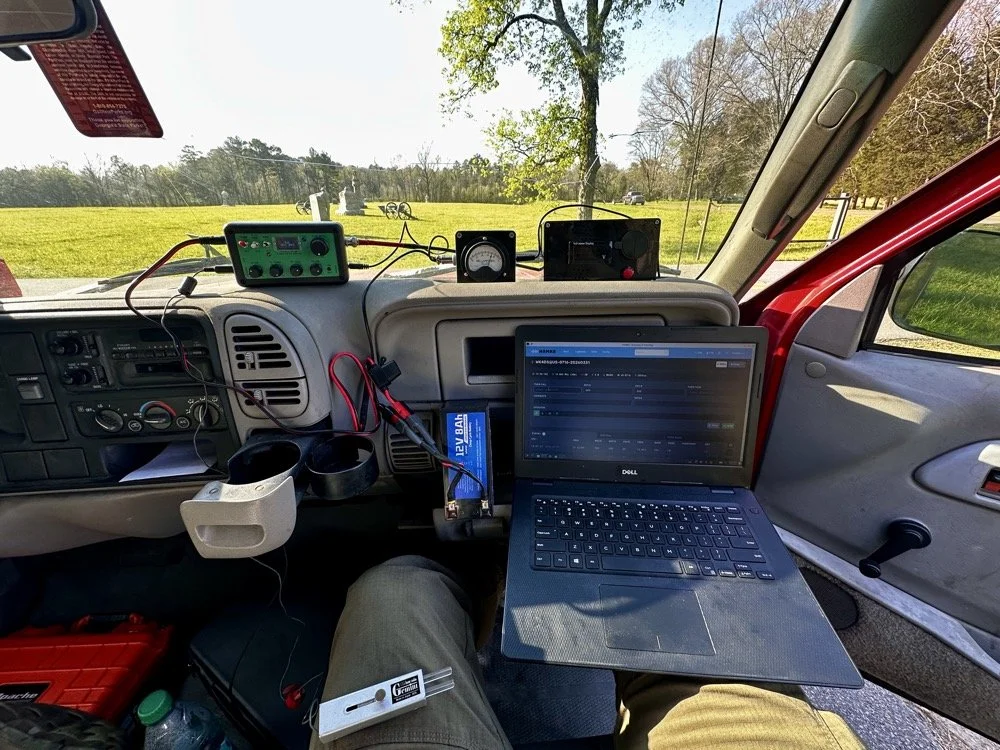
POTA CW station ready for use, including the Penntek TR-35, home brew S meter and battery pack/ speaker combo unit. Also the Gemini travel CW key and the Dell Inspiron computer with HAMRS for logging.
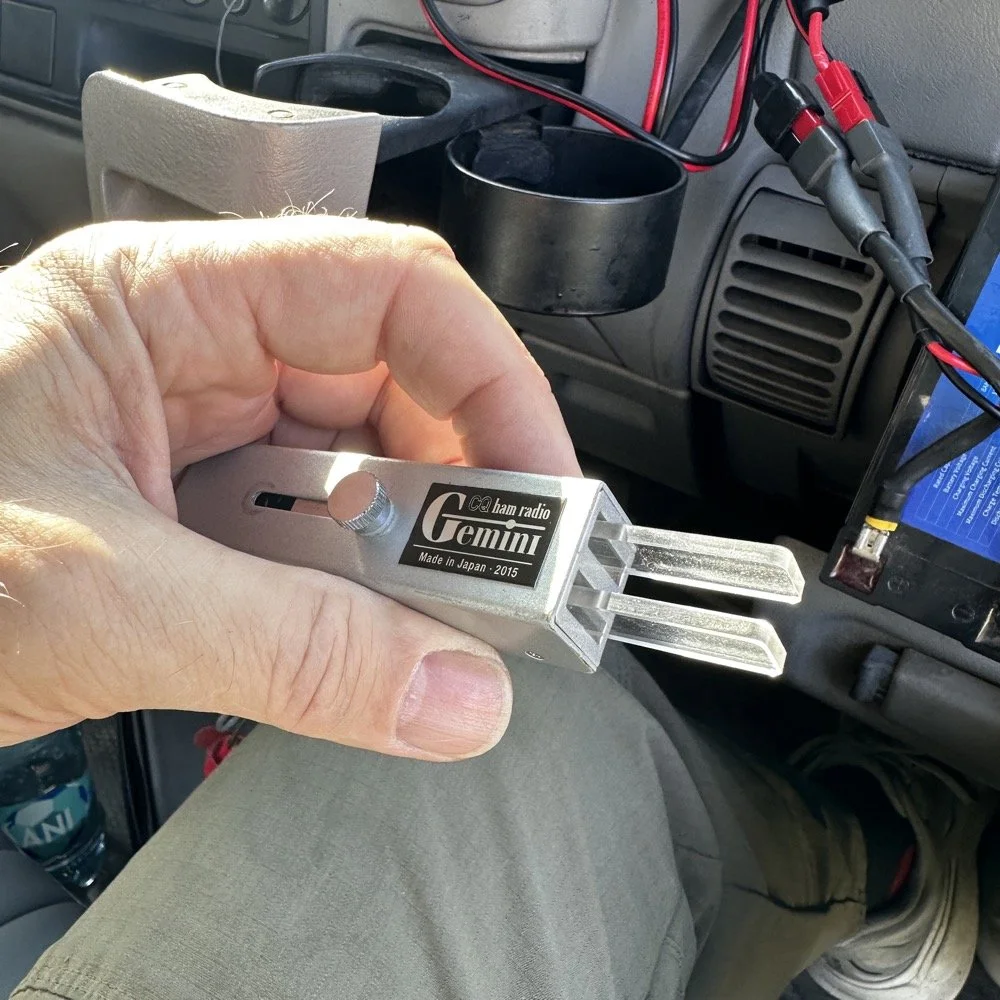
CQ Ham Radio - Gemini travel CW key is really well designed and cost effective. This is one of my favorite CW keys when I dont have a surface to set the Begali Traveler on.
The Gemini CW Key: A Collapsible Treasure from eBay
Let me introduce you to one of my favorite travel CW keys that I use for POTA operations. This is a key I bought off of eBay initially and as of this writing, it seems to be the only place to get one of these keys now. Maybe an opportunity for a creative solution here… lol. Anyway, these are darling little keys that work beautifully and I always enjoy getting this one out. As you can see below, the reason I like this key is how it stows the handles when not used. You simply loosen the screw on top a little, slide the screw to the rear and this collapses the paddles inside the housing which protects the from damage when stored in less than ideal conditions. This key also is dead simple, lacking any sort of adjustments at all, you just plug it into the radio and use it. I like that to be honest…
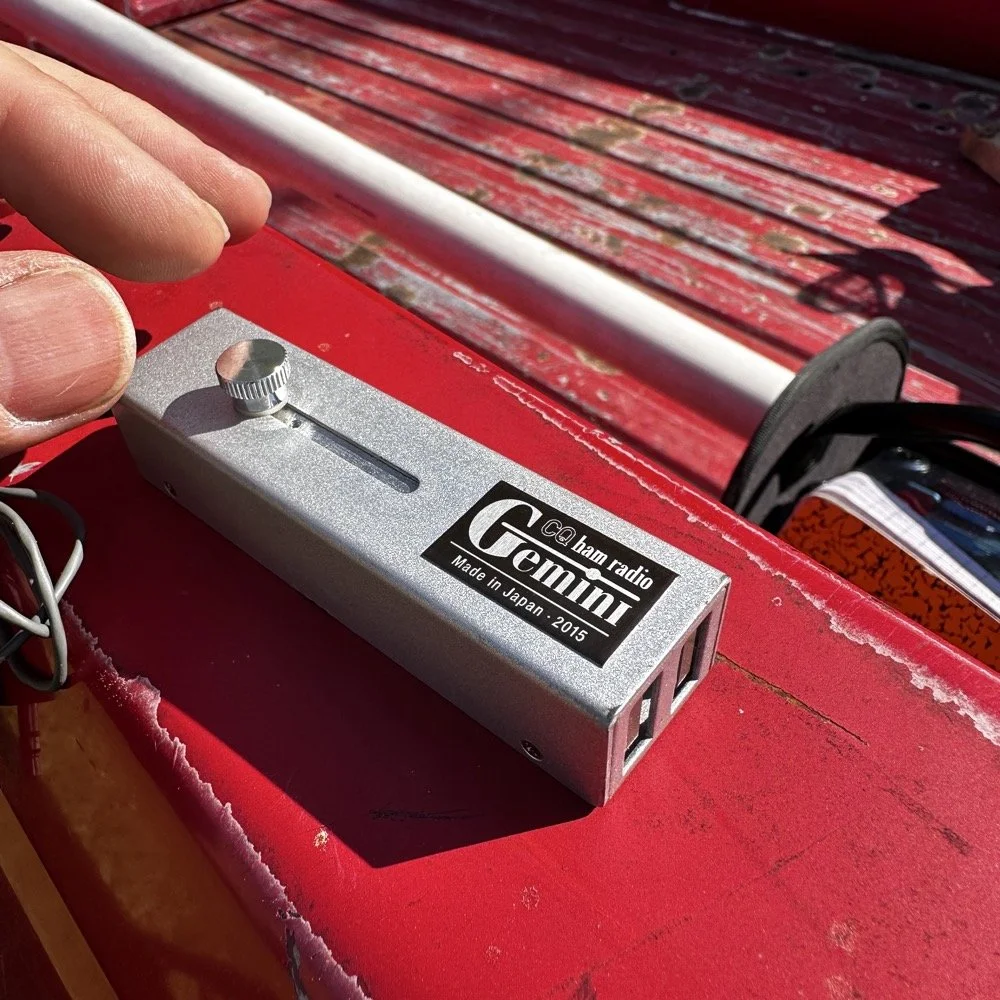
GHD CW Key for portable CW operations like POTA.
Operating QRP During a Solar Storm (And Why 20 Meters Was a Ghost Town!)
So after I struggled around for a little over an hour to put 15 calls in the log…well…14 since one was a dupe… (duplicate calls on the same band, park, day and mode dont count to your POTA score)…I decided to put up the headphones and get out the HF Signals sBitx and work some FT-8 on 17 meters. I had not seen Dan so I figured the honey-do list got him or something and put away the CW gear while FT-8 hummed along in the background.
A lot of times, I will run FT-8 while I do house keeping chores like putting up radio gear from a different mode that I had just finished using or talking to the wife on the phone about what she wants me to do next after I finish playing radio… you get the idea. I can do some other things while keeping an eye on the display and letting it run in auto mode for a while. Well, not today buckaroo, seems the band were so bad that I couldn’t get auto to work today very well. I called CQ for a while to no avail. I finally started hunting other stations can answering their CQ instead. Switching to this tactic netted me 5 more contacts before I closed out the log for the day. 18 valid QSOs will do just fine…actually, 36 since I activated the 2fer today!
If you will notice the waterfall in the photo below, you will see that there really were not that many stations on the FT-8 segment…which is usually choked pretty tight with stations. The bands were just that bad. Even with these terrible conditions, I was still able to get 5 calls in the log for today on FT-8!
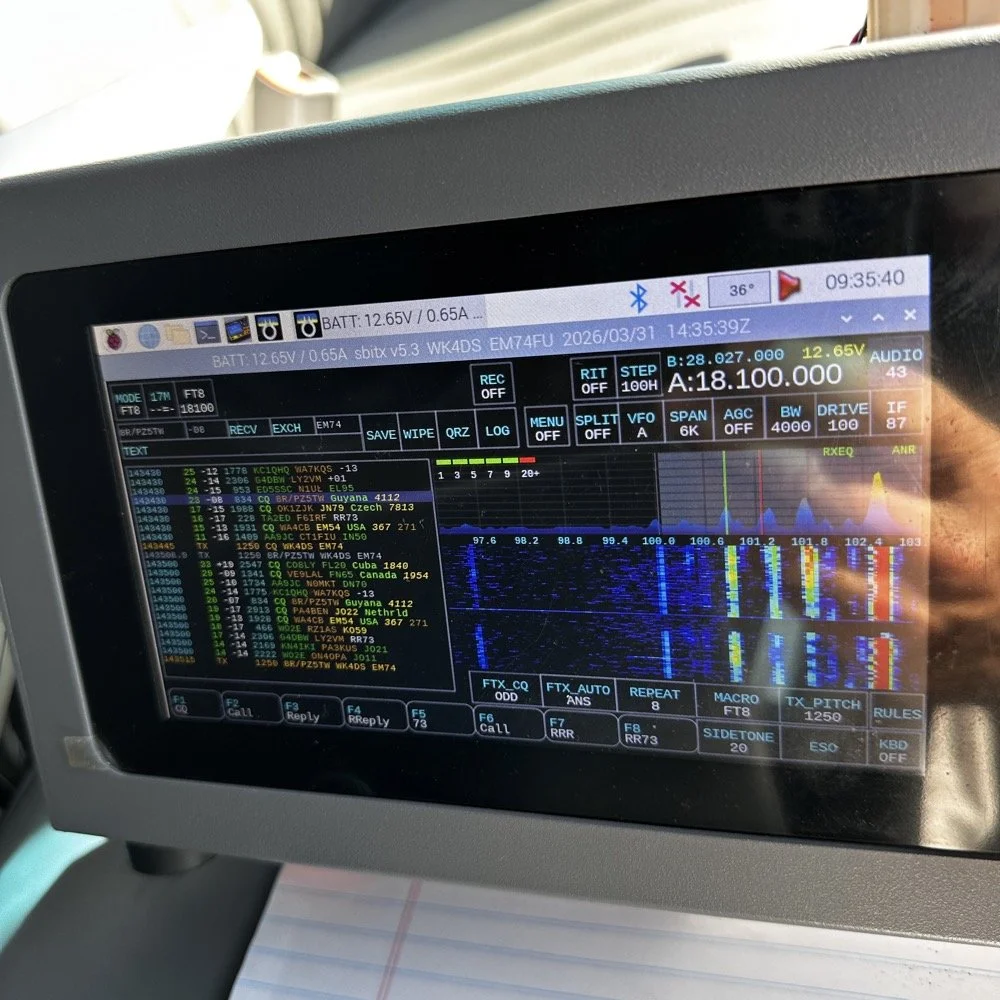
sBitx by HF Signals is a SDR powered by a Raspberry Pi 4 or Pi 5 SBC and does all sorts of things a regular radio can not do.
Meeting Dan (K2DTS) and the Ham Radio Community
While I was taking some of these photos and cleaning up the unneeded ham gear after switching to FT-8, look who stopped by to say hi and see the station! Dan (K2DTS)! He missed my CW portion of the activation and instead of setting it all back up, I did show -n- tell with him about all the gear I had brought to the activation. You have to understand that this is fairly substantial…haha. We talked for probably 20 minutes or maybe even a little longer about all sorts of things and had a great eye-ball QSO. I hope we can link up again at some point so I can get him on the air with CW so he can make some contacts too.
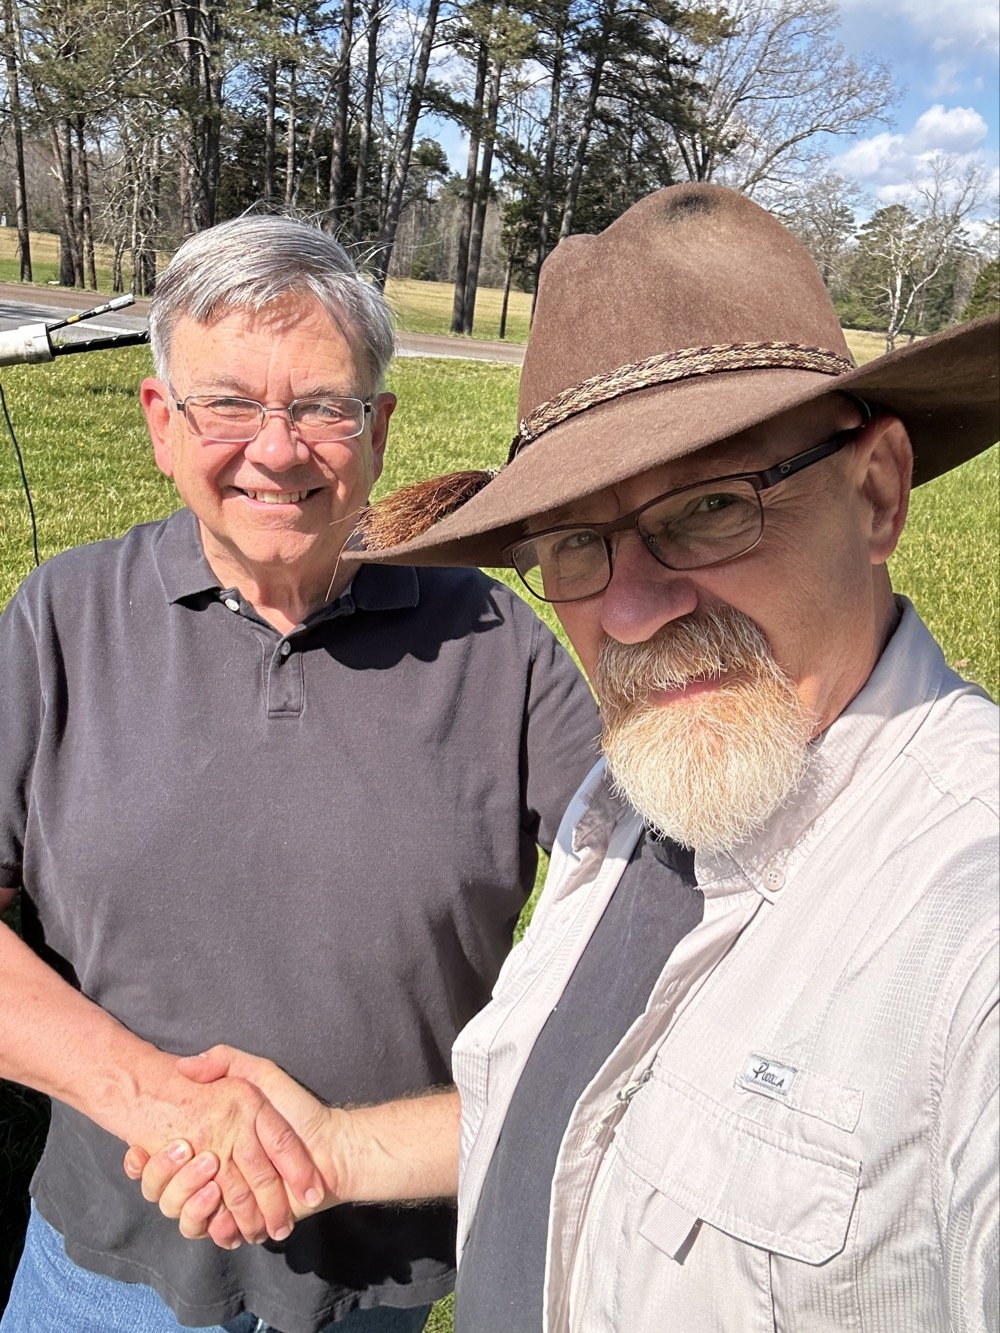
Ham radio is a wonderful community that has a large number of great people like Dan (K2DTS) who came out to the activation site today to see the setup.
Some days you don’t have to make a ton of contacts (although this never hurts…haha) to have a good time. Any day at a park with a radio is better than your best day at work. Knowing this I will always choose POTA over going to work… lol. Thanks for coming along today and I hope to work you on the air soon!
72
David - WK4DS
You can help support this website by using these Amazon Affiliate Links:
QRP/Portable Radios:
Antennas & Tuning:
CW Equipment:
Power & Accessories:
Organization & Transport:
BONUS ITEMS

Over 80 POTA QSOs in “less than ideal” conditions…
I activated US-2169 (Cloudland Canyon State Park) and made over 80 CW contacts despite lawnmowers, kids, and Murphy's Law doing its best to sabotage the activation. Here's what happened when "less than ideal" conditions tried to stop me!
Let’s talk about something that not a lot of people consider…what do you do when you get to a park and things are not like you imagined? Do you turn around and leave? Do you complain to park management? Do you setup and “get your ten” as fast as possible? What? Leave it in the comments what you do when you have problems like I did today?
POTA Park Conditions
Here is the setup, today I went to US-2169 (Cloudland Canyon State Park) to get on the air with my little Penntek TR-35 QRP radio and found some interesting things happening at the park today. As you can see below the weather was basically perfect for a POTA activation today. It is still early spring here so the top of the mountain is still not showing much signs, but the valley is getting ready…so to speak. Some trees are turning green and some of the dogwood trees are starting to bloom so we are getting started. The temperature was nice in the mid 60s today and it was sunny so it was really nice. I Did find the direct sun to be annoying to be honest as it kept causing a lot of glare on my computer which made it hard to see at times, but I powered through this first obstacle…
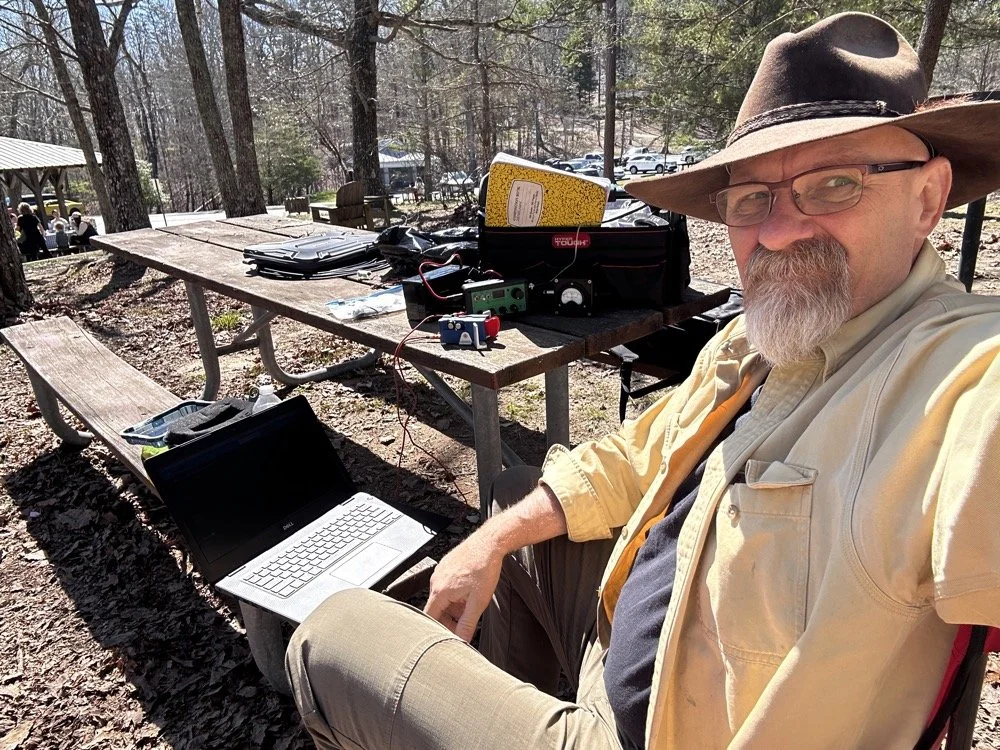
My POTA station for today consisting of the Penntek TR-35, the Begali Traveler CW Key and my Dell Inspiron computer for logging.
The next thing I ran into was the kids, there were so many kids in the park today, it must be some spring break or something as there were a lot of groups of children like you see in the photo above (in the background) and they were…well…being kids… This in itself isn’t a problem, but I failed to bring any sort of flagging tape to mark my coax with so I was constantly looking over my right shoulder to make sure no one was about to walk into it. Actually, I only had to do this for a little while as there was something else that happened a little later that basically ran the kids off for me… haha. The lawnmowers…
The POTA HF Radio System Setup - Reliance Antenna
Anyway, let’s look at the antenna setup today to see what made it work so well. I started with two throw lines today so I could elevate the whole antenna off the ground. You see, I was using the Reliance Antenna Bugout 40m EFHW again today and wanted to replicate what I had back in Florida.
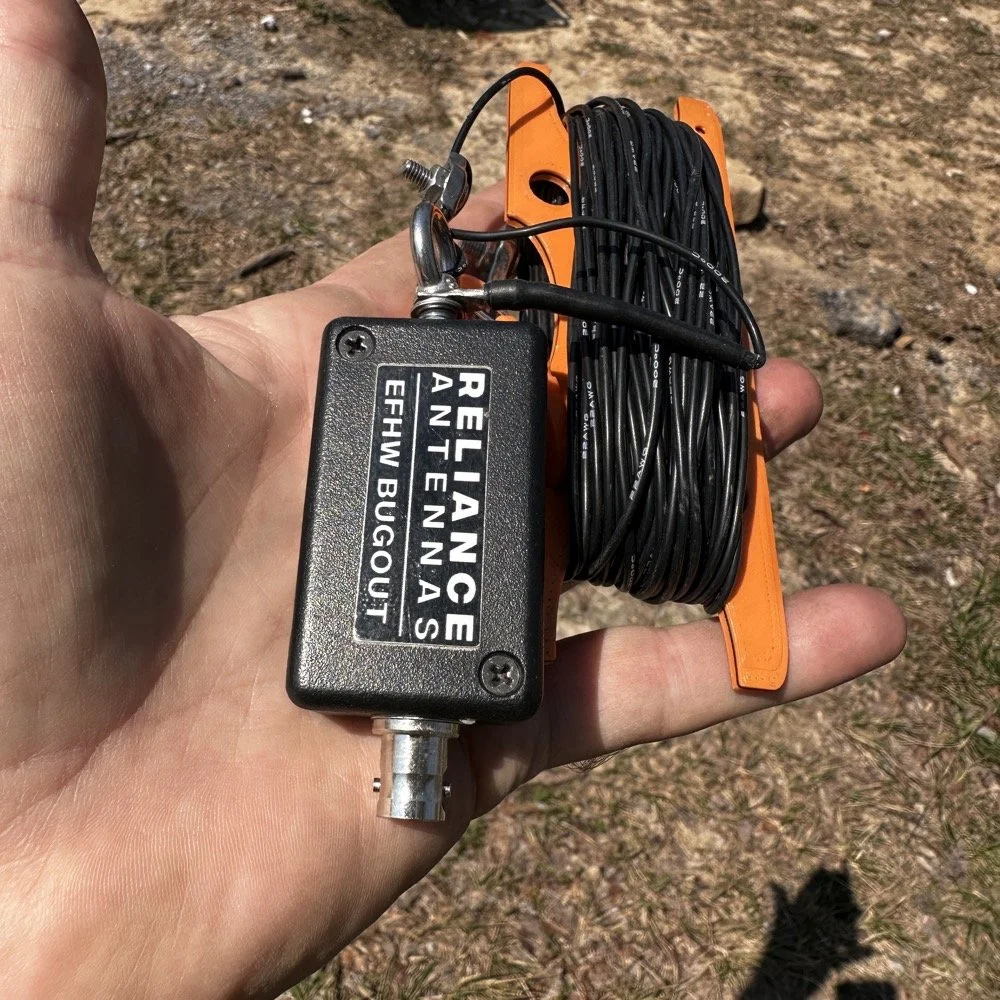
Today saw me use the Reliance Antenna Bugout 40m EFHW antenna to great effect even with all the problems.
I threw a line about 15 feet up over a large limb on the nearby tree to create the first point and this is where the coax went up to the transformer. I didn’t use a tuner today so I stayed on 20 meters the entire time today.
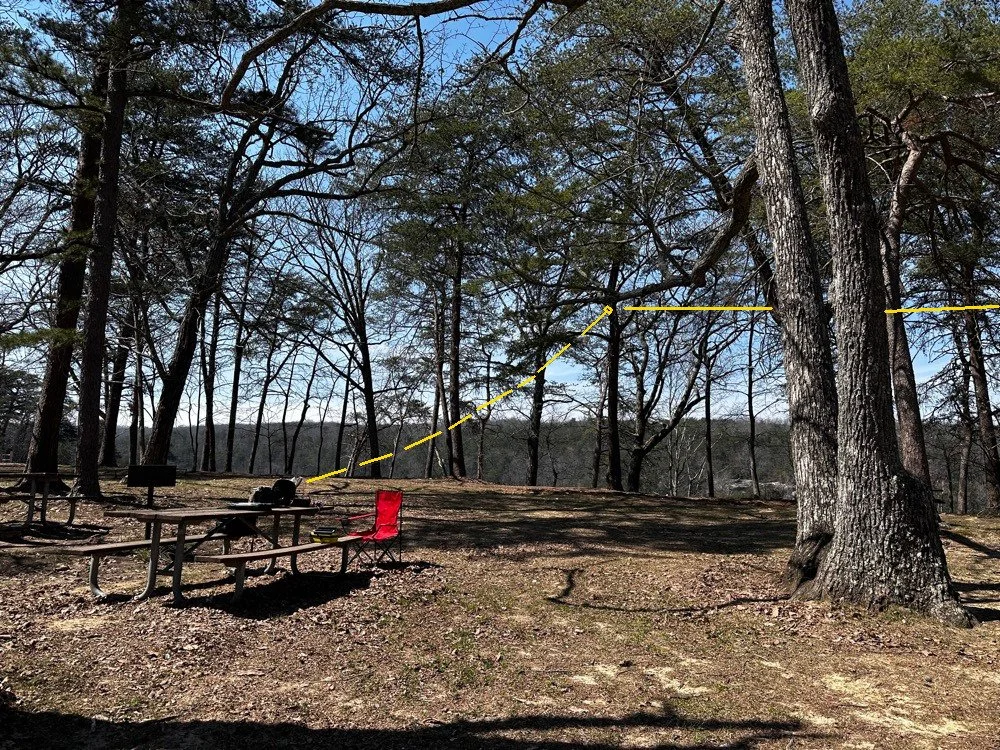
POTA antenna installation showing the 1st elevated point of the antenna transformer from the operating position.
I ended up tying the antenna lift rope (it is actually a small cord but you get the point) to the grill right behind the table to the left in the above photo. I used a Velcro tie to attach the end of the coax to the “possibles” bag on the table as it is heavy and the coax is really light and I figured it would hold it just fine…which it did. Next came the haul line to lift the antenna into the distal tree with the high end about 30 feet up. I use a stainless steel throw weight that I made in the machine shop so I can send this thing into the stratosphere if I want…haha. The wide angle photo below shows where the antenna was in the trees. You can also see another family at the picnic table in the background… more kids… haha. The good thing about using two haul lines in that the entirety of the antenna is WAY above where anyone could even get close to it. I was also using QRP power so there was no danger of RF issues here. The height is also beneficial for propagation and we will see a little later that it did in fact help.
Now, this antenna doesn’t have a counter poise of any kind so it uses the coax shield for the counter poise. To keep the stray RF out of the radio, I use a special coax from ABR Industries that has a ferrite common mode choke in one end. I simply put this end on the radio side and this allows the antenna to access the coax shield for counter poise use and also it keeps the common mode currents out of the radio… At least that is what I hope is happening, the strategy seems to work so I am running with it.
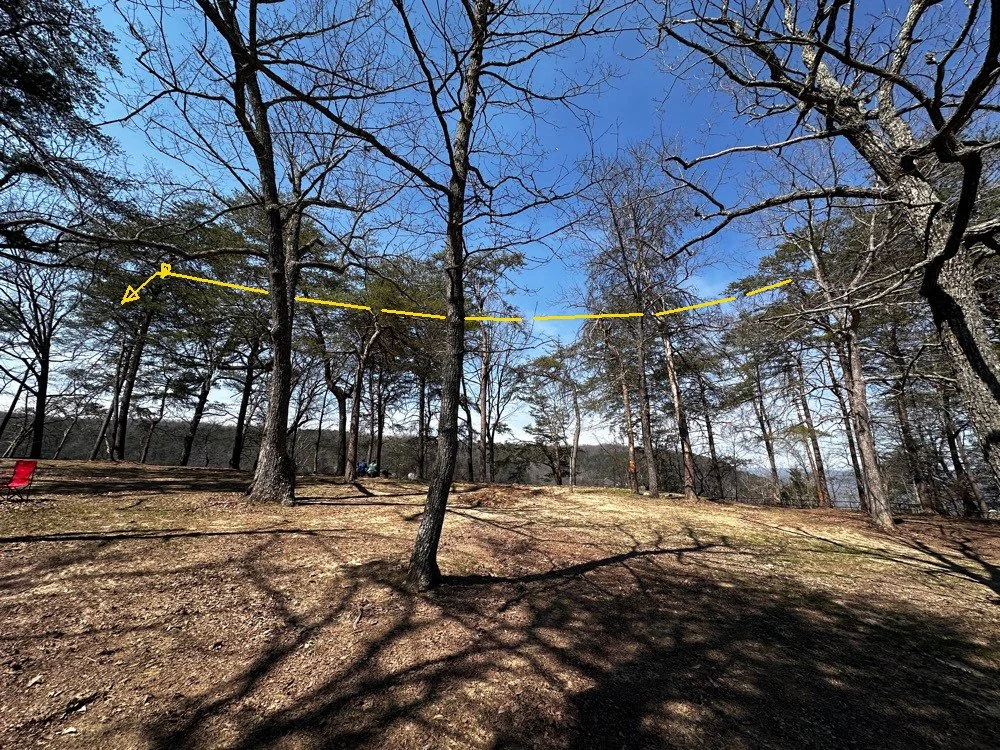
Position of the 40m EFHW antenna today for my POTA activation. Well above the ground!
POTA Activation Highlights
So once the radio was all put together and powered up on the table, I connected the speakers from my custom built project. This is a power pack with a 3aH Bioenno battery in a project box with a power-pole receptacle and a set of speakers so the Penntek TR-35 can be used like a regular radio since it has no internal speaker. I like running it like this if the ambient noise level is low enough as it allows the people around me to hear the CW as well. This sometime sparks interest and people will come over and ask me about what I am doing. A perfect5 opportunity to share with someone about amateur radio.
I started listening around a little and found 14.061mhz was clear after listening for a while. I have found that I will hunt me a clear frequency then get out the logging computer, boot it up and get the software running and ready to use, then I will spot myself on the POTA app all prior to sending that first CQ call. If you do any of this after sending that first call, you had better finish before the radio memory buffer does… that is all I have to say about that…lol. Just like clock work, I got an answer on the very first call too! I worked about 15 or 20 stations in pretty short order and then the QRM started. Someone decided that a QRP operator in the QRP portion of 20 meters activating a POTA park with a valid callsign was completely unacceptable for some reason. At first (read that as “for the first 5 full minutes” I actually thought they were just either missing me and sending their call twice or couldn’t hear me or something. You see, I was working stations the whole time! haha. So I finally stopped and listened and this person was sending real CW so it was someone who went to the trouble to actually learn it. But here is what they were doing, they would send a random letter, wait 3 to 4 seconds and send another random letter and then wait some more then do it again. All it really did to my normal QSO pattern was have me simply send everything twice as the spacing they were using allowed for this perfectly. Then I would send a CQ out of my keyer memory as the Penntek TR-35 has 2 keyer memories built into it. As soon as the CQ would start I could hear them in between my characters trying to jam me, so I would simply hit the keyer a second time and let it send the WHOLE message again and by then they either realized I was using a memory keyer or got tired of competing with a machine and would stop…till I would send a signal report. LOL. Remember what I just said about the cadence and my tactic to combat it? Well, I think they finally gave up at around QSO number 50 or so.
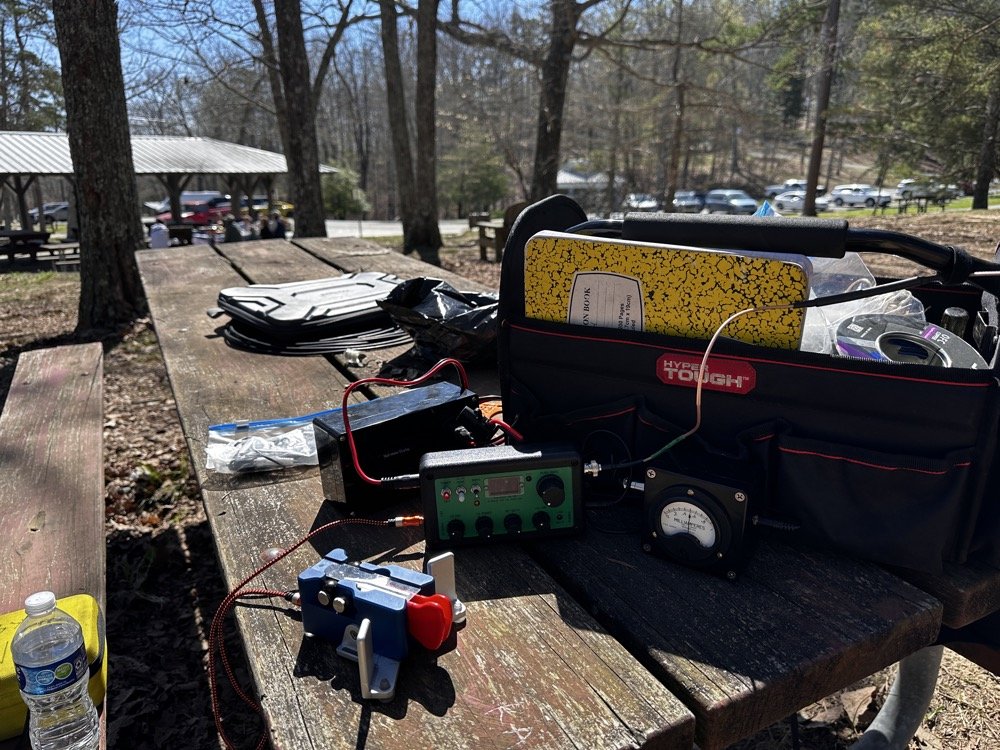
POTA station consisting of the Penntek TR-35, homebrew “S” meter, homebrew powerpack with speaker, Begali Traveler CW key and Relianca Antenna wtih ABR Industries Coax
Murphy’s Law at Work during a POTA Activation
That’s right, I made about 30 contacts while the QRMing op was actively trying to sabotage my activation. lol. So while this was going on, there was another “storm” brewing in the background… the lawnmowers had arrived…
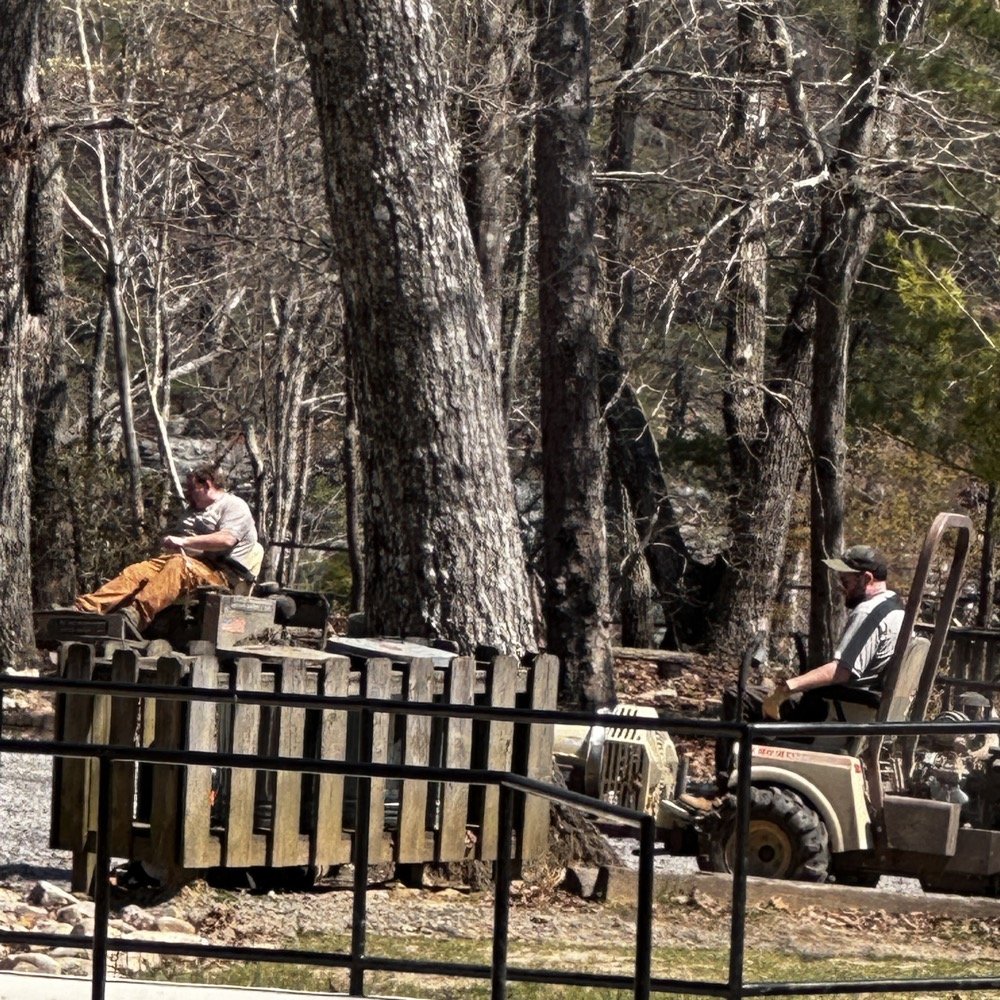
State park grounds keepers doing lawn maintenance.
They had been in the distance, but at this point they were starting to get closer and closer… At this point I am starting to think that these guys have been hired by the guy messing with me on the air! It was like they had been signaled or something. Just about the time the QRM vanishes, they show up!ll, to start with they were mowing over on the far side of the area so it was mildly annoying but not a real problem for my operating…but then…
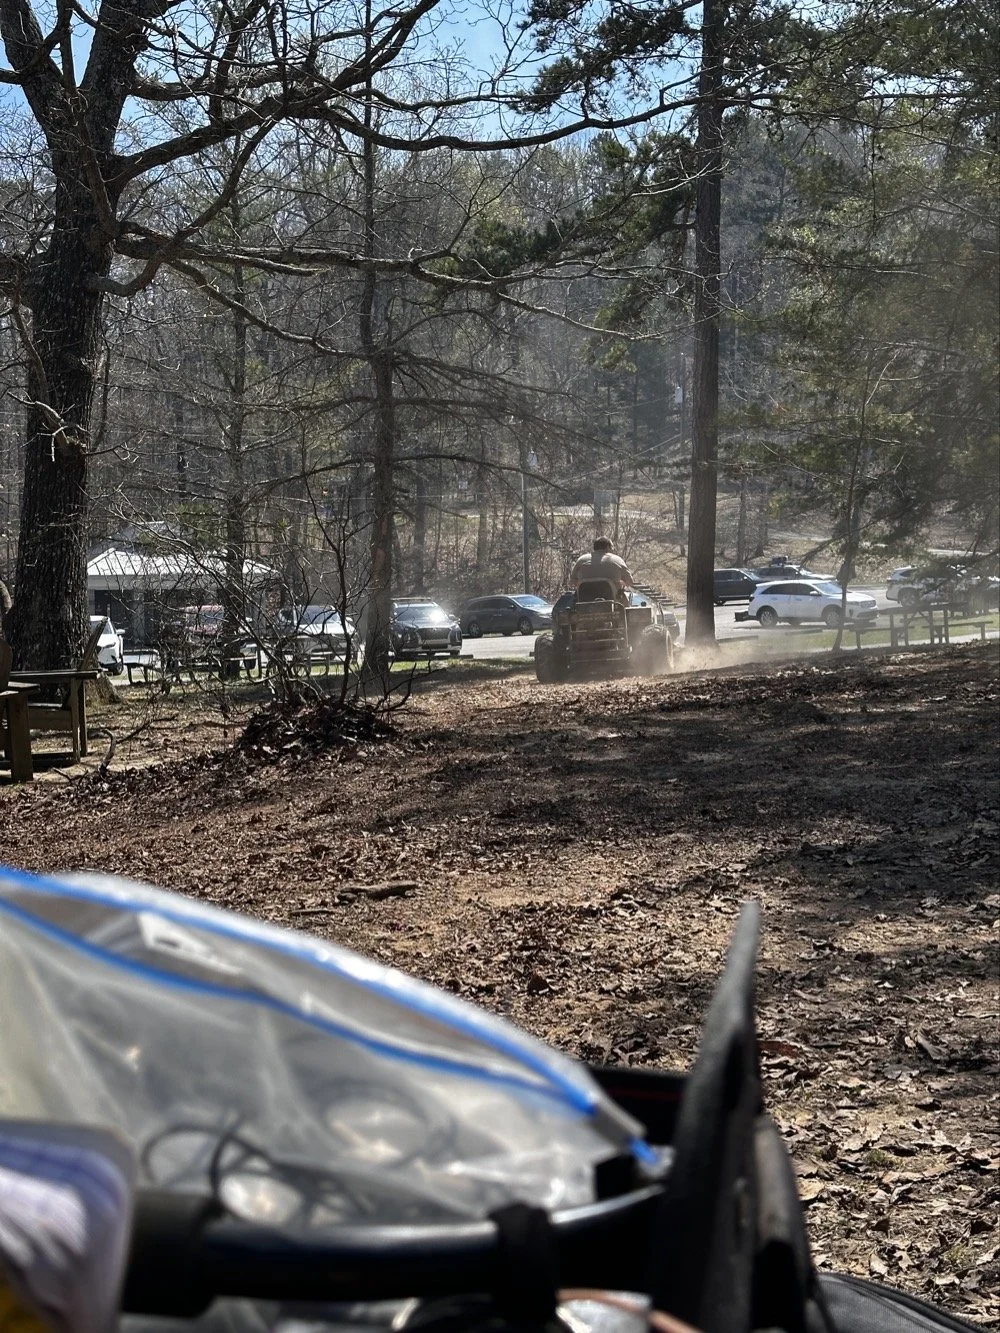
State park employee doing lawn maintenance while I activate POTA at US-2169 Cloudland Canyon State Park.
You guessed it, they felt it imperative to cut the dead leaves in the picnic area RIGHT BESIDE ME!!! Do you see any grass in that site?? I sure didn’t, but he sure was mowing it! Good grief, this is starting to get out of hand at this point and the sound of the engines was so loud that I had to resort to ear bud headphones to be able to hear. This did mitigate almost all of the noise from the mowers but it didn’t do anything for the dust cloud they were stirring up. Good grief.
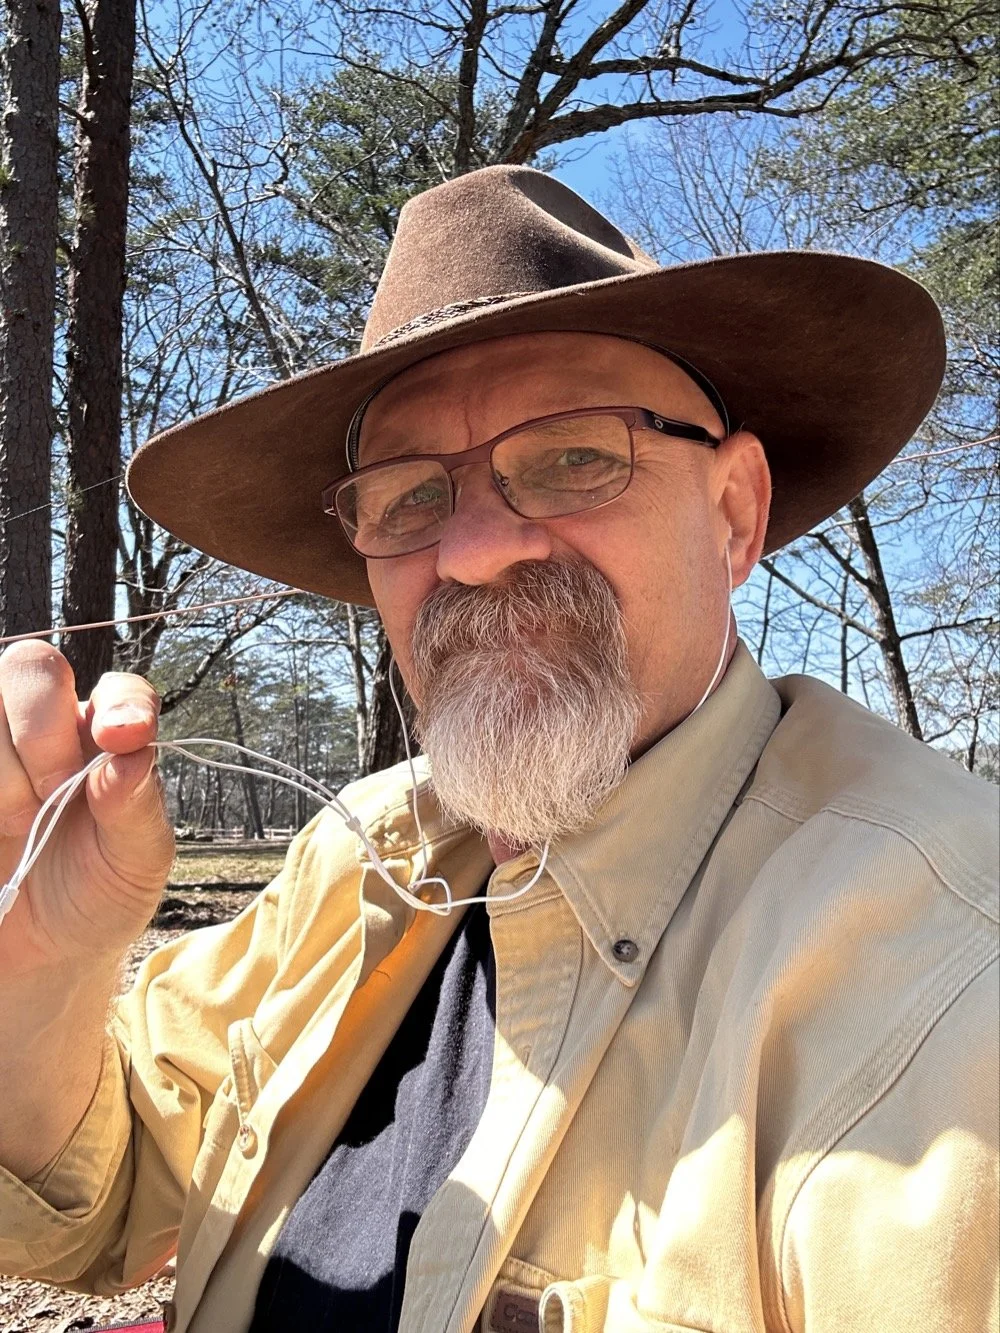
David - WK4DS resorting to headphones due to high noise in the local environment during POTA at Cloudland Canyon State Park
By this point I had almost 80 QSOs in the log so I set a goal of getting 80 counted QSOs to go towards my goal of 10,000 which meant accounting for the dupes in my log, of which there were many today. You see I had been there for several hours at this point and some stations had wandered by me a couple of times. I know I worked one station 3 times today, but so is life sometimes. I no longer tell people I have them in the log, I automatically assume one of two things have happened.
The first one is that I could have gotten someone else’s call wrong and therefore I now have the legitimate call on the hook at that moment. (very possible with my poor hearing at times) The second is that they simply don’t realize I have them in the log. So I work them again and log it again and simply let HAMRS record it as a dupe and move on with life. It doesn’t hurt anything to log them again, other than the time it takes, so I simply complete the QSO as if it was the first time. No harm, no foul.
CW and North America came in clutch for this POTA Activator today!
Today saw me work over 80 calls and of those exactly ZERO were outside of North America. I worked a couple of Canadians but other than that, the rest were US operators only. Not a single DX station at all. It could be one or more of several factors I guess. I did put over 80 calls in the log for today and that is a great day despite all the various things that attempted to stop me. haha. In the end, it was still a wonderful day and I had a great time with my tiny little Penntek TR-35, my Begali Traveler CW Paddle and the Reliance EFHW 40 meter antenna. What a great little setup! Portable, light weight and best of all, it works! What do the old timers say? “Five watts and a wire…” Yeah, it will absolutely work if you will go when the bands are open and just try…
You can help support this website by using these Amazon Affiliate Links:
QRP/Portable Radios:
Antennas & Tuning:
CW Equipment:
Power & Accessories:
Organization & Transport:
BONUS ITEMS
72 - WK4DS (David)

Penntek TR-35 QRP power, DX & POTA fun!
Today saw me back in north west Georgia and back at US-2169 (Cloudland Canyon State Park) for a quick little QRP activation. I deployed the Penntek TR-35 QRP HF Transceiver today as it is simple, compact and fun to use…as long as you like CW. This is because it is a CW only radio…haha. One of the things I love about this particular park though, is the fact that it has so many different places to setup a POTA station and not be in anyone else’s way. Today saw me deploy to the top of the hill at the Frisbee golf course (which happens to be my all time favorite place to deploy when at this park) and setup the telescoping vertical on the truck receiver hitch mount that I made. Since this location is in direct sun most of the time, I opted to set the radio up in the cab.
Cloudland Canyon State Park - US-2169 POTA Destination
Today saw me back in north west Georgia and back at US-2169 (Cloudland Canyon State Park) for a quick little QRP activation. I deployed the Penntek TR-35 QRP HF Transceiver today as it is simple, compact and fun to use…as long as you like CW. This is because it is a CW only radio…haha. One of the things I love about this particular park though, is the fact that it has so many different places to setup a POTA station and not be in anyone else’s way. Today saw me deploy to the top of the hill at the Frisbee golf course (which happens to be my all time favorite place to deploy when at this park) and setup the telescoping vertical on the truck receiver hitch mount that I made. Since this location is in direct sun most of the time, I opted to set the radio up in the cab.
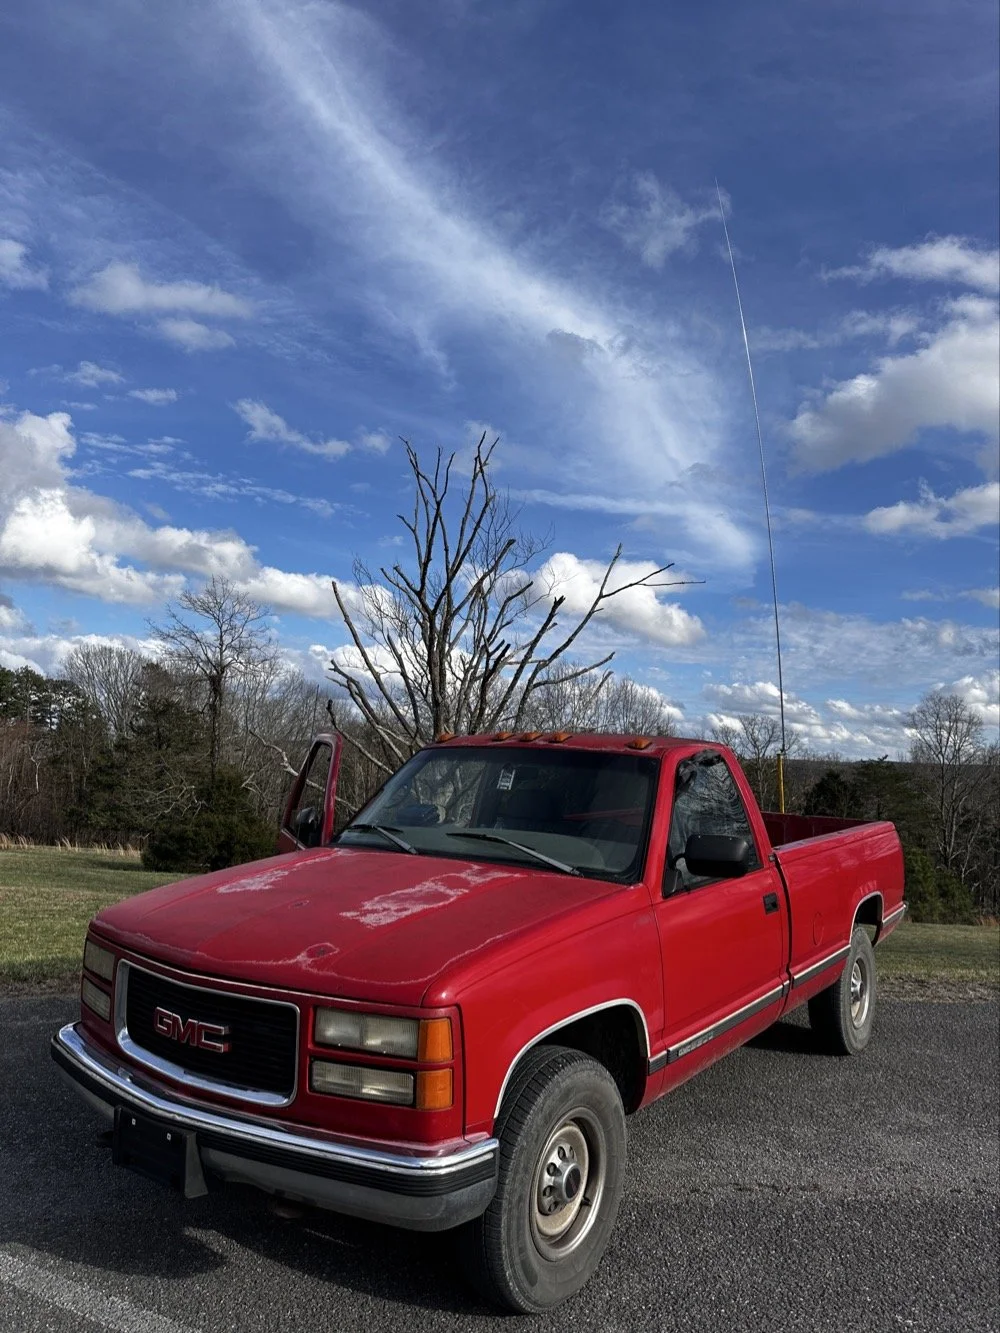
The old red chevy is back in service as the War Wagon is down currently with several problems. Today saw me setup the 18.4’ telescoping vertical from Amazon.
Setting up the 18.4’ Telescoping Vertical Antenna on 20m
Tuning is simple with my old friend the nanoVNA. I have learned to simplify my tuning process to the following. I will setup the antenna and collapse the first section at the top as it never ends up being needed unless I go below 20 meters. Then I deploy the two usual radials and connect them to the ground lug on the antenna base. Then I connect the nanoVNA to the base of the antenna with a short coax jumper and power on the nanoVNA. I have mine set to power on with the span set from 1mhz to 30mhz and you will immediately see the null where the antenna is tuned somewhere in the middle. Then I choose the menu for the marker and set the marker to minimum and then check the “tracking” box so it will follow the null. When you do this, the marker will display the center of the tuned frequency at the top of the nanoVNA. Now all you do is start shortening the antenna a little at a time till the frequency moves up to about 14.050mhz and your done! I happen to be just tall enough to be able to reach to first collapsible section on the antenna while it is still mounted and I can simply slide it down a little at a time without having to take it down to do it. This whole tuning process takes maybe two minutes now that I have done it so many times. It goes really fast. With the antenna built and tuned to 20 meters CW (today I couldn’t get the SWR below 1.5:1 for some reason but as you will see later, that is not a problem), I turned my attention to the radio side of the build out…
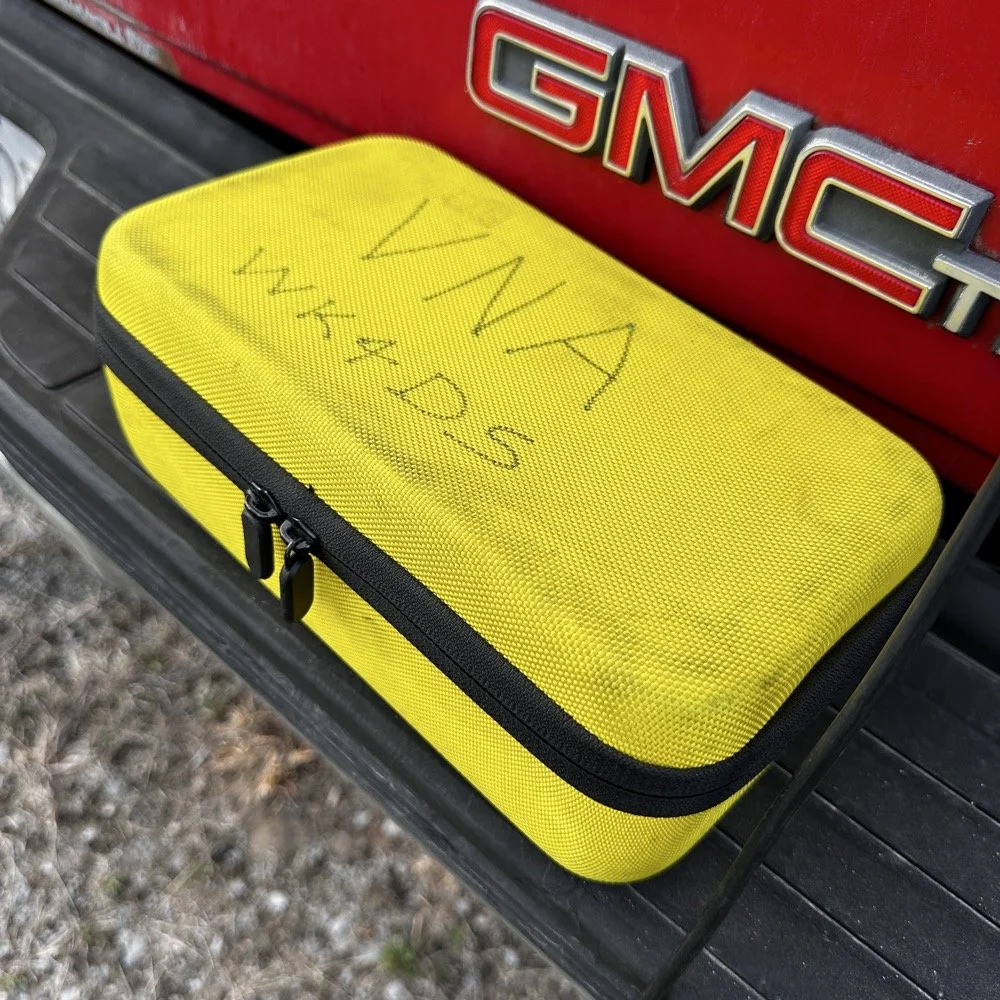
The GigaParts soft shell case is a great way to store a nanoVNA and all the cables and adapters you will collect for it.
Quick side note… I have FINALLY bought a hardshell case for my Begali Traveler CW paddle! I found this little case at Walmart if I remember right and the foam was left over from the Harbor Freight hard shell case for the Scout 555 I bought recently. I guess it pays to hold on to the scraps on occasion…haha. I have about gotten to the point where I dont save stuff like this foam, but for some reason I held on to this one. I really love this key and it have become the de-facto key I use as long as I have a hard surface to sit it on. I have retired my N3ZN key that I got from Tony a while back to my camper key and it now lives with my TenTec Argonaut V permanently in that capacity. I still deploy with three keys most of the time and if I don’t bring the Penntek TR-35 then I will have two keys. I will get into all that later, but for now, lets keep setting up the radio.
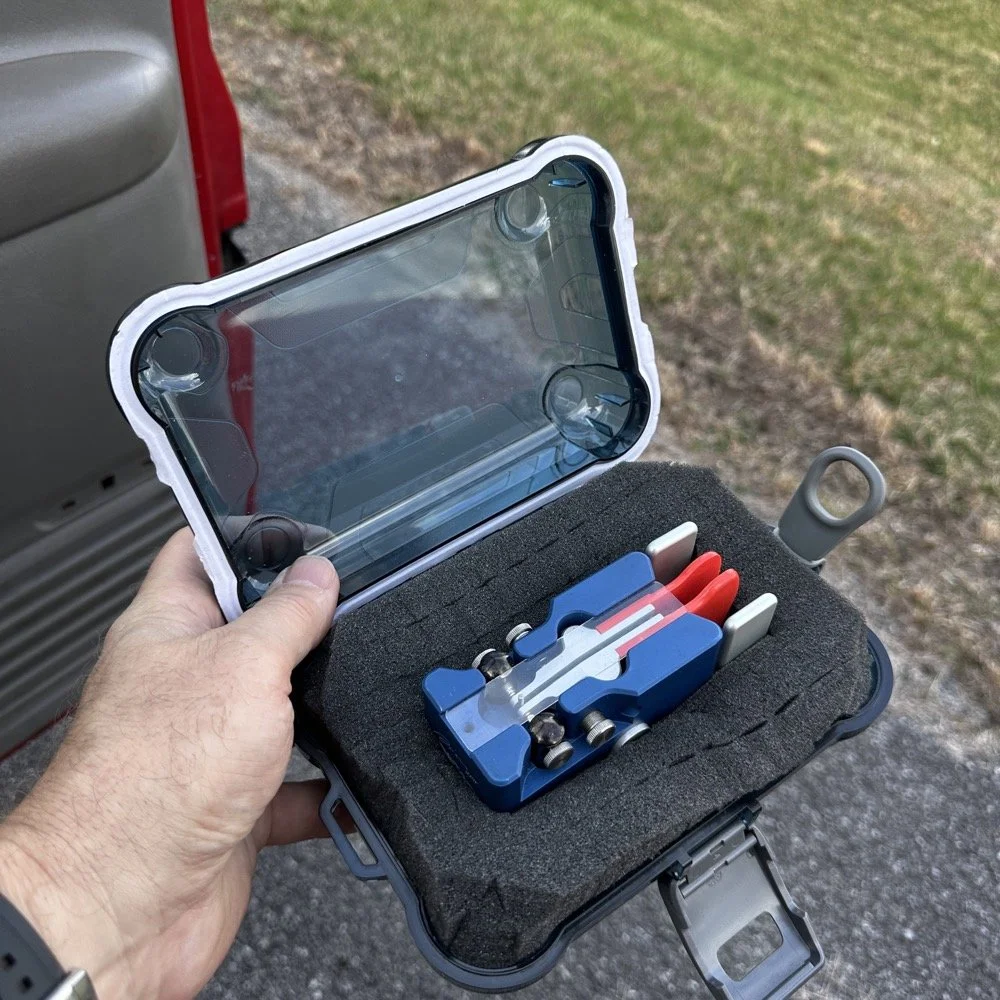
I finally procured a storage solution for my Begali Traveler CW paddle so it doesn’t get damaged between POTA park activations.
Pros and Cons of the Penntek TR-35 QRP Transceiver
Below is the star of the show…the Penntek TR-35 4 band QRP HF Transceiver. This little radio sports the following features which make it perfect for POTA field ops.
It is small and light weight.
Output power is a full 5 watts and adjustable down from there.
Three filters he calls SSB(VERY wide), CW wide and CW narrow. I think CW narrow is 500hz or a little less as it is really selective.
Two keyer memories that are easy to program once you get the cadence down.
4 HF bands (40m, 30m, 20m, & 17m) The radio only toggles up through the bands with the band switch. Simple and effective.
RIT which is de-facto split if you need to work a split station. It also helps me when someone is off a couple hundred hertz as well.
VFO has three speeds for the tuning. The default two are past the decimal and a long press on the VFO will set it to 1 khz tuning which is really fast for the CW portion.
There is a physical RF Gain AND a Volume knob!!! That is awesome on a whole different level by itself.
The keyer speed is set by a knob so speed changes for different POTA hunters is easy and fast. I really like this feature.
It has a straight key input as well as a paddle input so you are ready to go with either kind of key.
Some detractors that I wished were different are…
I really wished it had 15 meters instead of 17 meters…but I digress…
It is so small that there is no room for a speaker so you must use some sort of external speaker whether it be earphones or something like what I used today.
It lacks an S meter and this bothers me so much that I built one just for it. Link is here to that article…
That is about it for what I dont like, it is almost perfect.
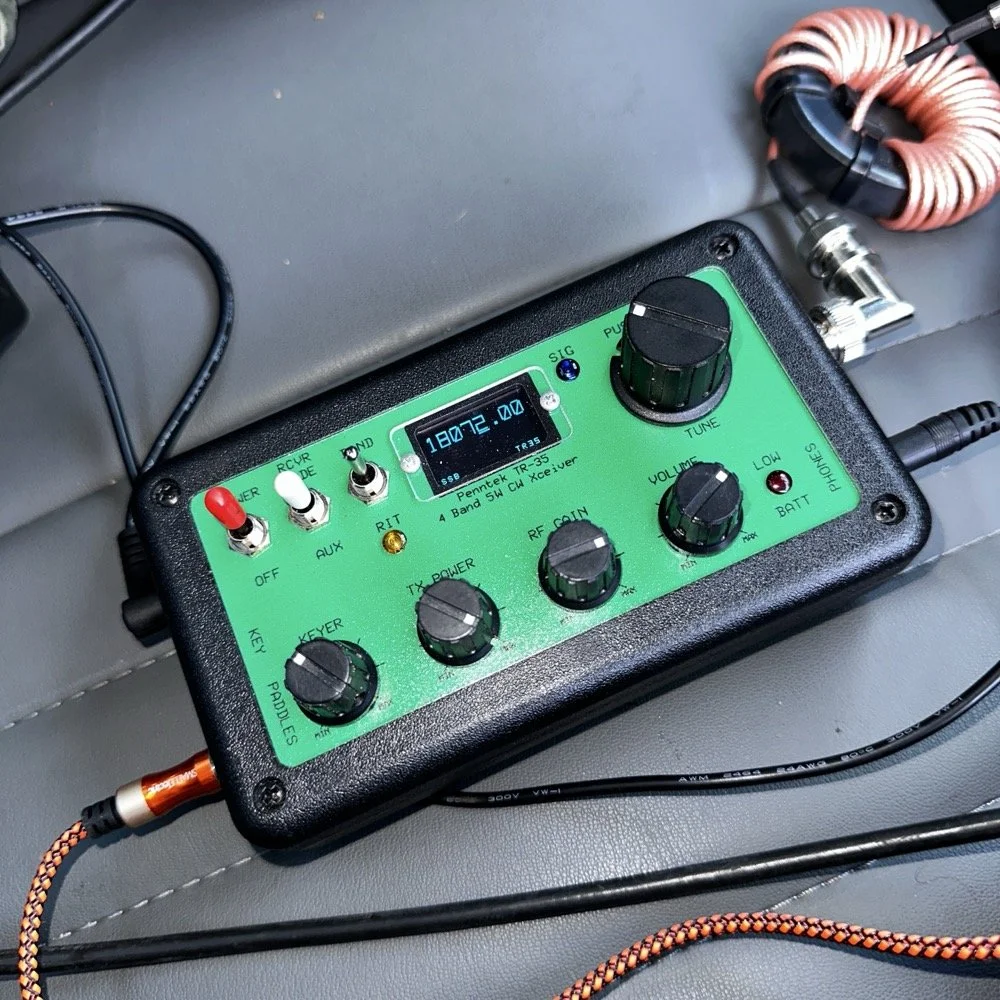
The Penntek TR-35 HF QRP transceiver is almost perfect, it is so close I wouldn’t change it now if I could. It really has everything you need and nothing you don’t to run a POTA activation.
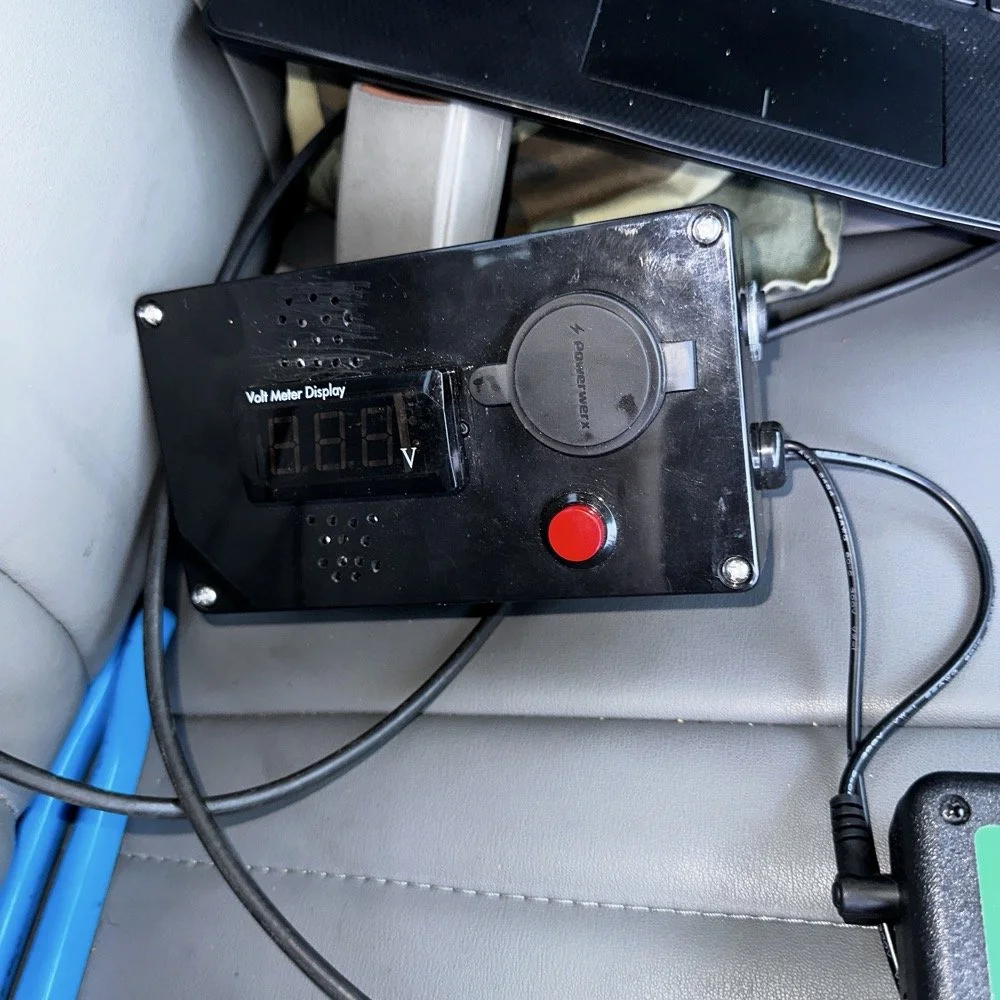
Homebrew power pack containing a Bioenno 3Ah LiFePO4 battery, speakers and a "on demand" voltmeter with a pair of Anderson power pole connectors
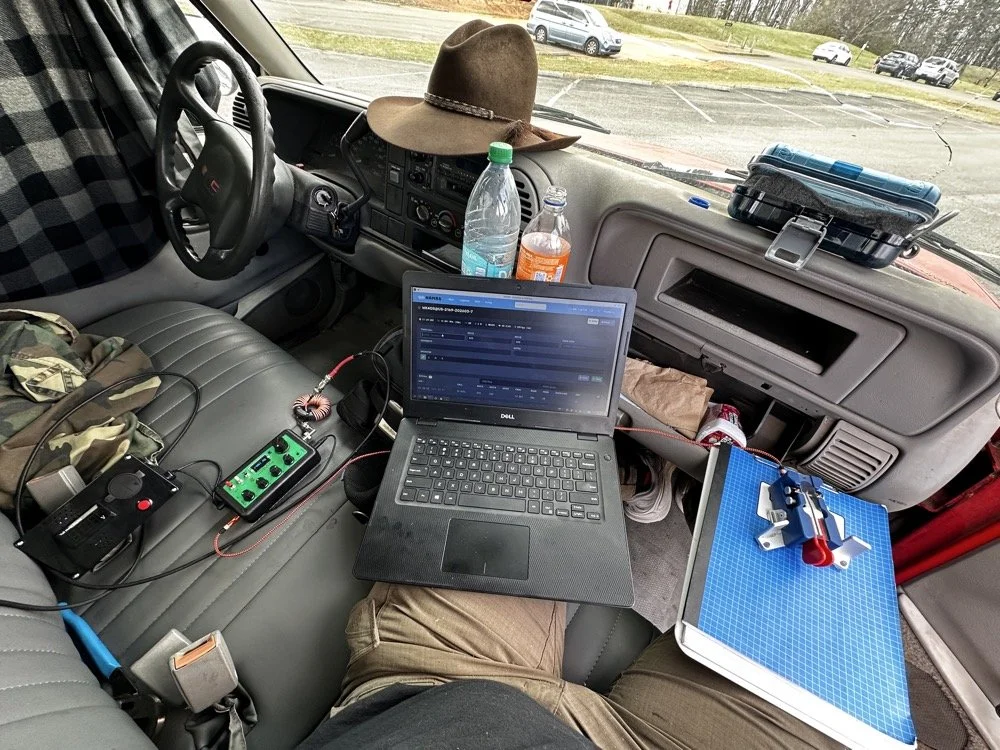
This is the station for today. Dell Inspiron computer, Begali traveler paddle, Penntek TR-35 QRP radio, and a POTA park!
POTA Station Positioning and Start Up
Once I finished connecting all the RF equipment together, I had to figure out where I would sit. I had not really considered this as my regular truck has that huge, flat arm rest that I normally have access to. With that considered, I decided to setup in the passenger seat as this made the most logical sense. Then I had the problem of the sun causing me a ton of glare and I had to come up with something to mitigate it. The below photo is my expedient “curtain” that I simply rolled up in the window. Modern problems call for modern solutions… lol.
Once the sun was beaten back out of the cab of the truck, I had to figure out how to setup up the whole station so that I could send code and log the contacts as well. What you see is how I solved that problem, I just balanced the computer on one leg and the clip board is cheated. The clip board is actually sitting on the top of the open glove box, which is stabilizing it, and then it is making the third contact on my leg which turned out to be very stable for the cw key. The Begali Trraveler is one of those keys that once you get it set like you want, it is simply a dream to use. I have learned that it takes me a few minutes to get it positioned properly or I will make a lot of mistakes with it. But once I get it in the right spot, it just works.
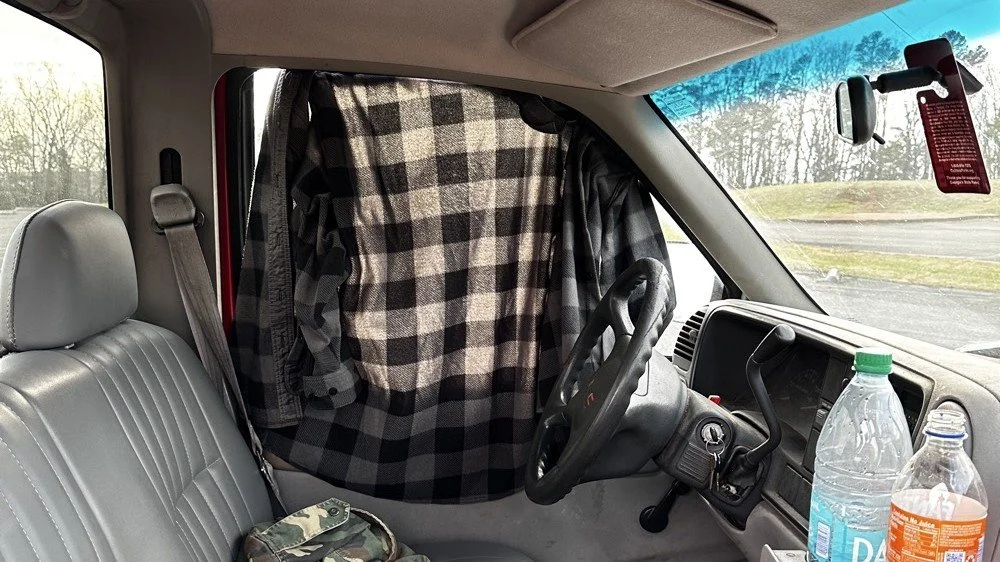
Simple problems require simple solutions, this is how I removed the sun glare off of my radio and computer screen today. If it works…
Activation Report: The Penntek TR-35 and 5 watts of RF Power
Once I had the station sorted out, I powered up the rig and hunted me a clear frequency, today the 20 meter band was going strong so the band was a little crowded. I would call QRL (This means “Is the frequency in use?”) and I would hear a lone “R” come back to me. This means someone is using it so I would simply dial to another frequency and try again. I finally found a clear spot and listened for a bit as sometimes you are on the other side of a station that is talking to someone you can not hear and they are listening to them at the time you get on frequency. So it is a good idea to listen for a while before sending QRL to make sure this is not happening. I didn’t hear anything and after calling QRL again, I started calling CQ POTA… Then things took off…
The log for this activation came together really nicely, and I was pretty happy with how the bands cooperated. All 36 contacts were CW at 5 watts QRP from US-2169, split between 20 meters and 17 meters.
I started on 20m at 14.061 and the pile-up got going almost immediately. The contacts came in steadily from all over the place -- Illinois, Vermont, Michigan, Missouri, Maryland, North Carolina, Texas, and more. A couple of Canadian stations made it into the log too, with VE3UXJ and VA3EKR both pulling through with solid enough signals to complete the exchange. Signal reports on 20m were mostly in the 559 to 599 range, which honestly is about as good as it gets when you are running 5 watts into a field antenna. Also remember that this radio lacks that S meter I like to have…so the signal reports were a bit more subjective today compared to other days.
After working through the 20m pile-up, I switched over to 17m at 18.072, and that is where things got really interesting. The band was in good shape with minimal QSB and the contacts kept coming. It did take a few minutes of calling CQ to get the RBN (Reverse Beacon Network) to auto update my spot on the spot page of the POTA website, but once it did, things started looking up! I picked up stations from Idaho, Florida, Colorado, Washington, and Texas, among others. But the two that really stood out were HI8D out of the Dominican Republic and JH1OCC from Japan! Getting Japan in the log on 5 watts from a field activation is always a treat, and the fact that JH1OCC came back at all through the noise is a testament to how well 17m was performing this afternoon. His received signal report was a 339, which is pretty typical for a trans-Pacific path at QRP, but a contact is a contact and I will absolutely take it! This has happened to me a few times now while doing POTA, I will be on one of the upper bands and a band opening to the Far East will open up for a couple of minutes and I will land one or two Japan calls. It takes me a minute to process this sometimes, as it is a long way to Japan from NW Georgia!
Total QSO count landed at 36, which is a solid activation by any measure. Both bands contributed meaningfully, and the geographic spread across the log -- from the Midwest out to the Rockies, up into Canada, down to the Caribbean, and all the way to Japan is one of those things that never gets old no matter how many activations you do. Five watts and a wire…errr…vertical…lol…, doing its thing. This setup worked pretty well but if I could improve it, I would make a more steady surface for the key. The key moved around too much for my liking so I would like to correct that going forward, like maybe use a different key…lol. Anyway, it was a great day in the park and I hope this nudge you to get out and activate a park near you.
You can help support this website by using these Amazon Affiliate Links:
QRP/Portable Radios:
Antennas & Tuning:
CW Equipment:
Power & Accessories:
Organization & Transport:
BONUS ITEMS
73, David / WK4DS

Alafia River POTA: How 12 Meters Delivered 72% DX While Everyone Else Fought on 20m
Everyone defaults to 20 meters for POTA. It's crowded, competitive, and honestly…boring at this point. So at Alafia River State Park (US-1829), I did something different: I skipped 20 meters entirely and focused on 12 and 15 meters instead. The result? A 72% DX rate on 12 meters, contacts to 10 different countries in under an hour, and some of the best propagation I've experienced from a Florida state park. All at 10 watts.
Everyone defaults to 20 meters for POTA. It's crowded, competitive, and honestly…boring at this point. So at Alafia River State Park (US-1829), I did something different: I skipped 20 meters entirely and focused on 12 and 15 meters instead. The result? A 72% DX rate on 12 meters, contacts to 10 different countries in under an hour, and some of the best propagation I've experienced from a Florida state park. All at 10 watts.

Let me show you why 12 meters is the band everyone's ignoring while they pile up on 20m.
Why I Skipped 20 Meters Entirely
Look, I get it. 20 meters is the default POTA band. It's where everyone goes, it's where the hunters expect you to be, and it's reliable. But reliable also means crowded, and crowded means QRM, pile-ups, and fighting for frequency space with a dozen other activators doing the same thing.
We're near solar cycle maximum right now, which means the higher bands (10m, 12m, and 15m) are performing like 20m used to during previous cycles. But most POTA activators haven't adapted their band strategy yet. They're still automatically going to 14.061 MHz CW or 20m SSB without even checking what's happening higher up in frequency.
So today at Alafia River State Park with Chas (who was also activating), I made a conscious decision: skip 20 meters completely. Start with 12 meters, see what happens, then move to 15 meters. If those bands produced nothing, I could always drop to 20m as a backup. But I had a feeling 12m was going to surprise me.
Spoiler: it absolutely did.
The Alafia River State Park Setup
Alafia River State Park is designated US-1829 for POTA and it's located in Lithia, Florida, just southeast of Tampa. The park has a really nice covered pavilion with picnic tables, bathrooms, and RV camping area with good tree coverage. Spanish moss everywhere, typical Florida scrub vegetation, and plenty of tall trees for wire antennas.
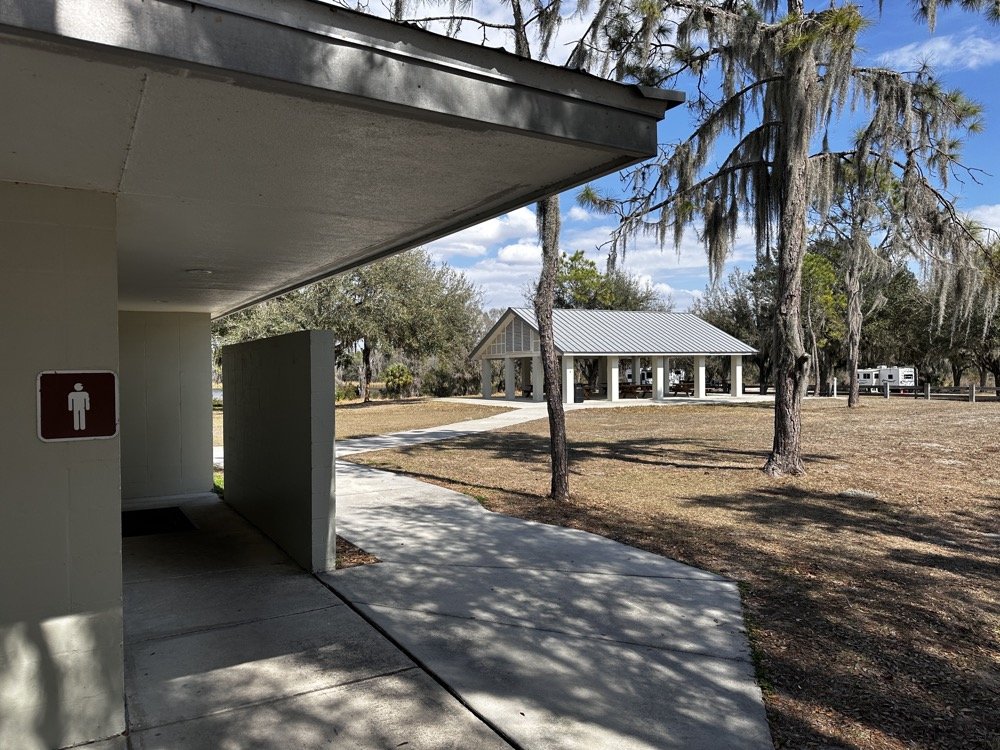
The covered pavilion where we set up for the activation. Clean facilities, picnic tables, and good tree coverage for wire antennas.
Chas and I both set up under the pavilion, him at one table, me at another about 20 feet away. This gave us enough separation to avoid too much RF interference between our stations, though we still had to coordinate who was transmitting when to avoid stepping on each other.
My antenna setup was a 65 foot random wire thrown up into one of the larger trees near the pavilion. I'm guessing it got maybe 30-35 feet up into the branches, which isn't spectacular but it's what I could reach with the available trees. The radiator came down to the tuner that is tied up high on the corner column of the pavilion. I also used a larger set of radials so the antenna would be more likely to work on 40 meters. But that didn’t seem to matter as I would come to find out…
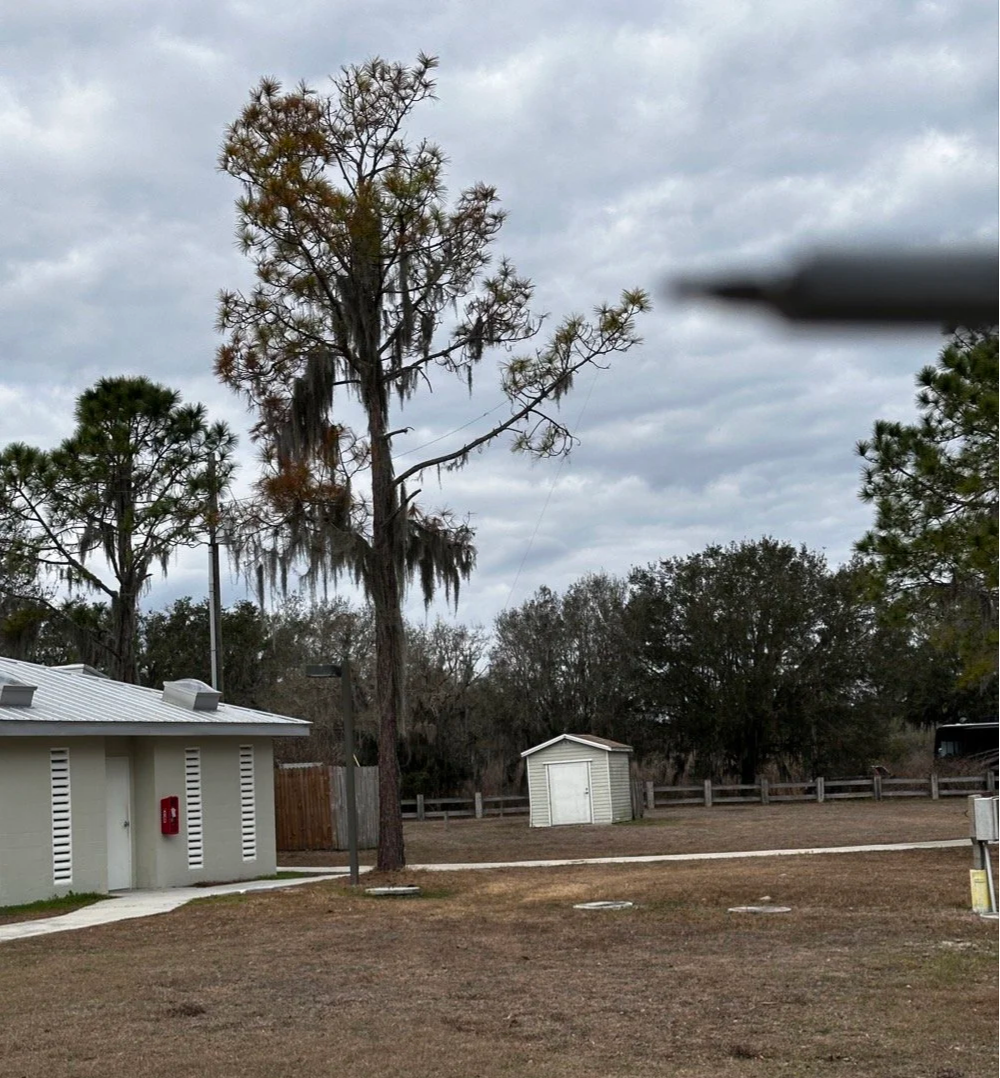
This is the tree branch I had my wire antenna ran out to, if you look close, you can see the wire antenna in the photo.
Now here's where I need to be honest about the equipment struggles today... I am not immune to making common, simple mistakes and here are a couple from today that I actually did. I started out on 40 meters and wanted to work some stations there since it was supposed to be about 9:30 when I would be starting the activation. Well, that isnt how it went at all. I started out usng the Elecraft T1 antenna tuner with the sBitx. This turns out to be a problem though, you see JJ and the team added a high SWR protection script in the new code and if the SWR goes over 3 to 1 then it automatically turns the output power all the way down to prevent it from killing the finals. Well, it seems that as the Elecraft T1 goes through the tune process, the SWR will rise above 3:1 and this shuts off the RF from the radio and the tuner cant finish the tune…
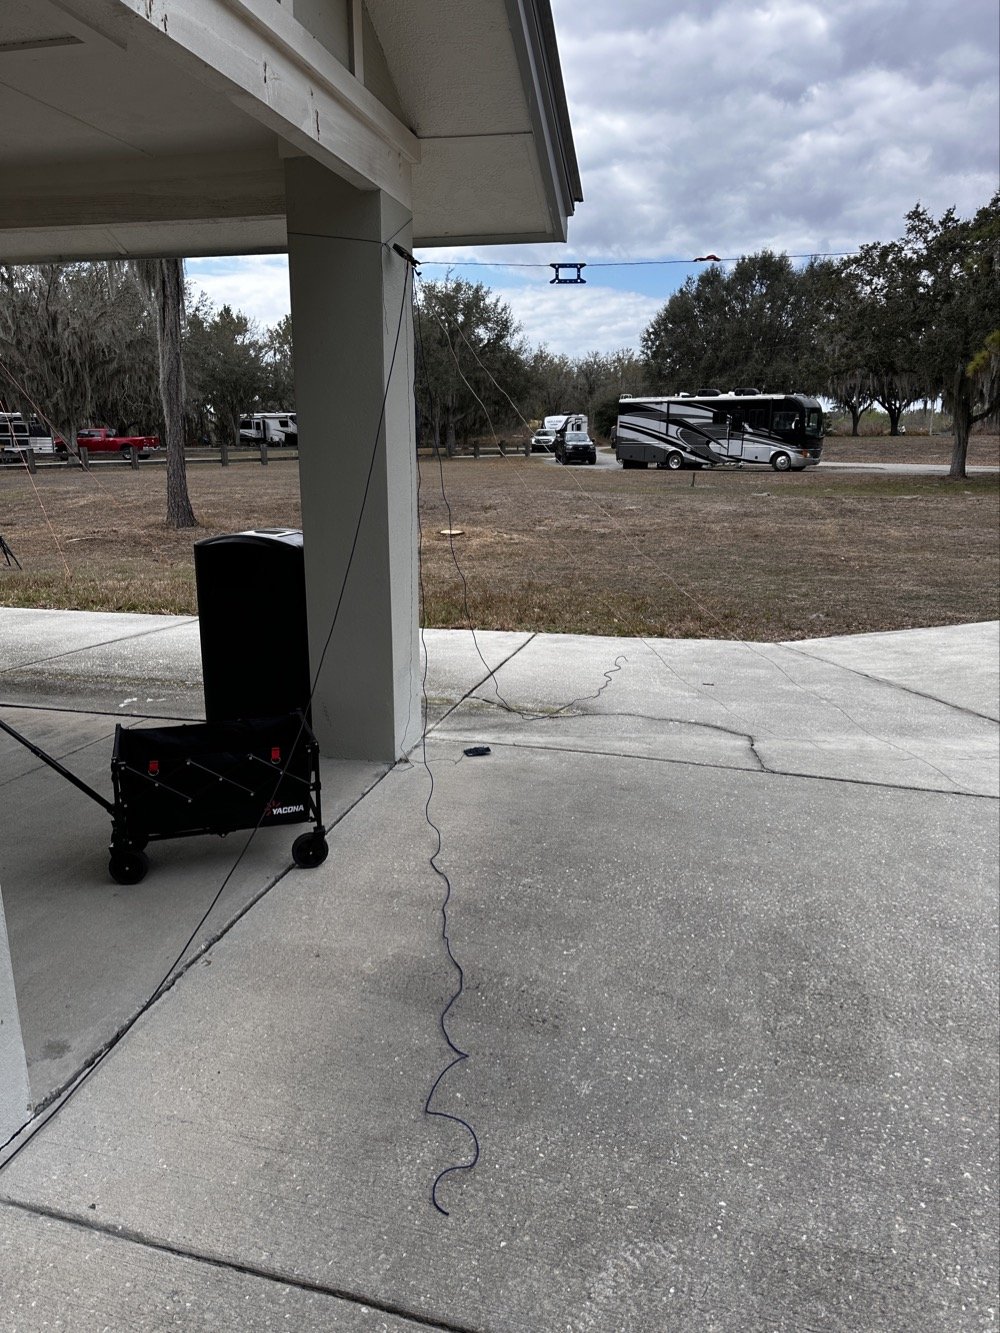
Elecraft T1 Antenna Tuner with wire antenna and ground radials tied to pavilion column.
But before I figured this out, there is another small detail… The sbitx tune feature is simple, hit a button and it will “dead key” the radio and hold that for a time. Both the level of power and the time are adjustable in the menu so I set it to 20 seconds and the level to about 5 watts as the T1 is a QRP tuner. The Elecraft T1 can tune about anything you want to use for an antenna to a usable SWR so I was confident in the little tuner. Soooo, I would hit the tune button on the sBitx then sprint over to the tuner and hit the button on it to activate the tune feature on the tuner. The tune timer on the sBitx would finish right as I would get back to the radio. I would check it with a Morse code key in CW mode and the radio would and SWR of 5 or 6 to 1 and the output power would be turned all the way down… I would turn the power back up to 5 watts and then try again. I performed this comedy act a few more times before seeing the “SPLIT” button was on and that the B VFO was on 15 meters!
Armed with this knowledge, I confidently turned off split and immediately found myself back to the HIGH SWR alarm on the sBitx… No matter what I did, as soon as the Elecraft T1 would start the tune cycle, it would trip the radio SWR protection feature and this would turn off the transmitter in the radio and by extension, also shut down the tuner mid-tune… Frustrated by this revelation, I found myself getting the Penntek TR-35 out of the bag and using it a couple of times to find out it was doing the same thing! After spending 30 minutes doing this, I finally threw in the towel and just went out to the truck and got my MFJ941 manual tuner and the nanoVNA and connected it in place of the Elecraft unit.
But the fun doesn’t stop here! I could not get this one to tune either! What was going on here!!! Well, it turns out that I had at some point switched the MFJ’s antenna selector from wire to the next antenna port and didn’t check it so I was effectively tuning the SO239 connector on the back of the tuner to 40 meters!!! Good grief, this has been a mess! Once I figured this out and set the tuner to the correct antenna, it tuned up almost instantly. This whole debacle took over an hour to sort out, so if you think you are not very good at POTA setup and breakdown because you see these “old pros” doing it effortlessly, just know we are not immune to errors and odd problems either…haha.
Back to the rest of the activation report…
Radio-wise, I was running the sBitx v3 at 10 watts maximum. For those not familiar with QRP POTA operations, 10 watts is pretty normal power level, it is about 1/10th of what most people run. But it's what the sBitx puts out reliably on all bands and that is well within the Elecraft T1 tuner’s power handling capability (remember, I had started with this tuner), and honestly, with propagation conditions this good, power isn't the limiting factor anyway.
I had my Dell laptop for logging contacts in HAMRS (the POTA logging software), a foldable keyboard because typing on a laptop in bright sunlight is annoying, a CW paddle, and the usual field gear—water bottle, clipboard with paper log backup, etc. Pretty standard POTA kit.
12 Meters: The Band Everyone's Ignoring
I fired up the sBitx on 12 meters around 1600 UTC (11:00 AM local time) and started calling CQ on FT8 at 24.915 MHz. Within seconds, I was getting responses. And not just USA stations, I'm talking Greece, France, Netherlands, Spain.
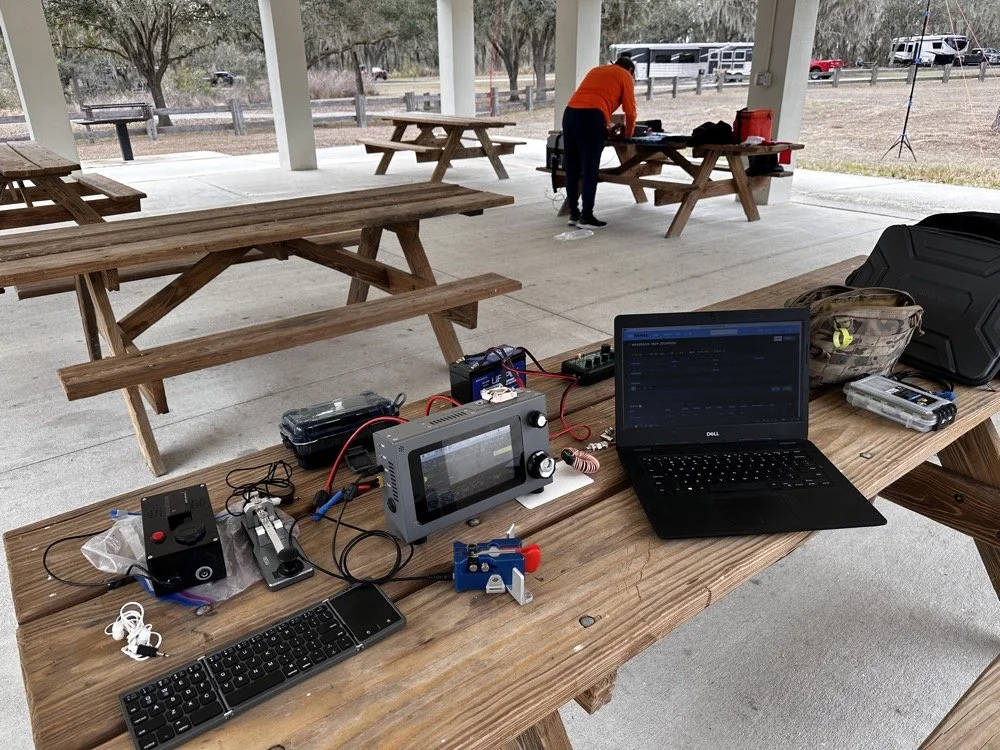
The station: sBitx v3 running 10 watts, MFJ-941 manual antenna tuner, Dell laptop for logging, Begali Traveler CW paddle, and field keyboard. This setup delivered 72% DX on 12 meters today!!!
The first contact was PB2A in the Netherlands at 1620 UTC. Signal report was strong both directions. Okay, that's promising! 12m is open to Europe!
Next contact: EA5KB in Spain at 1622 UTC. Also solid copy.
Then SV1GYN in Greece at 1626 UTC, followed by SV8EFJ (also Greece) at 1631 UTC.
This is when I realized 12 meters wasn't just "open" to Europe it was absolutely on fire! In the next hour, I worked:
Three stations in Greece (SV1GYN, SV8EFJ, SV7FDA)
Two stations in France (F4IFO, F6BIA)
Spain (EA5KB)
Netherlands (PB2A)
Portugal (CT1FIU)
Czech Republic (OK1DTC)
Poland (SP2GCJ)
Plus Brazil, Dominican Republic, and Canada as bonus DX
That's 10 different countries in less than an hour on 12 meters. With 10 watts. From Florida. To put this in perspective: of the 18 contacts I made on 12m, 13 were DX (non-USA). That's a 72% DX rate.
When was the last time you heard anyone report a 72% DX rate from a POTA activation? This is why solar cycle maximum matters, and this is why you should check 12 meters before defaulting to 20m.
The propagation held solid from about 1606 UTC until around 1657 UTC when it started to fade. That's nearly an hour of wide-open conditions to Europe from a Florida state park with a wire antenna and 10 watts. Just... chef's kiss (I saw someone else use this term and it absolutely applies here, lol). This is what amateur radio is supposed to be.
15 Meters: The Reality Check
After 12 meters started fading around 1700 UTC, I switched to 15 meters to see if the party was still going. Spoiler: it was not.
15 meters wasn't dead as I made 10 contacts between 1738 and 1748 UTC but the DX had evaporated. Out of those 10 contacts:
8 were USA stations (domestic)
2 were Germany (the only DX and were way down in the noise)
That's a 20% DX rate on 15m compared to 72% on 12m. The contrast was striking and immediate. As soon as I moved from 24 MHz to 21 MHz, I went from European pile-ups to mostly USA stations.
This isn't a knock on 15 meters, it's just propagation and we all know how the sky likes to mess with out brains…. By late afternoon (1730-1800 UTC), 15m was transitioning from long-skip DX to shorter-distance USA contacts. Which is fine if you need domestic QSOs to reach your 10-contact activation threshold, but if you're chasing DX, 12m was clearly the better choice earlier in the day.
The lesson here: timing matters just as much as band selection. 12m was the star of the show from 1600-1700 UTC. 15m was better for domestic contacts after 1730 UTC. If I'd started on 15m at 1600, I probably would've missed the entire European opening on 12m.
The 40m and 10m Bookends
I also made a few contacts on 40 meters and 10 meters to round out the activation, mostly just to see what those bands were doing.
40 meters (4 contacts): Mostly short-skip USA stations. Nothing surprising here as 40m in the afternoon is for regional contacts. It works, it's reliable, but it's not going to give you Greece with 10 watts and a random wire thrown over a tree branch.
10 meters (4 contacts): Had a brief opening but nothing like 12m. A couple of USA stations and some Caribbean/Central America. 10m can be spectacular during solar max, but today it was just "okay." You could just watch the stations fade in and out on the band here on the waterfall…
Final tally for the activation:
Total: 36 QSOs
12m: 18 QSOs (50% of total) - 72% DX rate
15m: 10 QSOs (28% of total) - 20% DX rate
40m: 4 QSOs (11%)
10m: 4 QSOs (11%)
Modes: 50% CW, 50% FT8
Twelve meters did half the work and delivered nearly all the DX. That's the story.
Operating With Chas: Multi-Operator Coordination
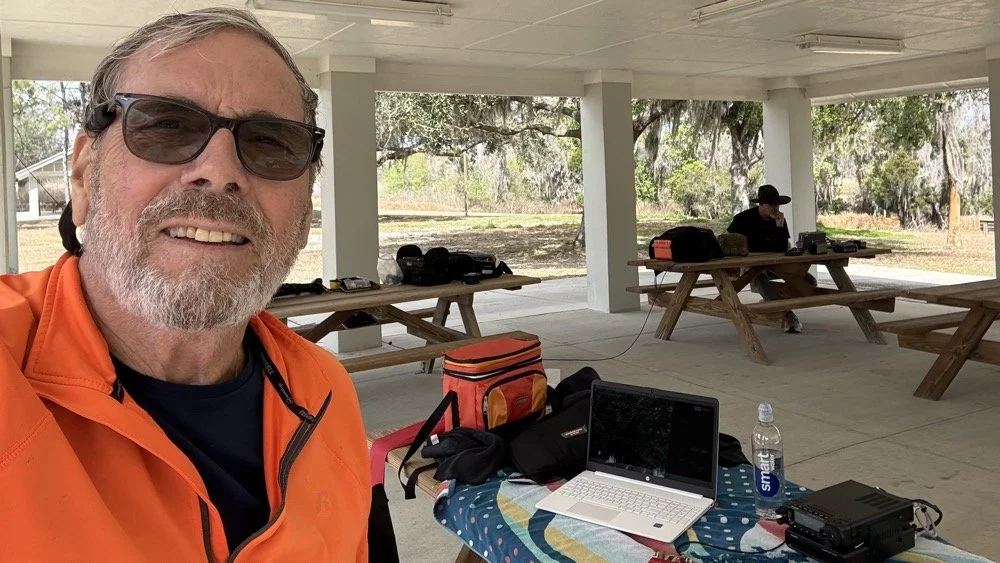
Chas (NA2B) at his operating position with me in the background. Multi-operator POTA setup at Alafia River State Park—he's about 20 feet away to minimize RF interference.
Chas was set up about 20 feet away at another picnic table under the same pavilion, also activating US-1829. We coordinated our operating so we weren't transmitting on top of each other. He started on 30 meters since I was on 40 and after I finished on 40, I jumped all the way to 12 meters so he could move slowly up the band through 20 then 17 and even 15 before he got his 60 and called it a day. He runs 50 watts currently and has great success with it, but the QRP bug has bitten him and he is going to be turning down the power dial soon… or so he says… haha
This coordination is important for multi-operator POTA setups. You can absolutely operate two stations simultaneously from the same park, but you need enough physical separation to avoid RF interference (20-30 feet minimum), and you need to pay attention to who's transmitting when. If both operators key up at the same time on different bands, you'll hear it immediately as front-end overload or mixing products.
It actually works out pretty well though, you have someone to talk to between contacts, you can share band information ("hey, 12m is wide open to Europe right now"), and if one operator needs help with something technical, the other person is right there. Plus it makes the drive more enjoyable when you're carpooling to the activation site (which we didn’t do this time, but this point is still valid). All of this and it is just plain fun to hand out with a like minded person for a while and just have the fellowship.
Chas and I have done several multi-op activations now and we've got the coordination pretty well figured out. As long as you're mindful of the RF environment and don't step on each other's transmissions, it's actually a really fun way to do POTA.
Lessons for Other POTA Activators
If you take away one thing from this activation, let it be this: check 12 meters before you default to 20 meters.
Most POTA guides and YouTube videos focus on 20m and 40m because those bands are "reliable." And they are! You can almost always make contacts on 20m or 40m during a POTA activation. But reliable isn't the same as optimal…or fun..
We're at solar cycle maximum right now (or very close to it), which means the higher bands—10m, 12m, and 15m—are performing better than they have in a decade. But those bands are only open during certain times of day, and you have to actually check them to know.
Here's my recommended POTA band strategy for 2025-2026:
1. Start with 12 meters during daylight hours (1500-1900 UTC / 10 AM - 2 PM local) Check FT8 on 24.915 MHz or CW around 24.900-24.910 MHz. If you see European or South American stations, stay there. Don't move until the band fades.
2. If 12m is dead, try 15 meters next Same time window. 15m opens a bit earlier and stays open a bit later than 12m.
3. If both higher bands are quiet, then drop to 20 or 17 meters You haven't lost anything by checking 12m and 15m first, it only takes 5 minutes to scan FT8 and see if there's activity. But if you skip straight to 20m, you might miss the entire European opening on 12m.
4. Add 40 meters in the evening or early morning 40m is your regional workhorse. Use it to fill in USA contacts if you need to reach your 10-QSO activation threshold.
5. Keep an eye on 10 meters during solar max 10m can be absolutely bonkers during cycle peaks. Sometimes it's dead, sometimes it's a highway to Japan. Worth checking.
Key point: Solar cycle conditions change everything. The band strategy that worked in 2019 (solar minimum) doesn't apply in 2025 (solar maximum). Adapt your approach, check the higher bands first, and you'll be rewarded with DX that most POTA activators never experience because they're stuck in the 20m/40m routine.
The "Skip 20m" Strategy: Does It Always Work?
Okay, let's be realistic here. Will 12 meters always deliver 72% DX rates? No, of course not. Propagation is fickle, solar conditions vary day to day, and sometimes the higher bands are just dead. The sun giveth and the sun taketh away.. lol.
But here's the thing: you don't know until you check. And checking takes 5 minutes to tune to 24.915 MHz on FT8, watch the waterfall for 1 minute, and see if you're decoding any DX stations. If it is a yes, start calling. If no, move down to 20m like you were going to do anyway.
The worst-case scenario is that you "waste" 5 minutes checking a dead band and then go to 20m as your backup. The best case scenario is that you find a wide open band to Europe with zero QRM and work 10 countries in an hour with 10 watts.
I'll take that bet every time.
Also worth noting: 12 meters is way less crowded than 20m. On 20 meters during a weekend, you're competing with dozens of other POTA activators, contest stations, and regular QSOs. On 12 meters? Most of the band is empty. You can call CQ on an open frequency without worrying about stepping on someone else, and when DX stations hear you, you're often the only POTA station they can work on that band.
Less QRM, better propagation, higher DX percentage, what's not to love?
Alafia River State Park: Worth Activating?
As for US-1829 specifically: yeah, it's a nice park. The covered pavilion makes POTA operations comfortable even in Florida weather (sun, rain, whatever), the facilities are clean and modern, there's RV camping if you want to stay overnight, and the trees provide decent antenna support.
It's about 30 minutes southeast of Tampa, so it's accessible if you're in the area. Not a destination park like some of the big state parks, but definitely worth activating if you're looking for a Florida POTA location that isn't mobbed with tourists.
The tree I used for the 65-foot random wire was a large pine tree of some variety with good height and thick branches for support. Spanish moss everywhere, typical Florida landscape. Got the wire up to maybe 30-35 feet, which is serviceable if not spectacular.
One note: there were RVs parked in the camping area about 100 feet from the pavilion, so we weren't completely isolated. Nobody bothered us though, and one RV owner came over to chat about amateur radio for a few minutes. Friendly folks just out camping.
Best time to activate: Late morning to early afternoon (local time) if you want to catch the 12m European opening. Earlier in the day if you want 40m to be productive for longer distance USA contacts.
Facilities: Bathrooms, covered pavilion with tables, RV camping, paved parking. Bring your own food/water.
Antenna options: Plenty of trees for wire antennas. A vertical would work too if you prefer.
Final Stats and Conclusion
Let's wrap this up with the numbers:
Total QSOs: 36
12 meters: 18 QSOs (50% of total) - 72% DX rate
15 meters: 10 QSOs (28%) - 20% DX rate
40 meters: 4 QSOs (11%)
10 meters: 4 QSOs (11%)
DX Worked: 12 different countries
Greece (3 QSOs)
France (2)
Germany (2)
Brazil (2)
Plus Spain, Netherlands, Portugal, Czech Republic, Poland, Canada, Dominican Republic, US Virgin Islands
Modes: 50% CW, 50% FT8 Power: 10 watts QRP Antenna: 65-foot random wire at about 30-35 feet
The takeaway: 12 meters is the secret weapon for POTA DX during solar cycle maximum. While everyone else is fighting on 20 meters, you can have an entire band nearly to yourself with better propagation, less QRM, and DX rates that would make any contester jealous.
So next time you're setting up for a POTA activation, do me a favor: check 12 meters first. You might be surprised what you find.
Thanks and get your radio out!
Have you worked DX on 12 meters during POTA activations? What bands are you checking during solar max? Drop a comment! I'd love to hear what's working for you.
You can help support this website by using these Amazon Affiliate Links:
QRP/Portable Radios:
Antennas & Tuning:
CW Equipment:
Power & Accessories:
Organization & Transport:
BONUS ITEMS
73, David / WK4DS

Smith Charts are easy…(The basics of antenna matching.)
When I decided to learn about Smith Charts and how to use them, I had no idea what a giant rabbit hole that was going to be. I have learned so much more since writing that first blog post about them that I wanted to revisit it and share some information with my readers. I love to learn new things and for some reason I have never taken the time (till recently that is…) to learn how to even read a smith chart, much less how to use them to design ANYTHING!
When I decided to learn about Smith Charts and how to use them, I had no idea what a giant rabbit hole that was going to be. I have learned so much more since writing that first blog post about them that I wanted to revisit it and share some information with my readers. I love to learn new things and for some reason I have never taken the time (till recently that is…) to learn how to even read a smith chart, much less how to use them to design ANYTHING!
The nanoVNA: A Vector Network Analyzer for everyone!
I started down this path with looking at antenna data from one of my POTA antennas on the nanoVNA. The nanoVNA is one of those wonders of modern technology that has become accessible to the masses recently. You see, before a few short years ago a VNA (Vector Network Analyzer) would easily run in the 5 figures and some of the nicer ones would break 6 figures. Rohde and Schwarz come to mind here… Even their used ones trade today for thousands of dollars…
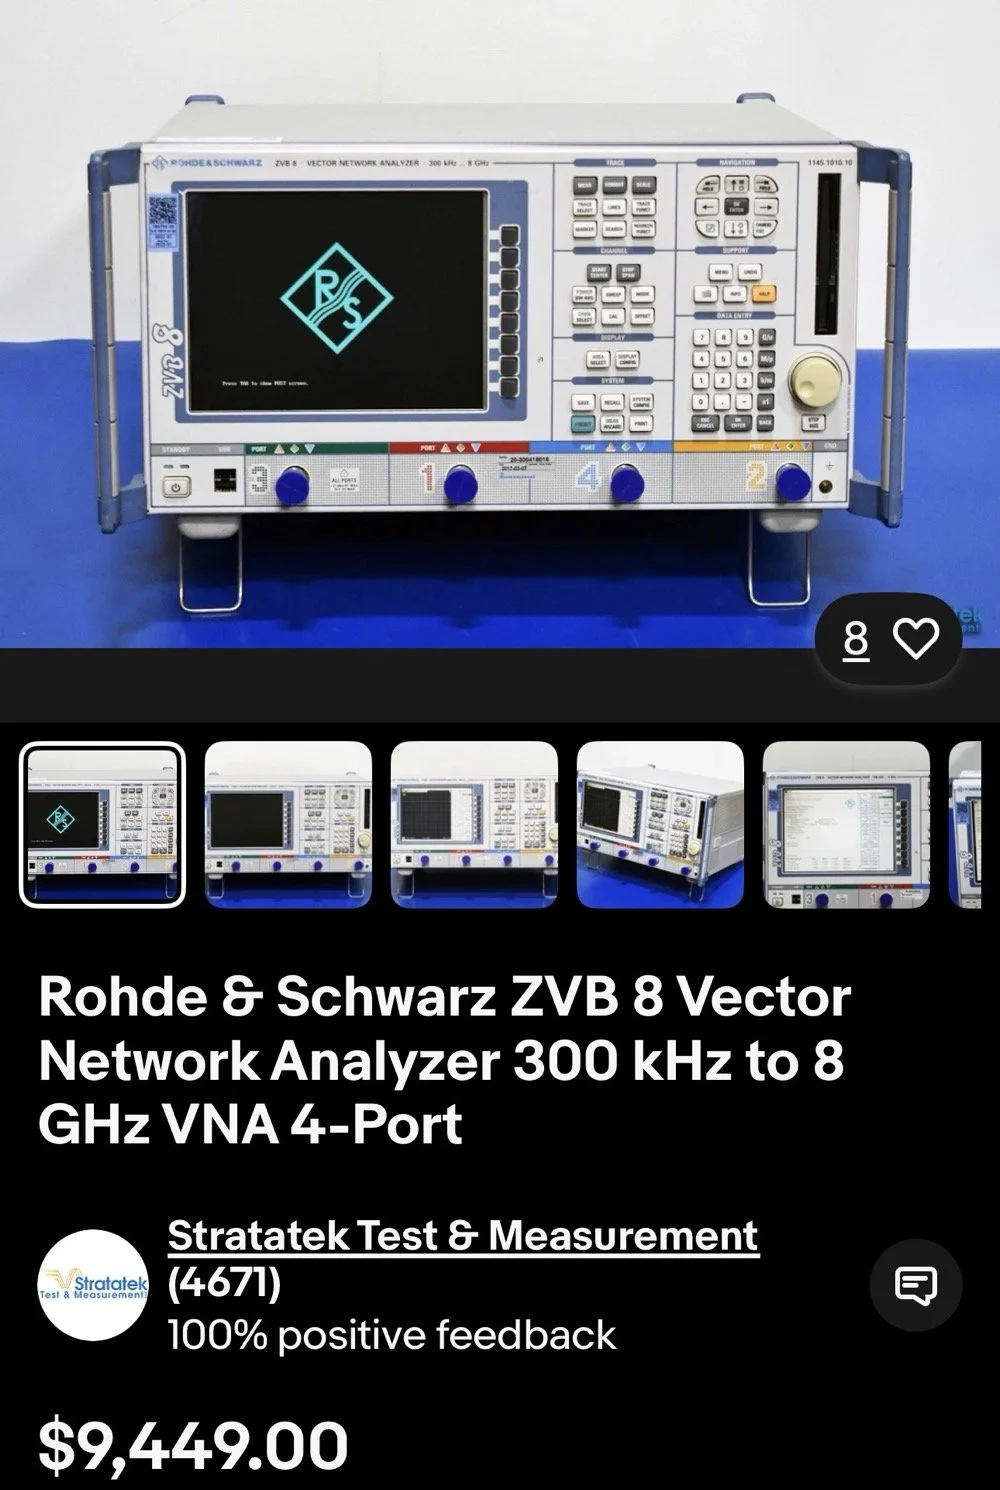
This is the reality of VNAs from just a couple of years ago. 4 and 5 figure prices for used units were common.
The nanoVNA changed all of that. It is small, runs on Linux and is now a single board computer in a tiny battery powered device that will literally sit in the palm of your hand. I have used one for my antenna setups for a couple of years now. I am actually on my second unit as the first one developed a fault and it was so inexpensive that I just bought a new one and threw the old one in the trash. You won’t see that happening with an HP / Agilent VNA!
There is a very good reason I use one for my antenna tuning needs too. The nanoVNA does everything those larger (and more expensive as well) ham radio specific antenna analyzers do that are available. You just have to learn a little more on how to use the nanoVNA. It also will perform functions that the antenna analyzers will not and this is where I love to bring the nanoVNA into the light. It has a smith chart function as well as an S21 input option that most, if not all ham radio antenna analyzers lack. You simply can not sweep filters with a MFJ antenna analyzer, at least not that I am aware of. This is where I found smith charts as I started to want to know what it was showing me on those charts. All of these nanoVNAs have a smith chart function and it is normally “on” when you start them up by default.
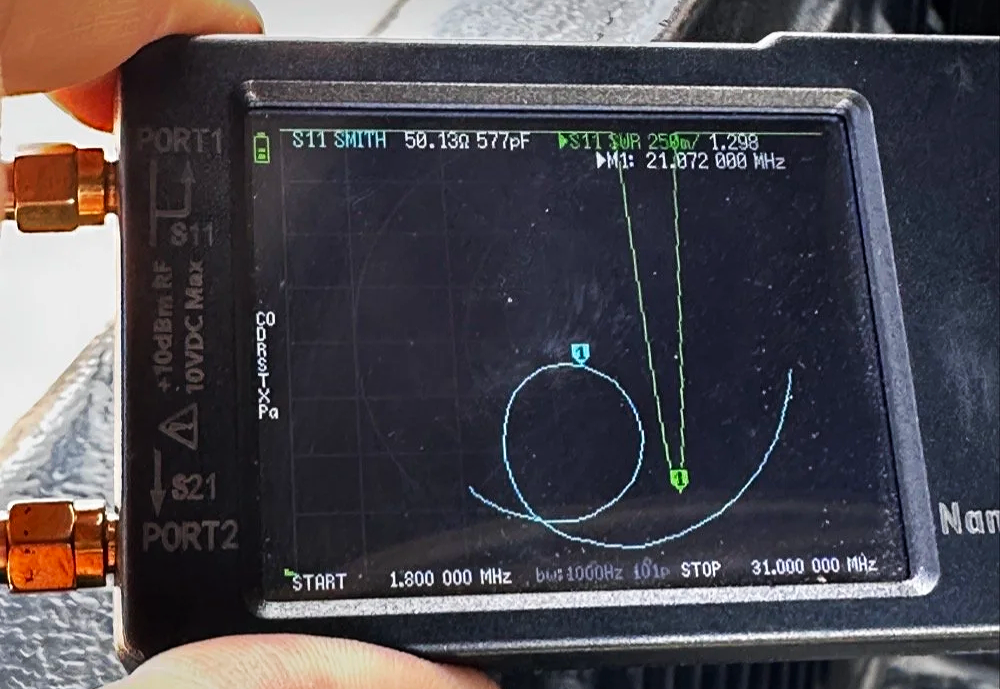
nanoVNA showing the Smith chart upon power up. Notice the diminutive size of the device compared to my fingers!
Smith Charts are NOT Scary…
In the above photo, the light blue trace is the one for the smith chart view. If you look really close, you can just barely make out the circular plot of the smith chart graph and in slight less illumination it does show up better. The light blue curved line represents the plotted values from 1.8 mhz up to 31 mhz (the two values are at the bottom) and you can move a marker along this plot as you go through that frequency range. In this photo I have stopped at 21.072 mhz as I was tuning my telescoping vertical to the 15 meter band to operate CW and FT8. It shows two more pieces of critical information though, the real reactance and the imaginary reactance..yes, imaginary… On these little nanoVNAs it shows up as either inductance (+j value when converted) and capacitance (-j value when converted). This antenna is measuring 50.13 ohms 577pf capacitive. We would need to convert this capacitance to a j value before we can plot it on the smith chart. I will get into that a little later in this article, but for now, this is a great tool if you are wanting to learn how smith charts work and I recommend you get one of these little wonders of technology for yourself and learn how to use it, even more so if you choose to use my link here to get it! As buying it from the link will help me maintain the website and costs you nothing extra.
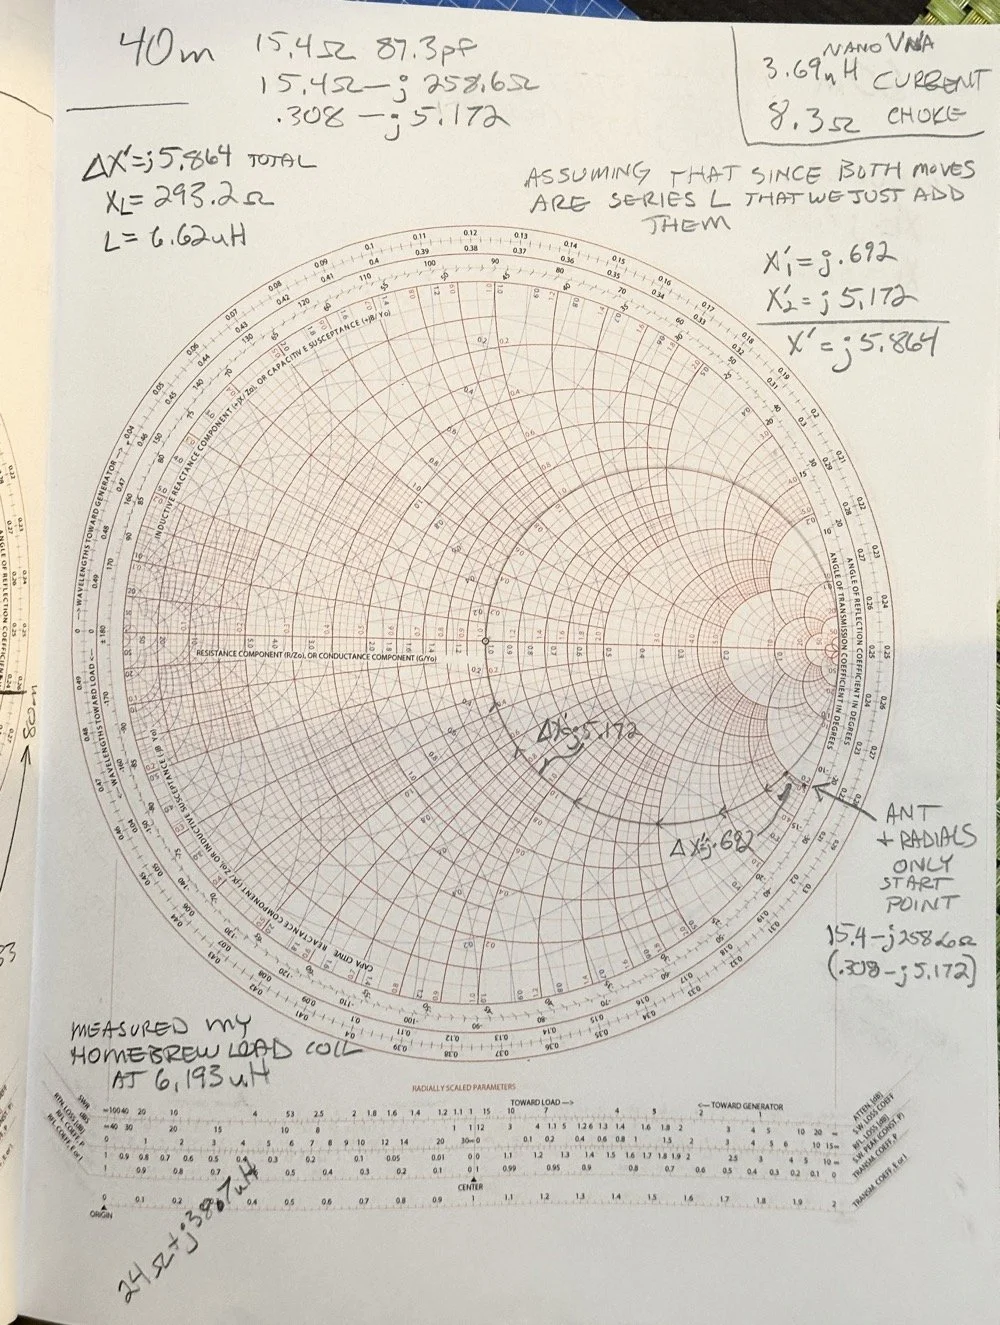
One of my early attempts at working with a smith chart, it is covered in errors, but this is how you learn…
This is a plain, run of the mill smith chart (pictured above). This one shows two graphs in one chart. The red is the impedance graph and the blue one is the admittance graph.
Smith Chart: Understanding some basic concepts
The simple explanation for these two colors are as follows: red lines are series components and the blue are parallel components when you are using the chart for matching impedances between stages of devices. Like between the coax and the antenna as in the example I have drawn above. That is an antenna I use for POTA that I wanted to see what it would take to get it to 50 ohm resistive. (which is the point right in the middle of the chart BTW)
Already, I have given you three tidbits of intel about these charts and we haven’t even drawn on one yet… Another one is that the horizontal line through the middle is pure resistance and you will notice that it doesn’t say 50 ohms at the center, but rather the number 1. The chart is what is called “Normalized”. All this means is that you can assign what ever value you want to the chart and this center point becomes THAT number and all the others are relative to that value. Maybe you had two stages in an amplifier circuit that are 200 ohm impedance and you want to use this chart to match them, then the center is now 200 and you do simple math to get the other numbers from that point. Like the number 2 (moving to the right, remember we are using the red lines right now) will become 400 ohms as a result. Basically all the numbers are multipliers of the center value you assign. It really is that simple.
Fun fact: All the values below the resistive center line are capacitive and all the numbers above the line are inductive. So when you see one of those weird numbers like 117-j68 This is the “complex” impedance…duh, it even looks complex…haha. But to put it on the chart, it has to be what is called “normalized” and this simply means that you divide the first AND the second number by whatever you assigned to the center of the chart. For most ham radio and especially ham radio antenna stuff, this is 50 ohms. So this complex impedance normalized will be 117/50=2.34 AND 68/50=1.36. BUT since it is a negative “j” value it will now read 2.34-j1.36. This can be plotted on the smith chart directly now. The first number is ALWAYS found on the center “resistive” line first.Then after this point is found you find the second number on the perimeter ring as you see in the photo below. The reason I started at the bottom and not the top (which has the same exact numbers) is because it has a negative symbol in front of the letter “j”. If it is negative, it always goes in the bottom half and if it is positive, then it goes in the top half.
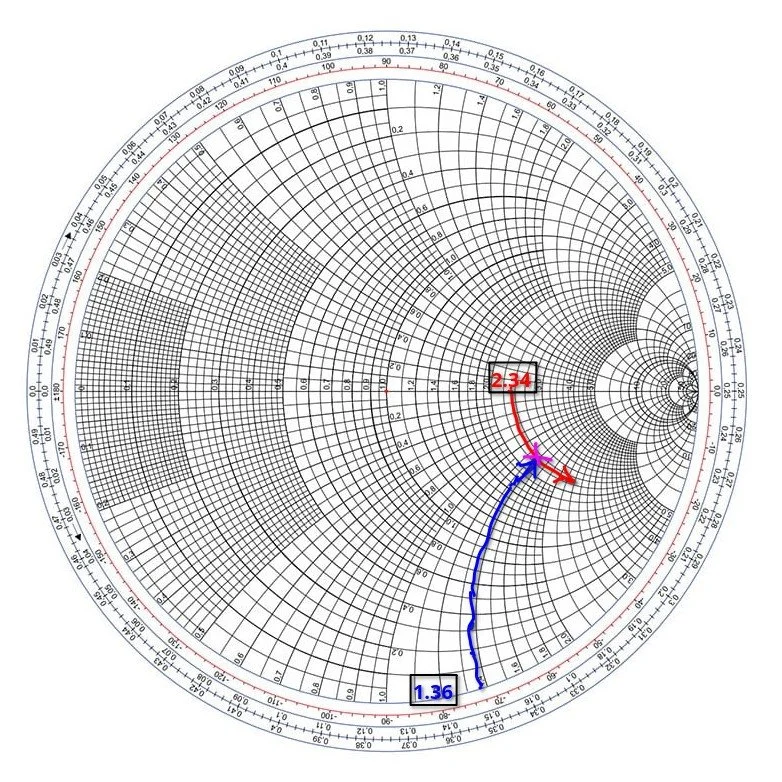
Smith chart showing the initial plot for the value 2.34-j1.36 and how to find it.
Then you simply follow the circular lines from each number out to where these two cross and this is your start point on the chart. Now this particular smith chart only shows the impedance curves so you need the second half (which is a literal mirror image of this one laid on top of it and in a different color) to be able to do a parallel → series type solution to solve for this. If we didn’t have the other half of the chart then we would never be able to put a component in parallel with the load as that is what the other half of the chart is for. Right now we can only add series components to get us up to the resistive line, but it will only give us the native resistance we started with and only eliminate the j portion of the value if we did that. It still doesn’t solve for the movement we need to get to 50 ohms resistive. I guess we could add a parallel resistor to lower the value, but that is really lossy option and we don’t want to put a resistor in parallel with our antenna, that is just burning RF and not putting it into the antenna. Remember a 50 ohm dummy load presents a perfect match to the transmitter output, but with radiate very little of that energy out to the world, instead it is turning this energy into heat…
Knowing this, the solution would be to add a “shunt” inductor to move the plot point up on the chart till it intersects the 50 ohm curve on the TOP HALF OF THE CHART. Once it intersects this line, we will add a series capacitor to bring the value back down to the center point, thereby matching the two stages perfectly. If this is clear as mud, then watch the video below for a visual explanation of what I just typed as well.
Add to all the stuff thus far the following tip as well, anytime you want to move the plot point up on the chart, towards the center line or above it, then you will use an inductor. By the same token, when you want to move the plot point down somewhere lower on the chart from where you are, you will use a capacitor. If you move along the red lines of the chart then it will be series with the load for either device (inductor or capacitor), if it follows a blue line then the device will be in parallel with the load. The below video by W2AEW does a really great job showing this visually so if you are a visual learner, this video is for you.
Matching Impedance with a Smith Chart…the easy way…
A good point someone made in one of the tutorials that I either read about or watched a video on said to remember you might need a specific solution for other reasons as well as to match impedance. Most of the time there is at least two ways to solve for these problems. In the example to follow below, I opted for a parallel capacitor and a series inductor, but let’s say you have two amplifier sections and you want to keep the DC voltage separated in the two stages, will then you would use a shunt inductor first then a series capacitor to finish the solution, this would match our impedance as well as block the DC voltage from the first stage as well. You see this is useful in more than one way.
Going back to the first image above of my hand drawn plot. If you will notice I drew a circle on that chart. This is called the Unity circle (for the reactance side) for some reason…. The point here is that no matter where you move the point along this circle the first number will always be 50. (If you used 50 ohms for that center point, from here on out I am going to assign 50 ohms to this value as that is what I use as a ham radio operator). Anywhere along this line, other than where it crosses the horizontal line in the center of the chart, there will be a “j” value added to it. If it is below the horizontal line, it will be negative and above will be positive “j” value. Now, at this point, if you want to use this chart to match a load, this is where the really easy stuff ends. Past this point you will need to use math…I know we have done some division earlier to get the normalized value so we could plot it above, but now we have to start calculating things like reactance and component values and such and as you know, this requires math… So buckle up as we match the 2.34-j1.36 mythical antenna from the second chart above to a 50 ohm transmitter output.
I have a two color chart below to make this happen as we have to use both colors to get it to work. The red dotted line is the arc on the impedance graph (red circles) for the 2.34 resistive value. You can see how I tracked it down into the negative region from the horizontal resistive line (this horizontal line is where you will always start these plots BTW) till it met the -1.36 blue dotted arc (denoted on the lower perimeter in red reactance arcs, you can see the numbers on the lower edge where I started). Yes, these charts are not precise to 5 decimal places, but are useful for ham radio ops and engineers use them for a myriad of other applications other than antenna matching like we are doing here. It will get you close enough to make the system usable and that is the whole point for us anyway. Anyway, these two initial lines meet at the start point of the process, the impedance of the antenna as measured…
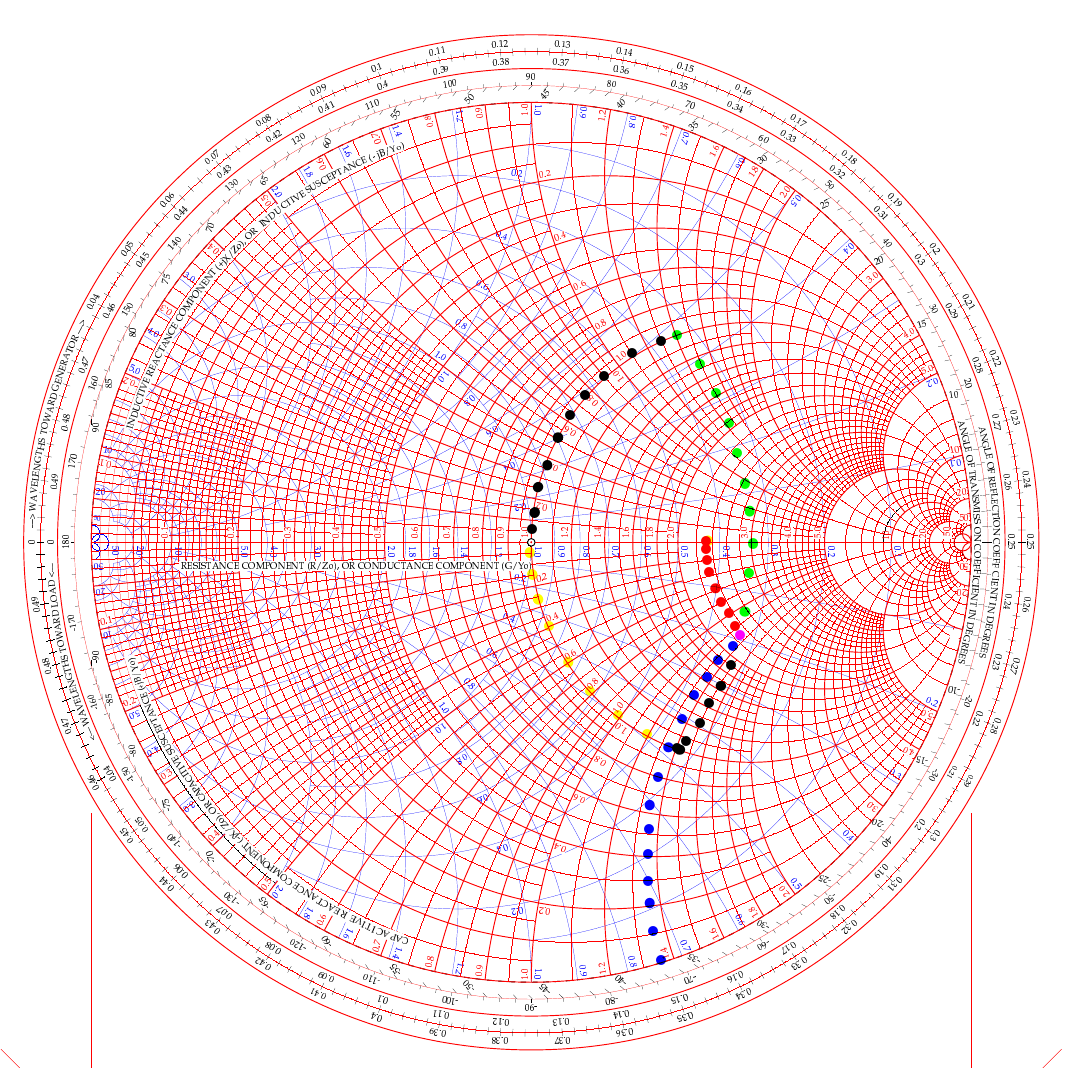
two color smith chart showing two possible ways to solve for L networks to match a transmitter to an antenna.
In the video above, he used the path of going up (like my green dots) and then following the 50 ohm arc back down (black dots from the green intersection point). But he was using a simple circuit built on a SMA connector. For an antenna installation though, it really makes more sense to me to actually follow the black line down from the start point and then follow the yellow line up the 50 ohm arc instead. Let me explain…
If we use the black arc that goes down first and the yellow one back to the center then what that looks like in the real world is a small capacitor from the base of the antenna to ground (this is what the black dotted line is after all). You see the black like is moving DOWN which means it will be a capacitor. We move it down till it meets the “50 ohm” circle so we can add the next part to move the point to the center of the chart. That next part isa series inductor between the base of the antenna and the coax. What us ham radio ops would call a load coil… This makes way more sense to me in this application than the other path which would be a “shunt” inductor or what would be an inductor from the antenna base to ground and then a series capacitor between the base and the coax. This is what would be similar to an L type antenna tuner to be honest but we are planning on using individual components in this lab… You see the yellow line is going UP to the central 50 ohm point, so this means it is an inductor and it is moving along the red lines on the chart which means it will be in series with the antenna.
This is actually really simple to be honest:
Red lines and your “movement” is going down - Series Capacitor
Red lines and your “movement” is going up - Series Inductor
Blue lines and your “movement” is going down - Shunt (Parallel) Capacitor
Blue lines and your “movement” is going up - Shunt (Parallel) Inductor
Do you see the pattern? Tracking up the lines on the chart is always inductors and tracking down on the lines is always capacitive. Like wise, if you use a blue line for your movement the the device will be in parallel and if the color of the line is red then it will be a series part. Now the color codes of my dotted lines above is purely there to make it easier to see what is happening and mean nothing other than that. The colors I am really concerned with are the two colors of the chart itself.
Math with a Smith Chart to match an Antenna
So the math is actually really simple to be honest. If you look at the first arc (the black line moving down) it is read on the blue chart (admittance - which is the opposite of resistance…) as it is moving along the blue circles. it is moving from about .19 to .48 on the blue chart (this is called suseptance, but you really don’t need to know that for this application) as you can see the lines run out to the perimeter where it is marked. This is .29 distance units on the admittance half of the chart. This .29 is the opposite of resistance so we then have to invert it (1 divided by .29), so it is a reactance value that we can use to do the math with, which turns it into 3.449 or as it should read -j3.449 (remember, because it is below the center line of the chart) and this is then multiplied by 50 (the value we assigned to the center point to start with) to get the actual reactance. 3.449 × 50 = 172.45 ohm of capacitive reactance. We now know everything in the formula to turn this into capacitance… since it is the same formula, you just switch out the two values. Super simple to be honest. Xc= 1/(2 x Pi x f x C) is turned into C=1/(2 x Pi x f x Xc) as you can see, we just plug in the numbers and then we get the capacitance. BTW, we are making this for 10 mhz so we can listen to WWV in Ft Collins… haha, why not?
Mathing this first step involved counting on the chart and subtracting the smaller number from the larger, then inverting it since it is on the blue lines (because the blue lines represent the opposite of resistance and we need it to be a resistance value), then multiplying that number by the center assigned value (in this example it is 50 ohms) and we ended up with 172.45 ohms of reactance. Now we turn this into C= 1/(2×3.1415×10e6×172.45) which is C=92.3pf
Once this step is done, we simply run up the red unity circle to the 50 ohm point in the middle and do the same thing but for inductance (since it is moving up on the chart). It looks like it is on about 1.42 on the red lines at the bottom of the chart, just take a look and see what I am talking about… Since it goes all the way up to the horizontal line, we just use this number and multiply it by the center value again (are you noticing a trend here yet?) and we get XL=1.42×50 so XL=71 ohms of reactance The we flip the inductive reactance formula and this time the formula looks a little different since it is XL=2 x Pi x f x L so to get inductance from inductive reactance the formula looks like this L=XL/(2 x Pi x f) so now we know all the numbers for this one too. It looks like this now L= 71/(2×3.1415×10e6) and this equals L=1.13uH of series inductance since this movement happened on the red lines and went UP.
So adding a 92.3pf shunt capacitor from the base of the antenna radiating element to ground (honestly an appropriately sized trimmer cap like a 50-100pf trimmer would be optimal since the calculated size is such an odd value...sure as a bird flies, this is some sort of common size…lol) Next is to insert a base “load” coil between the feedline and the antenna that is 1.13uH in size. This will match our mythical vertical to be resonant with the 10 mhz WWV signal as close to perfect as humans can get it. It SHOULD (if the parts are the right value) move the Smith chart plot to the center point on the chart which the goal for impedance matching.
Clear as mud again, right? HaHa… You can see it seems like a lot, but once you do it a couple of times, it really does get a lot easier to understand. I recommend you watch the video a couple of times and print off a chart from the web to practice on like this one.
Help support his website by using these Amazon Affiliate Links when you shop…

Ten watts to Spain. Ten watts to Germany. Ten watts to Austria. The EFHW at 35 feet made all the difference.
Activating Hillsborough River State Park (US-1878) with a friend is one thing—making over 100 contacts in a single afternoon using QRP power and a homemade wire antenna is another. That's exactly what Chas and I accomplished using a 65-foot EFHW antenna strung 35 feet up in the Florida pines, a ground mounted vertical, his FT891, a Penntek TR-35, and my sBitx v3 running just 10 watts (Chas was running 50 watts today though). This wasn't just a Parks on the Air activation—it was a field test of how well minimalist gear performs in a multi-operator setup, complete with lessons learned about antenna placement, front-end overload, and working around the Florida sun.
Activating Hillsborough River State Park (US-1878) with a friend is one thing, making over 100 contacts in a single afternoon using QRP power and a homemade wire antenna is another. That's exactly what Chas (NA2B) and I accomplished using a 65-foot EFHW antenna strung 35 feet up in the Florida pines, a ground mounted vertical, his FT891, a Penntek TR-35, and my sBitx v3 running just 10 watts (Chas was running 50 watts today though). This wasn't just a Parks on the Air activation, it was a field test of how well minimalist gear performs in a multi-operator setup, complete with lessons learned about antenna placement, front-end overload, and working around the Florida sun.

Hillsborough River State Park entrance designated K-1488 for Parks on the Air activations.
Hillsborough River State Park: Location and Access
Hillsborough River State Park sits about 12 miles north of Tampa and makes for an excellent POTA location. When you arrive at the entrance, the first thing you're greeted with is a ranger station where you pay your four dollar entrance fee. Yes, you read that right—four dollars for the whole day. This is a really nice park with extensive hiking trails, a large loop perfect for biking, and the Hillsborough River running through it where visitors can enjoy boating and fishing.
There's plenty of infrastructure here for families… playgrounds, picnic areas with covered pavilions, and well-maintained facilities. For POTA activators, the key feature is the abundance of tall trees throughout the park, making it ideal for wire antennas. The main loop road has several pull-off areas with picnic tables that work perfectly as operating positions. Cell phone coverage is good throughout the park, which helps for spotting yourself on the POTA network and coordinating with other operators.
After paying the entrance fee, I drove around the loop a couple of times while talking to Chas on the phone, trying to figure out where he'd set up. Here's the kicker, though, he decided to drive over to my location so we could operate together from adjacent tables. This gave us the multi-operator experience but also taught us some valuable lessons about antenna placement and RF interference, which I'll get into later.
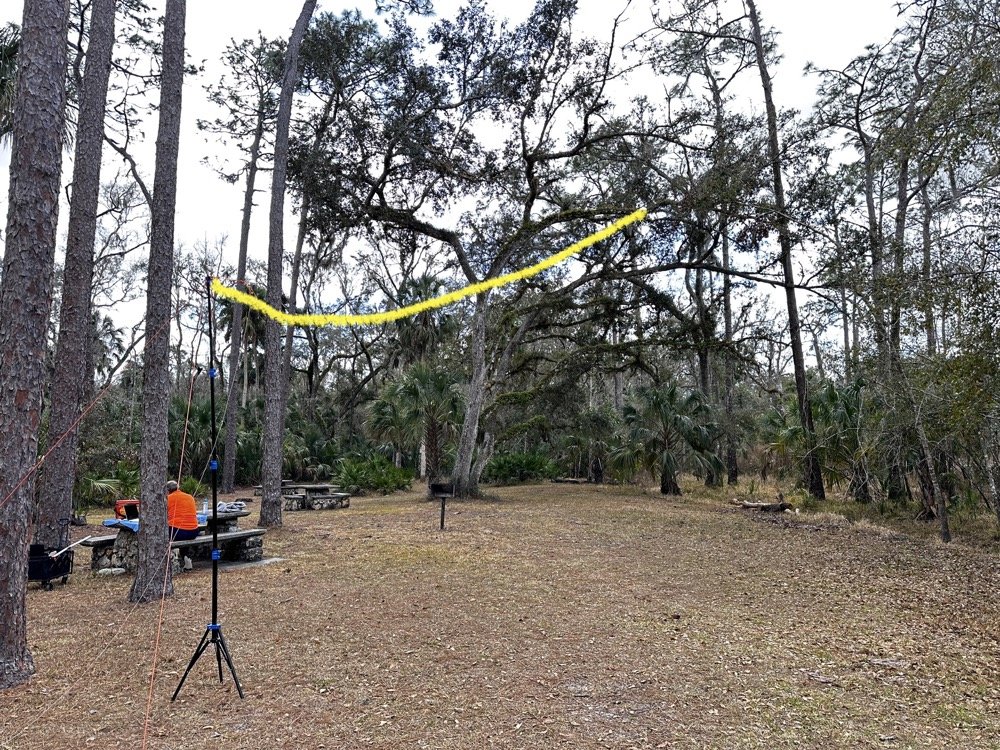
The 65-foot EFHW antenna strung into the tree canopy (highlighted in yellow) getting the wire 35 feet high made a dramatic difference in propagation. The wire itself is nearly invisible against the tree background.
The Antenna Setup: 65-Foot EFHW in the Trees
Today saw the use of a 65-foot long wire antenna, an End-Fed Half-Wave from Reliance Antennas. This antenna isn't rated for high power, so I held all of my transmit power to 10 watts or less throughout the day to prevent potential damage to the matching transformer. We deployed it using throw lines to get it about 35 feet up into a large oak tree, then Chas loaned me his 10-foot push-up pole and stand to support the feed point end of the antenna and get it a little higher off the ground as well.
I believe this additional height aided propagation dramatically. Getting the whole 40-meter EFHW that high off the ground, with the far end even higher in the tree, made a noticeable difference compared to previous activations where I'd run antennas lower. I made many contacts all over the United States, into Mexico, and even worked some European stations on the higher bands with just 10 watts. That's the magic of getting a wire antenna up high… height matters more than power in many cases.
The EFHW is resonant on 40m, 20m, 15m, and 10m without needing an antenna tuner, which keeps the station setup simple. I specifically avoided the WARC bands (30m, 17m, 12m) during this activation because the antenna isn't cut for those frequencies and I didn't want to deploy a tuner. Sometimes keeping things simple is the better approach, especially when you're testing equipment and learning how gear performs in the field.
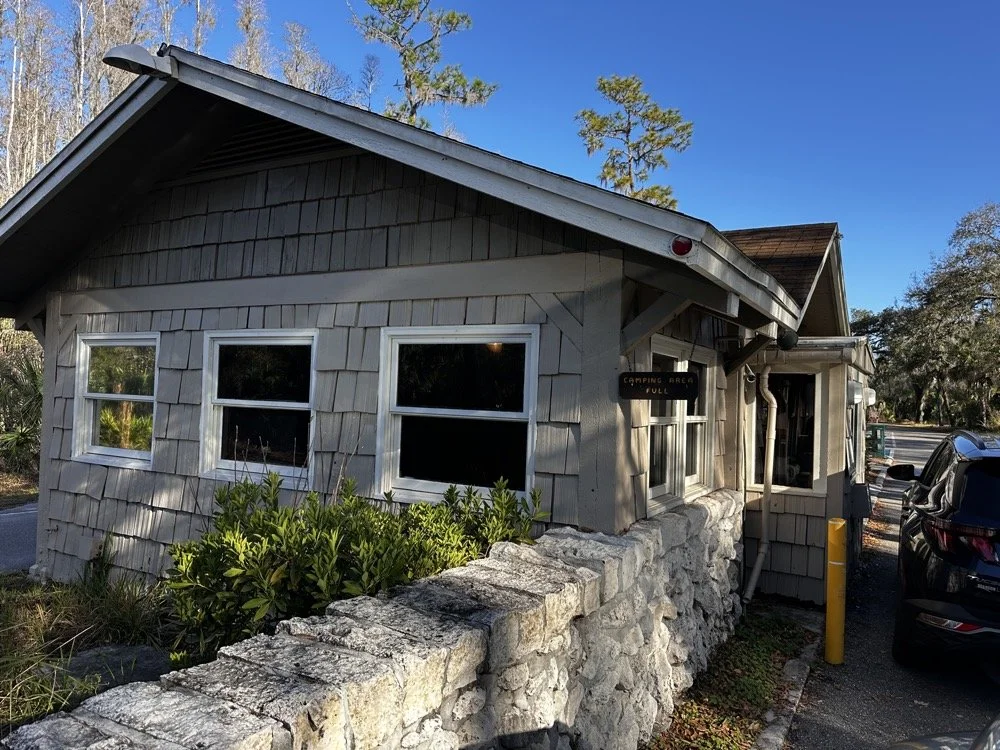
The ranger station where you pay the $4 entrance fee to access the park for POTA activations.
Radio Gear: Penntek TR-35 and sBitx v3 Performance
Once I had the antenna set up and tested, I decided to use the Penntek TR-35 transceiver first. I really enjoy using this tiny little radio, the CW break-in is phenomenal, and the keying from the internal keyer circuit works flawlessly. It's a true QRP radio putting out 5 watts maximum, and I've made some additional accessories for it to turn it into a more complete field station. But even as it sits stock, it's a wonderful little radio that's almost impossible to damage from bad antennas or other field mishaps. Plus, it just works really well at making contacts.
I started on 40 meters and after working through a good run of stations, I decided to move up to 20 meters where activity was heating up. Chas started on 30 meters and worked his way through the WARC bands, eventually ending up on 10 meters where we made a park-to-park contact with each other from 30 feet apart. That was pretty funny, logging a P2P (park-to-park) contact when we could literally see each other across the operating area. I turned my output power all the way down, it showed literally zero output and I was still booming into Chas’ radio!!! Haha!
After finishing my run on 20 meters with the Penntek TR-35, I swapped it out for my sBitx v3. I throttled the output power on the sBitx for two reasons: first, to prevent damage to the antenna which isn't rated for high power, and second, to keep from running down my battery too quickly. I'd brought an 8 amp-hour LiFePO4 battery, and if I'd run the sBitx at full output power I could have easily depleted that battery in an hour or so, especially running FT8 on the lower bands which requires more transmit time. As it turned out, limiting power to 10 watts kept the battery happy all day and I still had plenty of capacity left when we packed up.
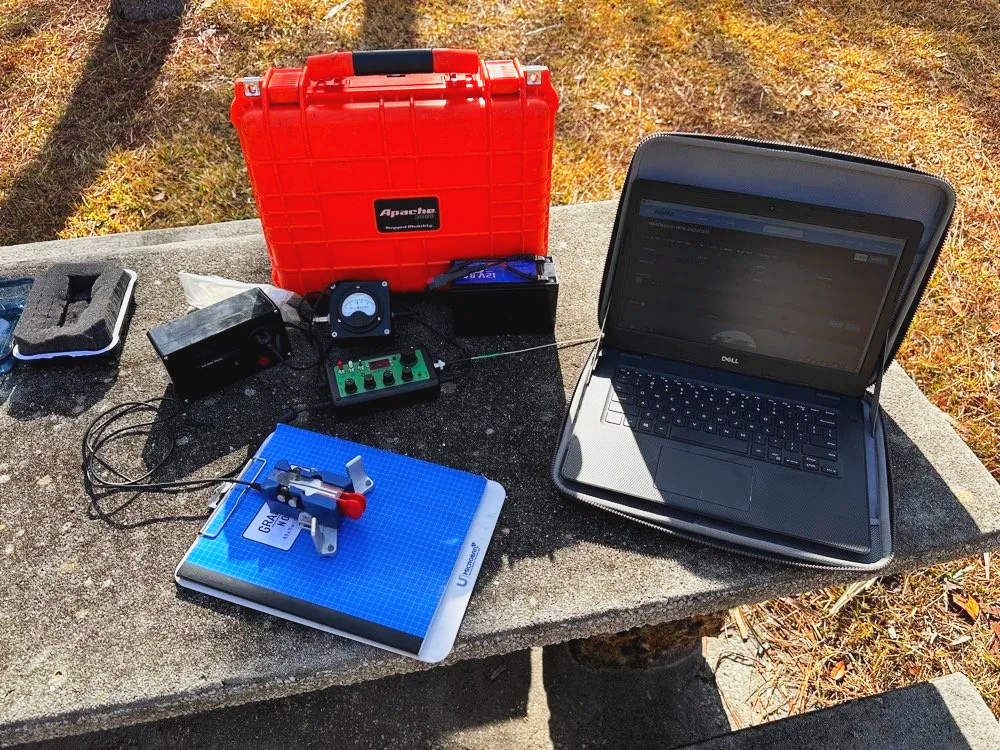
Initial station setup with the Penntek TR-35, Dell laptop for logging, clipboard with paper log, and CW paddle ready to make contacts.
The first thing I did with the sBitx was get on 15 m and attempt to make contacts there on FT8. This went pretty well and I made several contacts on 15 m before moving to 10 m to see what I could make on that band. The reason I skipped the WARC bands today was because this antenna is not resonant on any bands other than 40, 20, 15, and 10 m. So I stayed on those bands as I did not want to try and deploy an antenna tuner as well.

The sBitx v3 with improvised sunshade, Florida sun glare was a constant challenge throughout the activation. Notice the notebook to keep my arm off that rough concrete!
Contact Statistics:
Between Chas and me, we logged 118 total QSOs during the activation! 66 in my log and 52 in Chas's log(I did operate a little longer than him and we were not in a race either). Here's my detailed breakdown:
David's Stats (WK4DS):
40 meters: 5 QSOs (all CW)
20 meters: 50 QSOs (all CW)
15 meters: 1 QSO (CW)
10 meters: 10 QSOs (8 FT8, 2 CW)
Total: 66 QSOs
CW: 58 contacts
FT8: 8 contacts
Geographic Breakdown:
Domestic (USA): 56 QSOs across the continental United States
DX (International): 10 QSOs reaching six countries:
Spain: 2 contacts (EA4T, EA5BCO)
Germany: 2 contacts (DL4JCP, DJ9HX)
Mexico: 2 contacts (XE2BCS, XE2IF)
Austria: 1 contact (OE2IGP)
Canada: 1 contact (VE1ZZ)
Poland: 1 contact (SQ9JS)
Czech Republic: 1 contact (OL26WRTC - special event station)
NA2B Chas's Stats: Chas logged 52 QSOs throughout the day, primarily working 30m, 17m, and 10m (he might have done more but that is all I know of) while I focused on 40m, 20m, 15m & 10m. This band coordination helped us avoid stepping on each other while maximizing total contacts for the activation.
Combined Performance: For QRP power (my 10 watts maximum and Chas running 50 watts) and simple antennas, 118 total contacts in one afternoon represents excellent POTA performance. The 10 DX contacts on 10 meters with just 10 watts and the EFHW antenna particularly stand out, working Spain and Germany on FT8, then switching to CW for additional European contacts, demonstrates what's possible when propagation cooperates and you get your antenna up high.
Twenty meters was the workhorse band, delivering 50 contacts in my log alone. The concentration of activity on 20m CW (14.061 MHz) is typical for POTA activations, as this is where most hunters are listening for parks. The handful of 40m contacts at the start of the activation caught the tail end of daytime propagation before that band shifted to primarily short-skip domestic contacts.
Operating Challenges - Sun and Glare
Both Chas and I learned pretty quickly that the Florida sun was not our friend today, even though the temperature was pleasant. The glare from the sun continuously made us struggle to see our displays and adjust settings. I think Chas literally just toughed it out and lived with squinting at his screen. I, on the other hand, kept deploying improvised sunshades and repositioning my station to create shade for my equipment as the day wore on, as you can see in the photos. This is something to think about when planning a POTA activation, a simple popup canopy or umbrella can make the difference between comfortable operating and constantly fighting the sun. Add that to my growing list of field operation lessons learned.
sBitx v3 CW Keying: Improvements and Remaining Issues
The CW keying in the sBitx has been dramatically improved as the software revisions continue. The developers keep optimizing the scan time of the Raspberry Pi processor and how the program executes, making the keyer more responsive with each update. It's almost like using a regular radio now, though there are still quirks you need to work around.
I've learned that I have to pay very close attention to my sending cadence when working CW with the sBitx. The keyer isn't as forgiving as a traditional Curtis-style keyer circuit, and it will send errors if you're not careful with your timing. Knowing this limitation, I work much harder to stay at one speed setting throughout a contact when possible. It's easier to develop muscle memory and consistent sending rhythm at one speed rather than constantly adjusting the keyer speed up and down as I might do with other radios.
With a traditional Curtis keyer, minor variations in your paddle timing get smoothed out by the keyer circuitry and everything sends cleanly. The sBitx will occasionally miss characters if you vary your speed too much, if you slow down suddenly, you can actually outrun the radio's keyer circuit and it won't register that you asked for a "dit," so it leaves it out. This isn't a deal breaker, but it does mean the sBitx requires more disciplined sending technique than most modern transceivers.
I do tend to make more mistakes with the sBitx than I do with other more traditional Morse code radios, and I think all of this traces back to the timing limitations from the Raspberry Pi's scan cycle. But it's getting better with each software update, and for a radio that does CW, SSB, and all digital modes in a package this small and affordable, I'm willing to work around the keyer quirks.
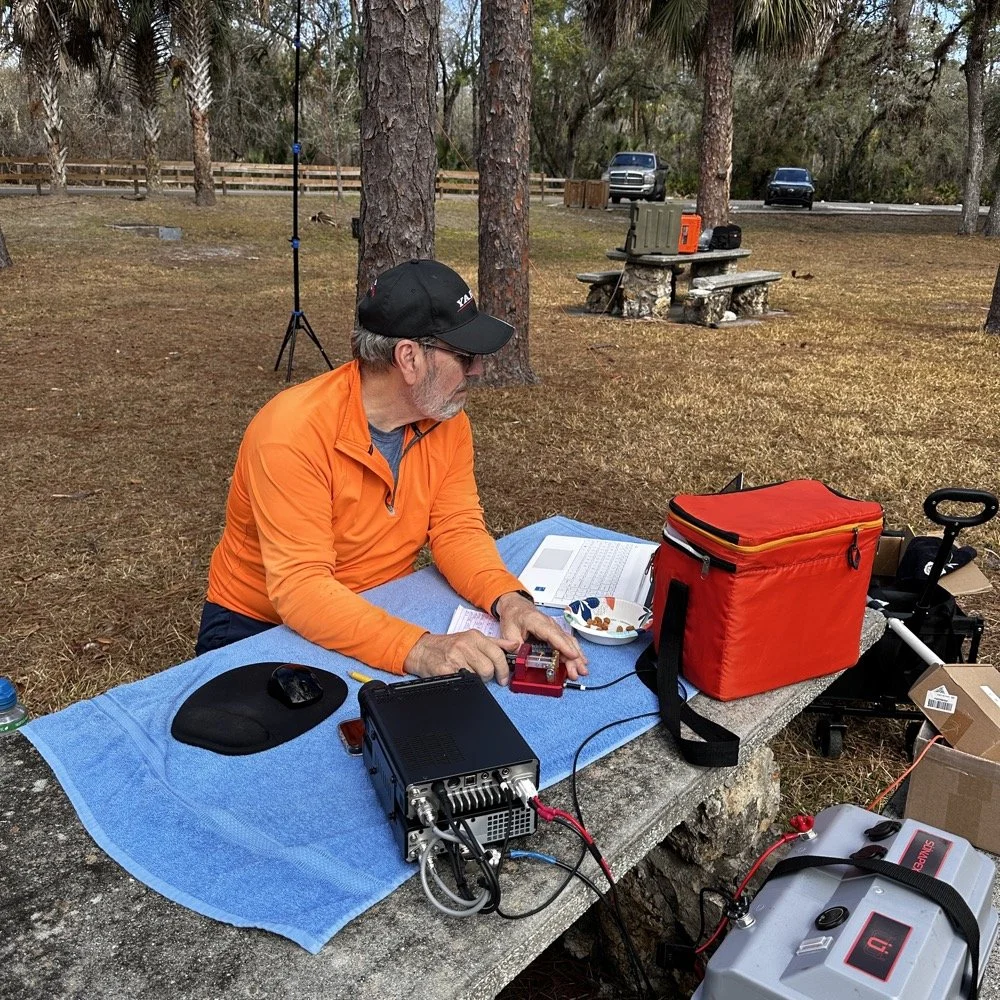
Chas operating his Yaesu rig from the adjacent picnic table. His vertical antenna is behind me and to my right. My wire antenna is behind him.
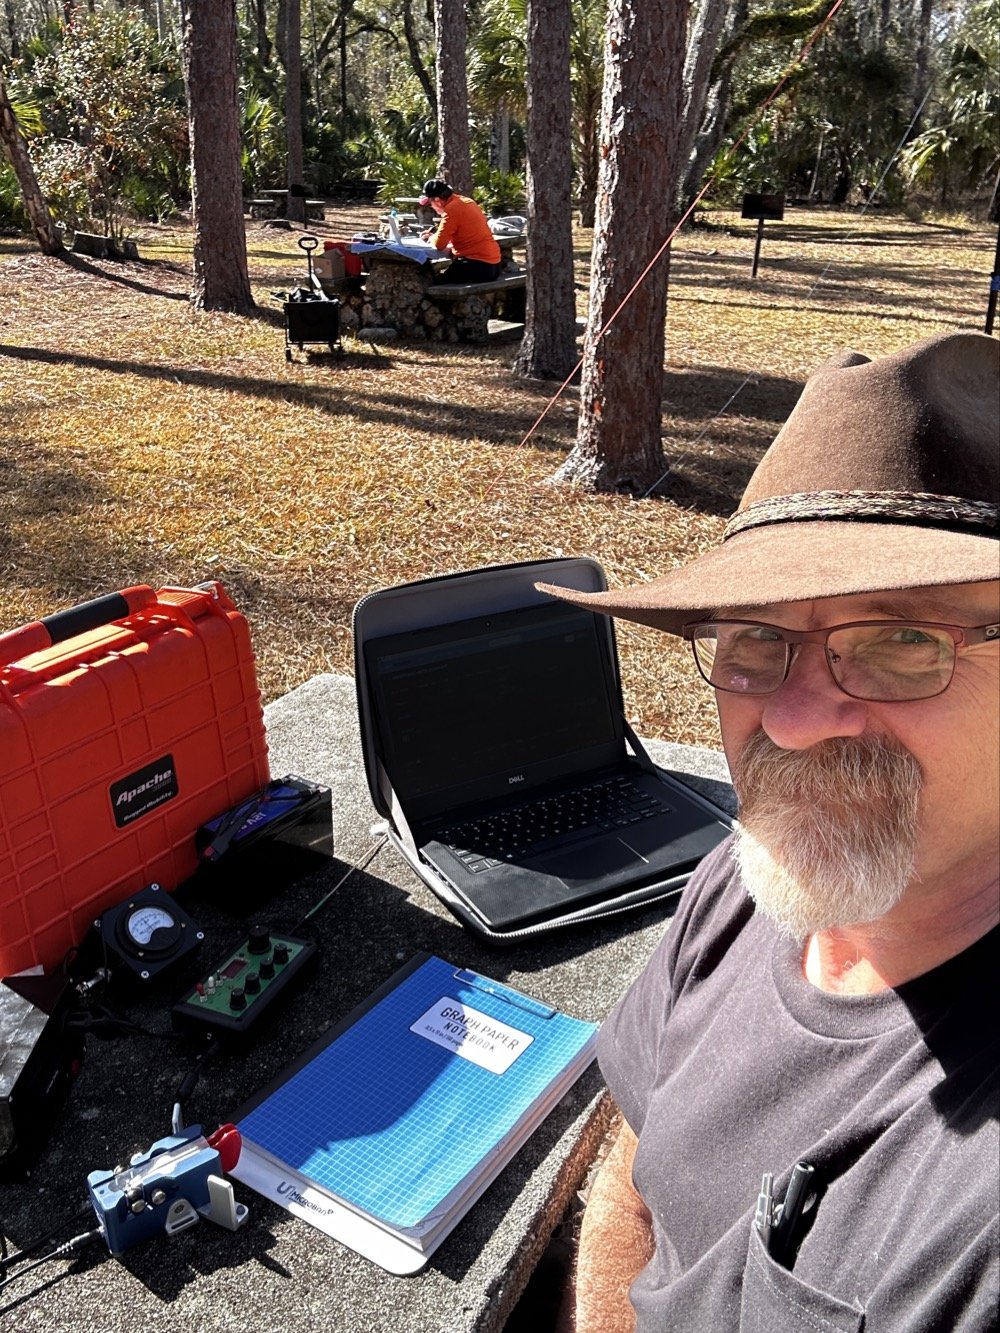
My operating position in the foreground with Chas visible about 30 feet away in the background—close enough for a park-to-park contact but creating some RF interference challenges.
20-Meter Band Issues: IRF520 vs IRF510 Amplifier Problems and Receiver Front End Overload"
The final two photos show a couple issues I've been wrestling with on my sBitx. The first image shows my sBitx operating on 10 meters with lots of noise lines visible in the waterfall display. These noise lines are coming from Chas transmitting Morse code on a different band, his signal is getting into my receiver and creating visible interference. I don't remember exactly what band he was on, but the important lesson here is that antenna placement matters tremendously when you're running multi-station setups like this one.
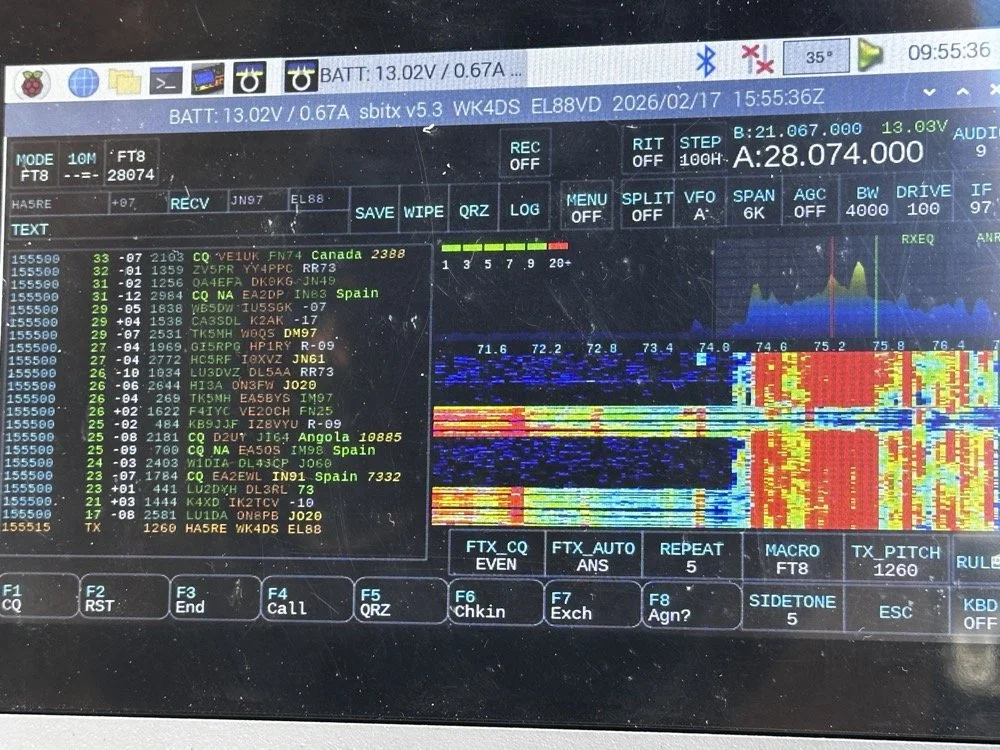
sBitx running FT8 on 10 meters (28.074 MHz) showing the noise spikes from Chas transmitting on a different band nearby 9in the waterfall) this is what front-end overload looks like in a multi-op field setup. The vertical lines in the waterfall are RF bleed-through from his station 30 feet away.
Be mindful of where you place antennas if you're operating a multi-operator event. We were only 30 feet apart, which is far too close for optimal isolation. I was still able to work many contacts even with this persistent noise coming through, though. This is something you learn to work around if you're going to be an amateur radio operator in a multi-operator event of any kind…think Field Day here. It's just part of the game, so you expect it and adapt. We could have used bandpass filters to eliminate most of this interference, but I didn't bring mine to the park.
The next photo shows my sBitx on 20 meters, and on 20 meters my radio has a persistent issue that I'm still troubleshooting. I'm beginning to believe it has to do with the IRF520 MOSFET transistors that I used in the power amplifier section when I built this radio. These IRF520 transistors have significantly more internal capacitance than the IRF510 transistors that Farhan originally specified in the revised amplifier design. I think this extra capacitance is causing the amplifier to oscillate, and that oscillation is what you're seeing as the noise signal in the photo.

sBitx on 20 meters CW mode (14.061 MHz) showing the noise from what I am suspecting is from oscillating mosfets.
Here's the interesting part: as the radio warms up during operation, this spurious noise signal moves down in frequency within the 20-meter band. If I want to push it out of the way temporarily, I'll switch to 40 meters or 80 meters and run FT8 for a few minutes. You generate more output power on those lower bands, which heats up the amplifier section faster. Usually, if I just run FT8 first thing when setting up, it warms up the transmitter enough to push the oscillation down to below where I normally work CW on 20 meters anyway, giving me a temporary workaround.
This isn't a permanent solution, obviously. I'm convinced I'm going to have to address this capacitance issue when I get back home, probably by swapping out the IRF520s for the specified IRF510s or adding additional filtering to the amplifier circuit. But for now, knowing the workaround lets me keep the sBitx operational in the field for POTA activations, which is what matters most.
Multi-Operator Challenges: RF Interference and Antenna Placement
Operating two stations in close proximity taught us several valuable lessons about multi-operator setups. The biggest challenge was RF interference between our stations. With antennas only 30 feet apart, we experienced significant front-end overload, when Chas was transmitting on his station, I could see his signal bleeding through into my receiver on completely different bands.
The sBitx has a somewhat easy-to-overload front end compared to more expensive commercial receivers, which made this problem more pronounced. But even with a better radio, operating this close together without bandpass filters or careful band coordination is asking for trouble. The solution for future multi-op activations is simple: either space antennas much farther apart (100+ feet minimum if possible), or operate on bands that are far enough apart in frequency that filter roll-off provides natural isolation.
The position of your antennas matters just as much as the distance between them. If we'd oriented our antennas at right angles to each other instead of parallel, we might have achieved better isolation through pattern nulls. These are the kinds of things you learn by doing, and they apply equally to Field Day operations where you might have multiple stations running simultaneously.
Despite the interference challenges, we still made excellent contact numbers. Multi-operator POTA activations are worthwhile because you can cover more bands simultaneously, operate different modes at the same time, and keep the activation going continuously while one operator takes a break. Just be prepared to work around the RF challenges that come with the territory.
Who Should Activate This Park?
Hillsborough River State Park is an excellent choice for both first-time and experienced POTA activators. Here's why:
For beginners: The $4 entrance fee is minimal, facilities are excellent with clean restrooms and covered picnic areas, and the tree coverage makes wire antenna deployment easy. You don't need to hike to reach good operating locations…everything is accessible by car right off the main loop road.
For experienced activators: The park's location north of Tampa puts you in a good spot for both domestic and DX contacts. The tall pines support wire antennas at significant heights, and there's plenty of space to spread out if you're running a multi-operator activation.
Best practices for K-1488:
Arrive early morning (8-10 AM) or late afternoon (3-5 PM) to avoid midday heat and sun glare
Bring sunshade or canopy, there's limited natural shade at the picnic tables
Plan for 2-3 hours of operating to get a good contact count
Cell coverage is good for self-spotting on the POTA network
Spring and fall offer the best weather conditions
If you're in the Tampa Bay area and looking for an easy, productive POTA park with good facilities, Hillsborough River State Park should be on your list.
Activating Hillsborough River State Park proved to be a highly productive POTA outing. Between Chas and me, we logged well over 100 contacts using QRP power and simple wire antennas…proof that you don't need high power or expensive gear to have success in Parks on the Air. The 65-foot EFHW at 35 feet worked exceptionally well, the Penntek TR-35 remains one of my favorite field radios for CW, and the sBitx v3 continues to impress despite some remaining amplifier quirks on 20 meters.
Key lessons learned: antenna height matters more than output power, multi-operator setups require thoughtful antenna placement to avoid interference, and limiting transmit power to 10 watts keeps your batteries happy all day. If you're looking for a beginner-friendly POTA park in Florida with good tree support and easy access, Hillsborough River State Park (K-1488) is an excellent choice.
Have you activated K-1488 or other Florida state parks? Share your experiences in the comments below, I'd love to hear about your favorite POTA locations and antenna setups.
Want more POTA activation reports and technical amateur radio content? Check out my other WK4DS blog posts for detailed equipment reviews, antenna builds, and field operation tips.
Frequently Asked Questions About POTA Activations
What is Parks on the Air (POTA)?
Parks on the Air is an amateur radio operating activity where hams set up portable stations in state and national parks to make contacts. Activators (operators in parks) try to make at least 10 contacts to qualify the activation, while hunters (operators at home) try to contact as many parks as possible. It's similar to Field Day but focused on public parks and conservation areas. POTA encourages hams to get outdoors, test portable equipment, and promote amateur radio to park visitors. The program started in 2016 and has grown to include thousands of parks across the United States and internationally.
How do you activate Hillsborough River State Park for POTA?
To activate Hillsborough River State Park (K-1488), you need to set up your amateur radio station within the park boundaries and make at least 10 contacts. Pay the $4 entrance fee at the ranger station when you arrive, then find a suitable operating location with trees for antenna support. Most activators set up at picnic tables near the main loop. Operate from battery power or a generator, no AC mains allowed for POTA activations. Log your contacts using a smartphone app like HAMRS or POTA Logger, then upload your log to the POTA website within a few days. The park has excellent tree coverage for wire antennas and is open from 8 AM to sundown year-round.
What is an EFHW antenna and why use it for POTA?
An End-Fed Half-Wave (EFHW) antenna is a wire antenna that's fed at one end through a matching transformer (typically a 49:1 unun), making it incredibly easy to deploy in the field. For POTA activations, EFHWs are popular because they require no ground radials, work on multiple bands without a tuner if cut for harmonically-related bands, and can be thrown into trees using a throw line and weight. My 65-foot EFHW works on 40m, 20m, 15m, and 10m, covering the most productive POTA bands. Getting it 35 feet high significantly improved propagation compared to running the same antenna closer to the ground. A properly deployed EFHW antenna at height will often outperform a vertical antenna at ground level for DX contacts.
Can you run two stations at the same POTA activation?
Yes! Running multiple operators at the same park location is allowed and encouraged in POTA. Each operator logs their own contacts and submits their own activation log. Chas and I each operated our own stations about 30 feet apart, which let us cover different bands simultaneously and maximize the total contact count. However, you need to be mindful of RF interference between stations. With our antennas so close together, I experienced front-end overload on my sBitx when Chas was transmitting on nearby bands. Solutions include better antenna separation (100+ feet apart if possible), using bandpass filters on receivers, or coordinating to operate on widely separated bands like 40m and 10m simultaneously.
What's the best QRP radio for POTA activations?
For CW-only POTA activations, the Penntek TR-35 is exceptional. It's lightweight (under a pound), battery-efficient, has outstanding CW break-in, and is nearly indestructible, perfect for field operations. For multi-mode operation covering CW, SSB, and digital modes, the sBitx v3 offers incredible value and capability in a portable package, though the CW keying requires careful technique and practice. Other popular POTA QRP rigs include the Elecraft KX2/KX3 (premium price but premium performance and battery efficiency), QRP Labs QCX-mini (CW-only, ultra-portable and inexpensive), and the Xiegu G90 (good SSB performance, acceptable CW, built-in tuner). Choose based on your preferred modes, budget, and how much weight you want to carry into the field.
How many contacts should you expect from a POTA activation?
Contact numbers vary widely based on propagation conditions, time of day, your operating skill, and whether you're spotted on the POTA network. A successful activation requires at least 10 contacts to count, but most activations yield 20-40 QSOs in an hour or two of operating. Our 100+ contacts in one afternoon between two operators was excellent, partly because we covered multiple bands and modes (CW, FT8) and had good propagation to Europe on the higher bands. If you're new to POTA, expect 15-30 contacts on your first few activations. Using CW typically yields more contacts than SSB due to pile-ups from hunters chasing parks, and FT8 can be productive when propagation is marginal or when SSB isn't getting through.
My 66 contacts plus Chas's 52 gave us 118 total QSOs from K-1488 on February 17, 2026. Ten of mine reached six countries across two continents, all at 10 watts or less.
You can help support this channel by using these Amazon Affiliate Links as well:
QRP/Portable Radios:
Antennas & Tuning:
CW Equipment:
Power & Accessories:
Organization & Transport:
BONUS ITEMS
73
David / WK4DS
Overall, today we had a wonderful day and made many contacts and was able to test antennas and enjoy ourselves in the warm Florida sun far from home where all the cold weather and dreariness is at. So until next time, get your radio out and go power it up and make a contact on it. That’s why you bought it after all.
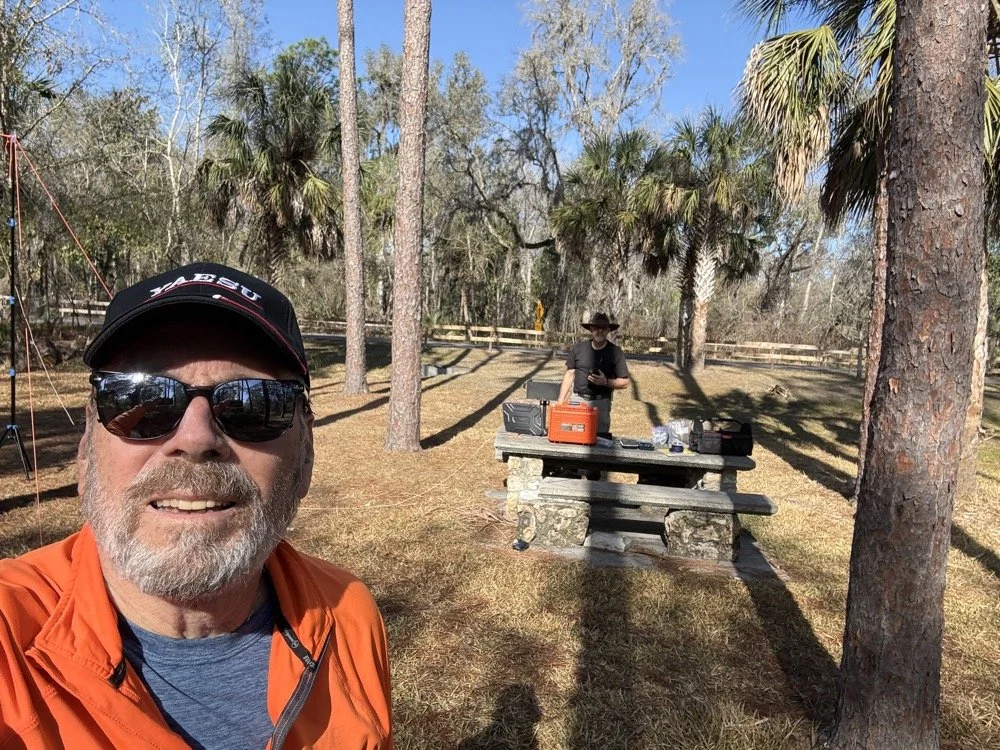
Chas grabbing a photo from his perspective for posterity! HaHa! Look at all that stuff I brought!

Over 100 QSOs at Chito Branch US-5524 POTA Activation AAR
Once on 15 meters with a warm radio, I set off with calling CQ on a clear frequency. I called for maybe two or three minutes before I started getting replies…and then I got more, and more, and more till I had a genuine pileup on 15 meters! There was times when I am sure I could hear at least ten stations calling at once and this happened a coupe of times today!
Today saw me working on my kilo at Chito Branch again. I figured I would net 30, maybe 40, contacts considering the band conditions and the problems I was running into, but nothing prepared me for what happened today…
The Antenna and Radio Setup
I arrived at the park after hitting a pretty heavy traffic jam this morning a little frustrated since I am attempting to secure the kilo before we leave town for the rest of the year. I get to the park and there is not a single person on site other than me, which gives me the pick of the litter of locations. I immediately go about setting up the antenna and tuning it.
I also noticed today something about the antenna that was of interest to me. I will be investigating it further and writing about it soon. It is that the characteristic impedance of the vertical can not be made purely 50 ohms without a reactive component at all. It simply doesnt work. I testing it for a few minutes as I was curious and as I would tinker with the vertical and the radials to move the plot to purely resistive, it would move the frequency of the antenna off at the same time (stands to reason) but I couldn’t get it to a nice clean 50 ohms no matter what I did. I tinkered with it and the radials till I got the null on frequency and the SWR as low as feasible and moved on to the radio.
After I finished setting up the antenna, I chose to use the TenTec Scout 555 amateur radio and only pulled the 15 and 20 meter band modules for today’s activity. I wanted QSOs in the log and not exotic bands today… I had made a mistake last night though, this radio is temperature sensitive to some degree, it will drift in frequency (mine wanders slowly up) till it warms up from use. So when I am running the keyer and the radio is in transmit a lot calling CQ, the radio heats up in the back and slowly that heat creeps forward in the case to warm the rest of the electronics. Once warm I find the radio to be very stable and work exceeding well, but until it does, I have to watch it and turn the VFO down a little at a time till it is warm. This is what I had to deal with today
The POTA Activation Begins…
People were sending me notes in the spots on the POTA website about my frequency so I would know about the drift. I love how the hunters are there for you all the time, even once they have you in the log. That is awesome camaraderie if I must say so. I racked up a staggering 35 QSOs in short order! It was going so well that I figured I would hop onto 15 meters and see if I could get 40 or 45 before I ran out of time… What happened next blew my mind. After I worked those 35 stations it is like the radio simply turned off, I don’t know if I had worked everyone on the band or if the band had started to close, but I could no longer hear anyone calling. So I called CQ a couple more times and finally after not hearing anyone else for a coupe of cycles, decided to QSY to 15 meters.
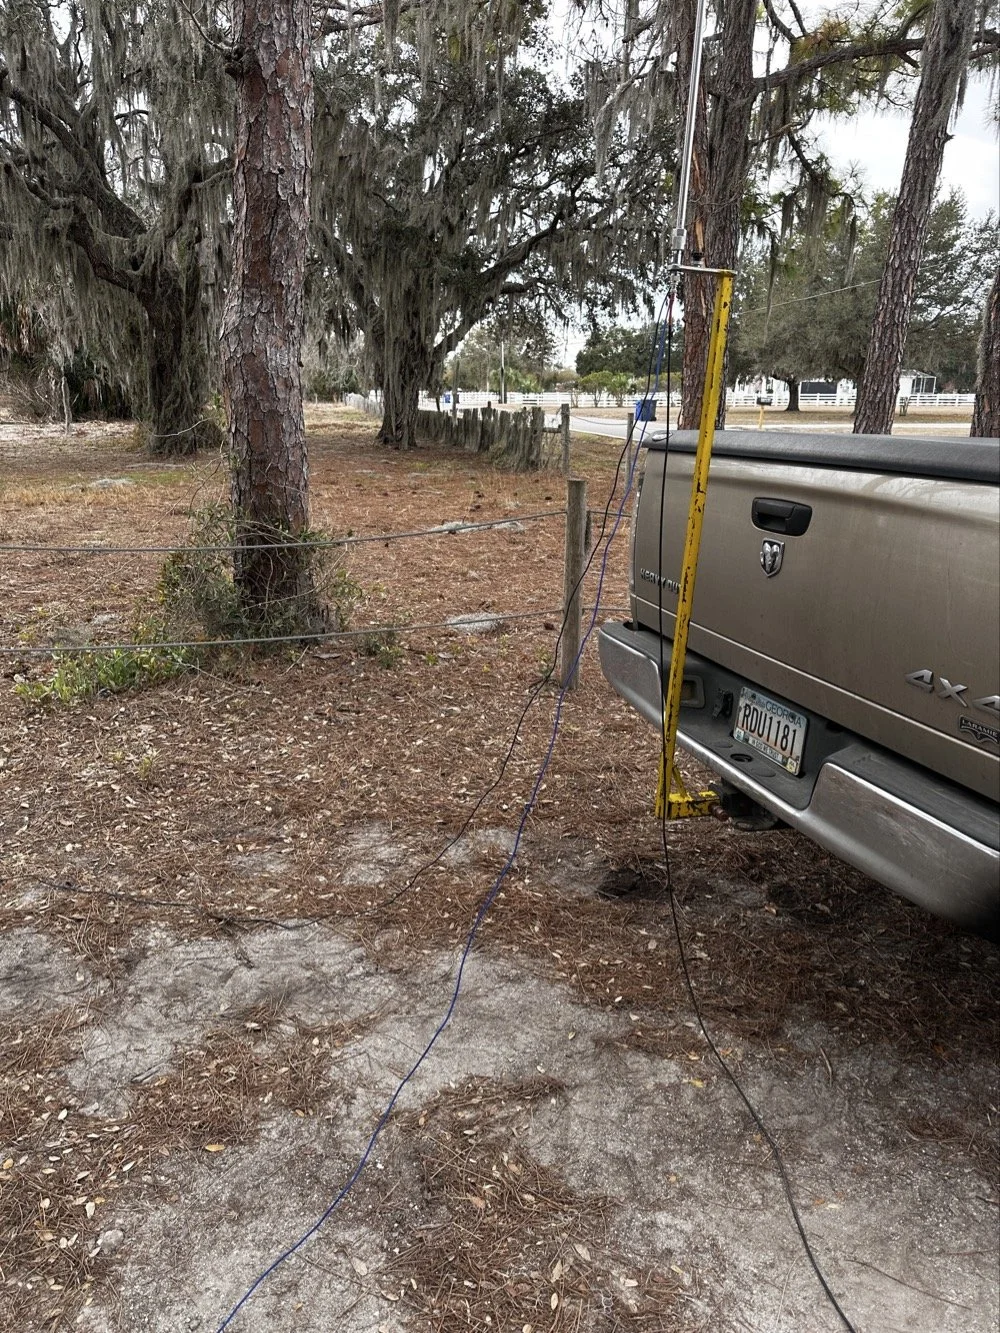
The ¼ wave telescoping vertical antenna was simple and effective today.
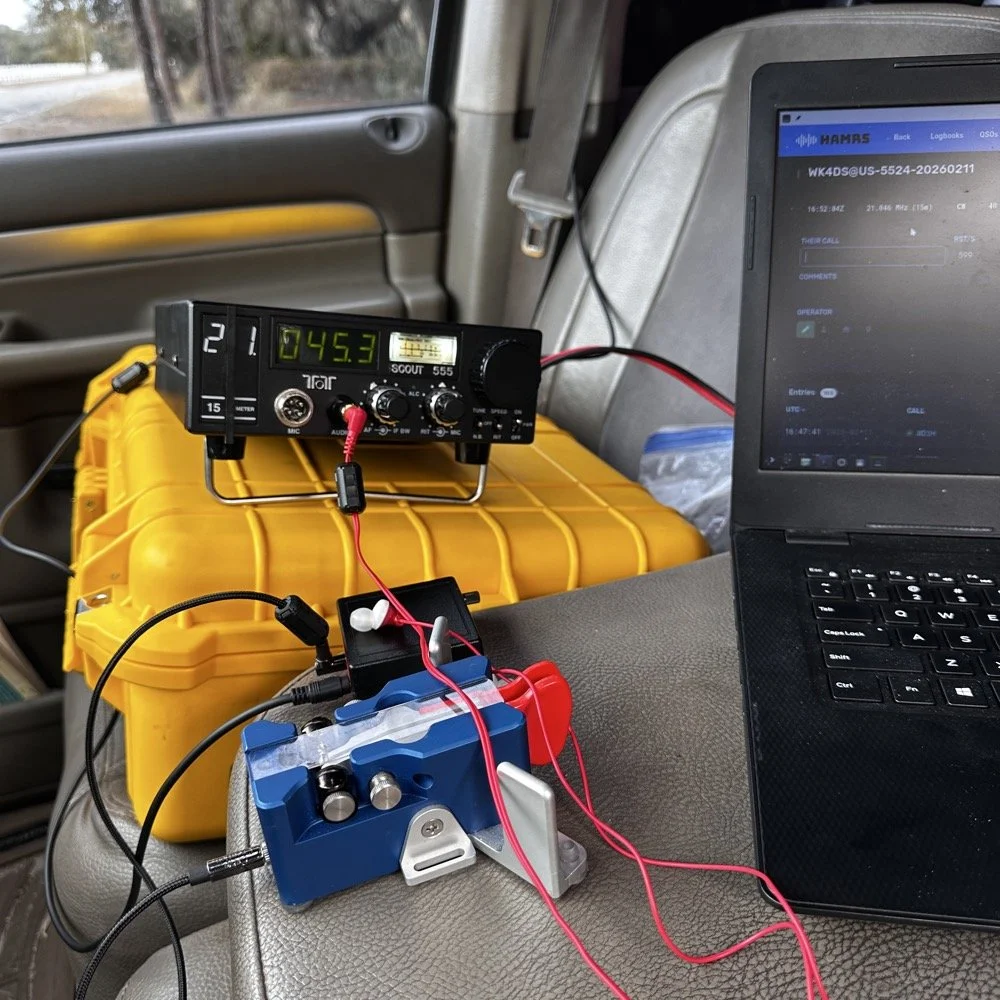
TenTec Scout 555 Amateur Transceiver with Begali Travler CW Key
15 Meters Gets Sporty!
Once on 15 meters with a warm radio, I set off with calling CQ on a clear frequency. I called for maybe two or three minutes before I started getting replies…and then I got more, and more, and more till I had a genuine pileup on 15 meters! There was times when I am sure I could hear at least ten stations calling at once and this happened a coupe of times today! I also knew from prior experience that 15 meter is kinda where I start really hearing DX stations when the band is in good shape so I was kinda listening for stations with callsigns that start with letters other than A,K,N and W. I have found that after doing POTA for a while that my brain instinctively listens for one of those letters first in the call. If I don’t hear one of those 4 at the beginning then something in my brain trips and I only get the last 2 or 3 letters of the callsign and require a repeat…unless…I am on 15 meters and above.
It is really rare for me to even hear DX with the antennas I use for POTA until I get up to 21 mhz or higher. To be honest, I am surprised I hear them at all with some of the antenna designs I use. The ¼ wave vertical pictured above is a prime example, I am pretty sure this antenna needs to be a good bit higher in the air for a good DX take off angle, but here we are….
Here is the list of the DX I worked today from a POTA park:
DX Countries Worked:
Working DX on simple antennas is one of the joys of amateur radio. The ARRL's guide to HF propagation explains why 15 meters can be so productive for European contacts from the US.
Venezuela - YV1GIY
England - G0LLU, G3NKQ
France - F6CAX, F6OYU
Spain - EA4MZ
Belgium - ON5JT, ON4ZD
Czech Republic - OK1MGW, OK1XC
Germany - DF2PI
Cape Verde - D4HP
Belarus - EW6GB
Russia - R1QBD/3
Israel - 4Z4DX
China - SH2NR
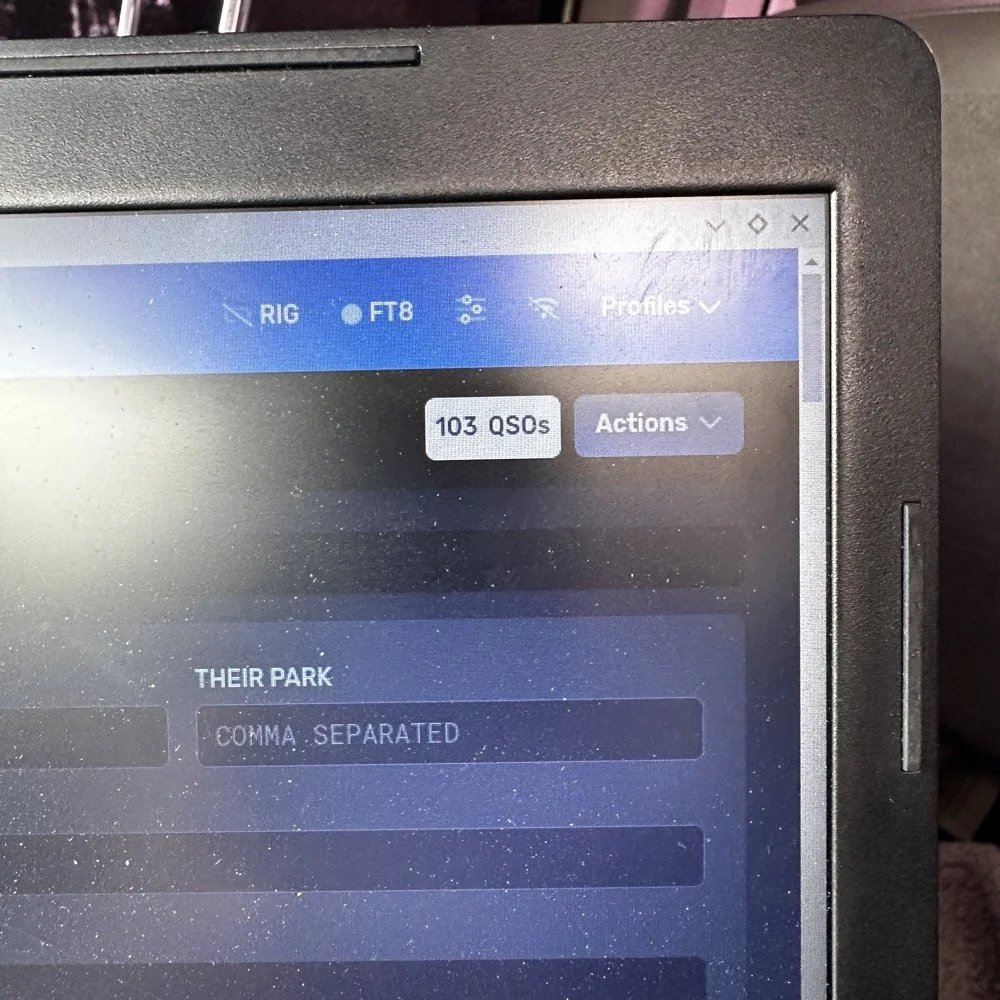
I use HAMRS for my POTA logging.
AAR POTA Wrap Up
As you can see, I was hearing people from all over the world! I couldn’t believe some of the ones on this list. I don’t think I have ever worked Cape Verde before! He was really weak too, I could just make out the call and signal report after him repeating it a few times, but we got it done! Europe would come booming in with spurts of band openings apparently as I would work two or three at one time then it would go silent in the EU for a while then it would happen again.
Now this is not to say the band was in perfect condition. There was considerable QSB (fading) of the signals today, but it was manageable with a decent set of headphones and a properly adjusted radio. I could hear all but maybe 3 stations that I could hear at all. Of those three, one of them I almost got but then it faded out completely. I was so close too… Anyway, the calls just kept coming in and over the next hour I hit 50 then 60 then 70 and the log just kept building. I use HAMRS for my POTA logging and it shows the total in the top corner like a little scoreboard...
I finally got to something like 78 and had a couple of duplicate calls by now so I wanted to finish with a solid 80 and started really working towards this new little goal I had thrown up. Then I did it and then ran right past 80 to almost 90! It just kept happening! 15 meters was on fire today! I finally got to about 98 and I was almost out of time so I decided to stop at 100 even if I didn’t account for the duplicates. 98 is better than being late for picking up the XYL (the wife)… haha. But then I hit a little run of 5 and landed finally on 103 and the goal being reached, I called QRT and powered off the station. This is what I love about POTA, the callers were coming in from everywhere.!
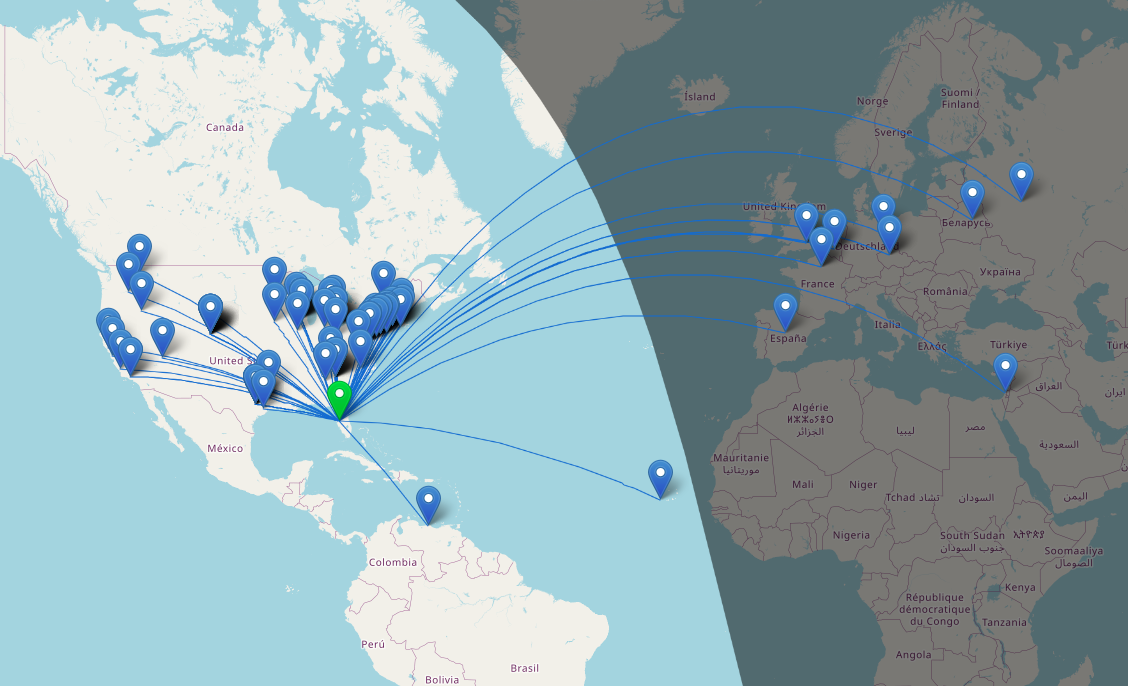
Screen capture from the HAMRS logging software QSO map.
This map blows my mind, all of those calls were worked on a 30 year old, 40 watt TenTec Scout 555 radio (I turned the power down from factory spec for a reason)that has to warm up to stay on frequency, with an “outdated” mode that appears to be very NOT outdated at all, with a less than ideal antenna! So with all this I have to say, just get something together and don’t worry too much about if it has perfect SWR or if the antenna is “high enough” for DX, obviously that don’t matter when the band conditions get right! Now of note, most of the DX (I think almost all of it other than Venezuela, is 15 meters only) also all of the west coast if 15 meters as well as several of the ones due north of my position.
Elated at the fact that I had put over 100 calls in the log toward my kilo, I hurriedly broke down the antenna and packed the radio away and drove off to get the wife from school. Now if I can just repeat this again tomorrow…haha.
How many watts does the Ten-Tec Scout 555 output? The Ten-Tec Scout 555 outputs 50 watts from the factory, I have mine “turned down” to 40 watts as this is a simple adjustment and helps protect the radio from high SWR issues in the field, which is more than adequate for POTA activations and working DX on CW. Despite being a 30-year-old radio, it performed exceptionally well during this activation and many others in the past.
What bands work best for DX during POTA activations? 15 meters (21 MHz) and above typically offer the best DX opportunities during POTA activations (for me at least). At US-5524, nearly all European DX was worked on 15 meters, while 20 meters provided primarily US contacts.
Do you need a perfect antenna for POTA DX contacts? No - this activation proved that DX is possible with simple antennas. Using a basic quarter-wave vertical with radials at ground level, I worked 12 countries across Europe, South America, Africa, and Asia…in one sitting.
Why does the Ten-Tec Scout 555 drift in frequency? The Scout 555 is temperature-sensitive and drifts slightly as it warms up during transmit cycles. Once warm (after 15-20 minutes of operation), it becomes very stable. Simply adjust the VFO slightly downward as it warms. The radio drifts in frequency due to component value changes as they warm up, this is common in older equipment or less sophisticated designs like the Scout 555. Things like crystals will change frequency when they get warm, other things like capacitors will also change value with temperature if they are not specifically stabilized versus temperature.
What is the best logging software for POTA activations? HAMRS is excellent for POTA logging - it's free, works offline, handles POTA references automatically, and generates helpful QSO maps. It also exports to ADIF format for easy upload to pota.app. Is it the best? For me it is…
Related Posts
Hope you enjoyed this AAR, leave a comment and I look forward to hearing from you in a future one,
You can help support this website by using these Amazon Affiliate Links:
QRP/Portable Radios:
Antennas & Tuning:
CW Equipment:
Power & Accessories:
Organization & Transport:
BONUS ITEMS
David - WK4DS